22
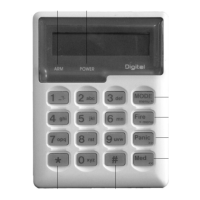
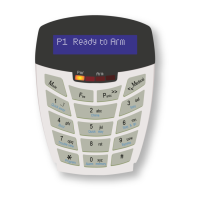
IDS LCD Keypad User Manual 700-292-01C Issued March 2009
Example:
If a user is assigned to door 1, there will be a [Y] next to Option 1 and the user can thus open door 1. If
the user is assigned to door 14 there will be a [Y] next to Option 14. It is possible to program codes to
open any combination of the available doors.
6. Repeat step 5 until the User Code has been assigned to the correct doors.
7. Press the [#] key to edit another User Code's doors and repeat steps 4 & 5.
8. Press [#] twice to exit program mode.
8.3.8 Option 7 - Assign a User Code to a Schedule
(Not applicable to the IDS 1224 & IDS 816)
Hold [*] + [Master Code] + [*] + [7] + [*] + [User Code] + [*] + [Schedule Number] + [*]
1. Enter the User Program Mode as per steps 1 - 4 of (8.2).
2. Menu option 0 - 'Add User' is displayed on the LCD Screen by default. To select menu option 7 -
'Schedule', press the [7] key or alternatively use the [PANIC] or [MED] keys to scroll through the
list of programmable options until you reach Menu Option 7.
3. To select programmable option 7, press the [*] key. The ARM LED will flash.
4. When prompted for the 'User Code‟ enter the [USER CODE] followed by the [*] key.
5. Three schedule options exist. Schedule options are displayed next to the data prompt. If a user is
assigned to Schedule 0, the user may arm / disarm the premises at any given time. Users
assigned to Schedule 1 are allowed to arm / disarm the area only during the specified
programmed schedule times. The same applies to those users assigned to Schedule 2.
6. To select which schedule the [USER CODE] may be assigned to, press the relevant keypad key
followed by the [*] key.
7. Press [*] key to assign another user to a schedule and repeat steps 4 & 5.
8. Press [#] key to exit User Program Mode.
8.3.9 Option 8 - Adding User Remotes
Hold [*] + [Master Code] + [*] + [8] + [*] + [User Code] + [*]
1. Enter the User Program Mode as per steps 1 - 4 of (8.2).
2. IDS 816 Panel
When prompted for the 'Menu Option' press the [8] key followed by the [*] key to select
programmable option 8.
IDS 1632 & IDS 1224 Panels
Menu option 0 - 'Add User' is displayed on the LCD Screen by default. To select menu option 8 -
'Assign Remote', press the [8] key or alternatively use the [PANIC] or [MED] keys to scroll
through the list of programmable options until you reach Menu Option 8. Press the [*] to confirm
your selection.
3. The ARM indicator flashes and the LCD prompt reads 'Enter User Code'.
4. Enter the [USER CODE] followed by the [*] key.
5. Press any button on the new remote. This will assign the new remote to the user code as entered
in Step 4. Press [*] to store the added remote.
6. To add additional remotes, repeat steps 4 & 5 or press the [#] key to exit User Program Mode.