6–12 Minimate Pro Operator Manual
6.5. Unit Keypad and Menu Navigation Overview
Before starting the Basic Tutorial, Section 7, familiarize yourself with the following two Subsections,
Unit Keypad Overview and Unit Menu Navigation.
6.5.1. Unit Keypad Overview
The display has a variety of commands used to navigate the menus, enter or edit data, or perform
actions. Use the keys of the of the Minimate Pro to navigate through the menus, perform a
Sensor Check, enter the Setup menu, and Start Monitor for manually recording Events.
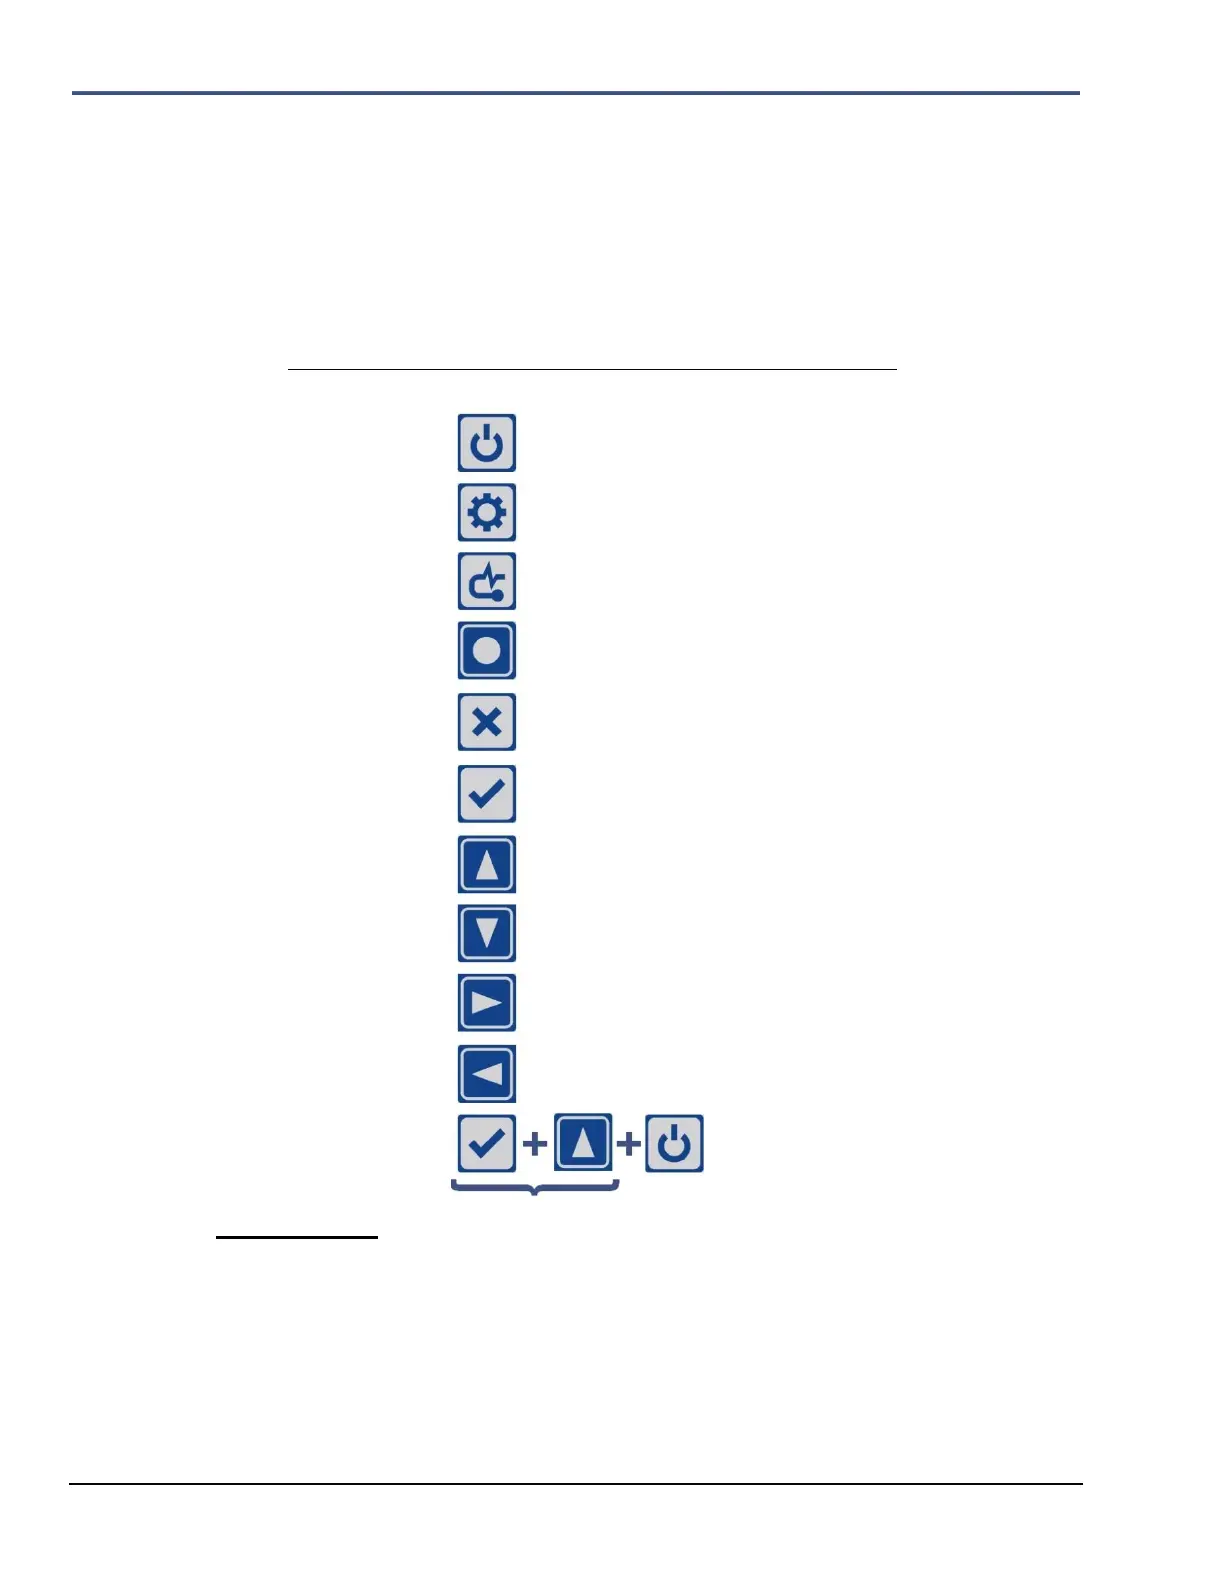
Key Symbol Associated Commands
On/Off Turn the monitor display On or Off.
Setup Access the Main Menu.
Sensor Check Perform a Sensor Check.
Start Monitor Manual start key to monitor an Event
Cancel Cancel, Back, or Exit.
Enter Enter, Save, Accept, Menu.
Up/Down Arrows Next/Prev, Scroll through Menus, or Text Entry.
Hold down to scroll quickly.
Right Arrow Edit, Action, Add, Detail, or Text Entry.
Left Arrow Navigate Text Fields
Down Arrow Levels Off, View Data Files, Last Event
Key Combination Use this sequence to connect the battery and turn
the unit on without an AC Adapter
Status Light
A Charging Status LED is mounted next to the Down Arrow key and indicates the following:
1. The light is not on – The charger is not connected to a power outlet, or the charger is malfunctioning.
2. The light is Yellow – The charger is connected to a power outlet and is charging.
3. The light is Green – The batteries are fully charged.
4. The light is flashing Red/Yellow – The power source is not sufficient (i.e. battery, solar panel, or
malfunctioning charger).

 Loading...