Minimate Pro Operator Manual 8–1
8. BASIC TUTORIAL
In this basic tutorial, you will set up your computer and the supplied Instantel® Blastware
program to work together with the Instantel® Minimate Pro™. You will then create a sample
Event using the Manual Record Mode, and transfer the Event file from your Minimate Pro
to
the computer. Once you have completed this, you view and print the Event Summary Report.
Step 1: Install the Blastware Software
1. A copy of the Blastware program was shipped with the unit that was purchased; this will
either be the Blastware Compliance Module, which is provided with every delivered unit,
or the optional Blastware Advanced Module. A custom-programmed USB hardware device
lock is shipped with the Advanced Module which allows access to additional tools and
processes.
2. Follow the installation instructions within the Blastware Operator Manual.
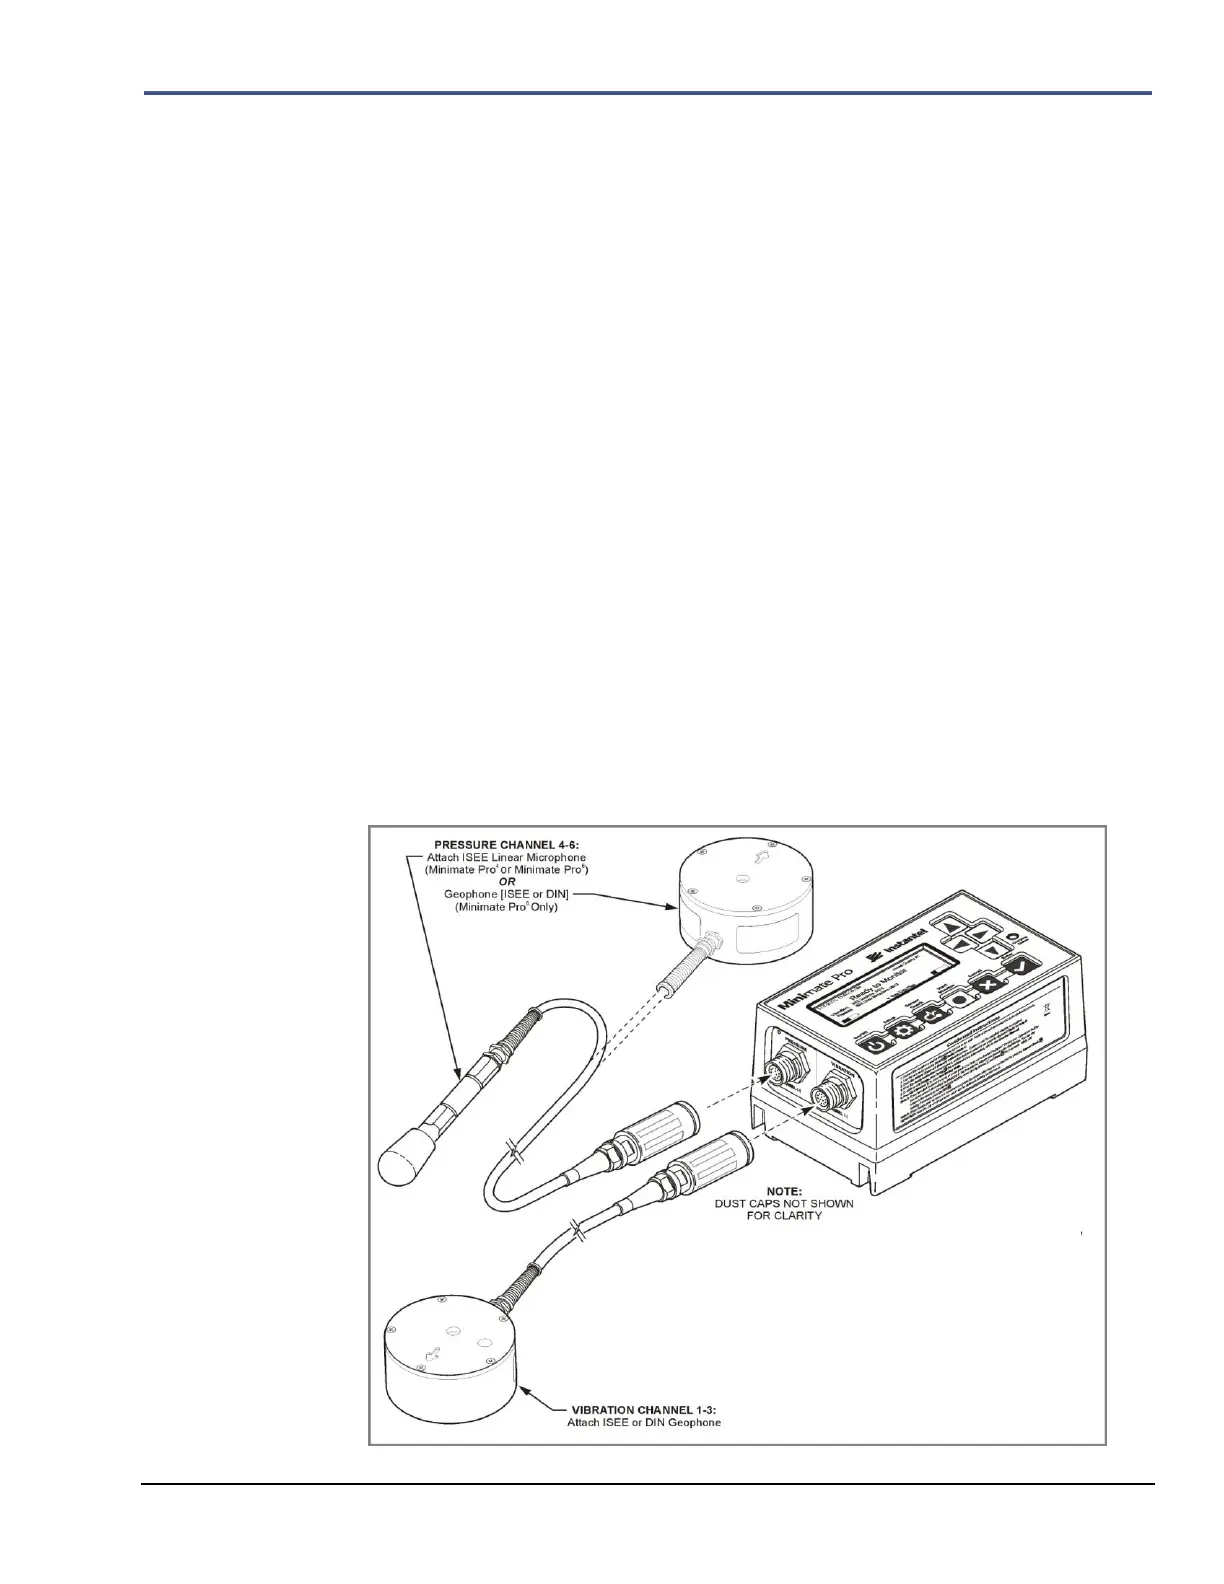
Step 2: Connect the Geophone and Microphone to the Unit
1. Align and connect the ISEE or DIN Geophone(s) and/or the Linear Microphone to the
connections with the proper labels on the Minimate Pro.
Firmly hand-tighten each cable
connector with a quarter turn of the cable connectors. For unit identification, the top label on
the unit indicates if you have a Minimate Pro4, or Minimate Pro6.
a. Connect the Geophone to the channel connector labeled VIBRATION (Blue) if
you have a Minimate Pro4, or one Geophone to the VIBRATION (Red) and
one Geophone to the PRESSURE (Red/Blue) channel connectors if you have a
Minimate Pro6. Connect the Linear Microphone to the channel connector
labeled PRESSURE.
 Loading...