Minimate Pro Operator Manual 9–37
1. Press the Down Arrow key to highlight Call Home Session Timeout.
2. Press the Right Arrow key to enter the editing mode.
3. Press the Right and Left Arrow keys, as required, to place the cursor under the desired
value.
4. Press the Up or Down Arrow keys to edit each field.
5. Press the Enter key to save the new setting.
NOTE: Make sure that the timeout is long enough to allow an Event to download before
the connection is terminated. For example, a 1- second 4-channel Event recorded at 1024
sps takes about 1 minute to transfer using a typical modem connection.
h. Date and Time:
There are several ways to set the unit Date and Time. Either enter the Date and Time
directly on the unit within the View/Edit Preferences menu, or by attaching the unit to
the PC and using the Blastware program to send a set Date/Time or synchronizing with
the PCs date and time. The clock on the unit does not automatically adjust for Daylight
Savings – ensure that you update the clock on these dates so that the correct time is
displayed on the Event Reports.
Follow the directions below to set the time and date by using the Blastware program:
1. Attach the Minimate Pro communications cable between your PC and unit.
2. Start the Blastware program; ensure that the baud rate of the Minimate Pro and
the Blastware communications are identical.
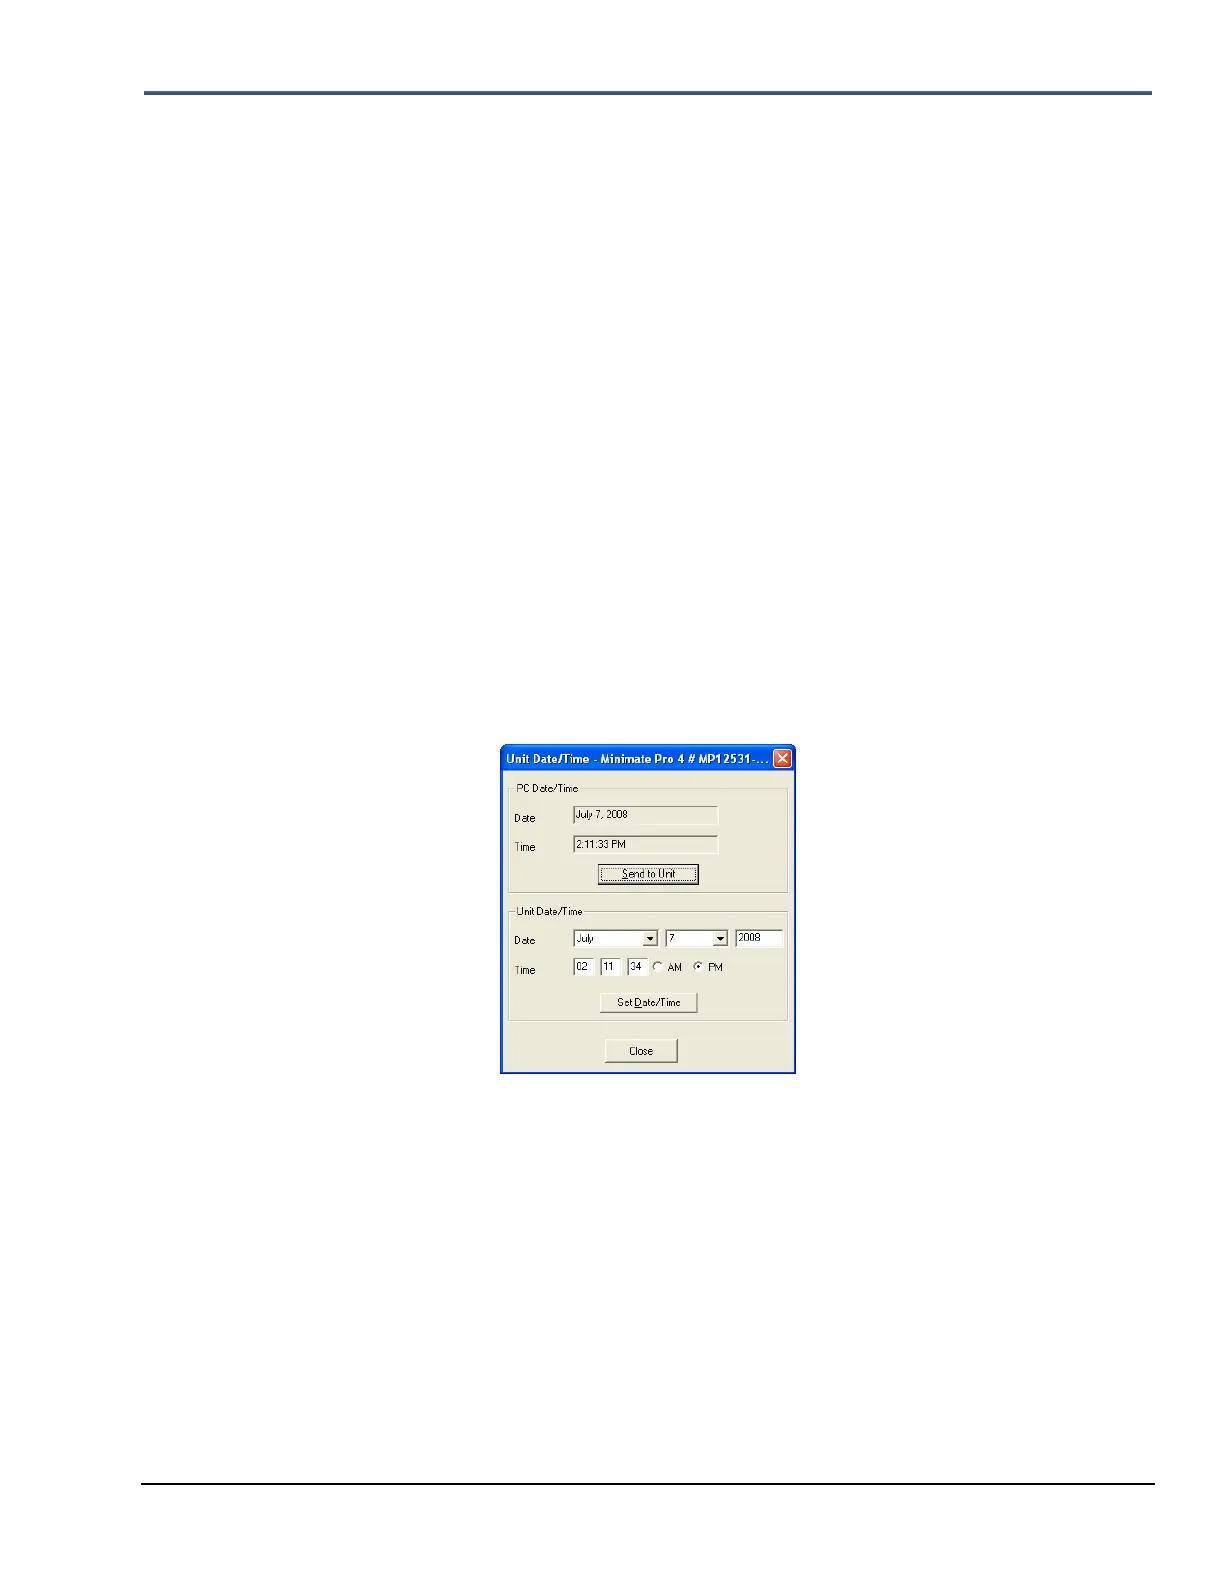
3. From the Unit menu, select Date/Time.
4. Within the Date/Time menu, there are two sections, a) PC Date/Time, and
b) Unit Date/Time
5. Select the Send to Unit button to synchronize the unit to the PC Date/Time, or
6. Enter the Date/Time within the fields under the Unit Date/Time section, and
select the Set Date/Time button.
7. Select Close to exit the dialog.
Follow the directions below to set the time and date by using unit menu:
Access the Date and Time command to set the unit time, using a 12 or 24-hour format,
manually or from an attached GPS device. The time may also be sent from Blastware to
synchronize with the PC setting. Refer to your Blastware Operator Manual for more
information about synchronizing the time.
There are three Date Formats available: mm-dd-yy (Month – Day – Year), dd-mm-yy
(Day – Month – Year), or yy-mm-dd (Year – Month – Day). The date format will
appear on all subsequent data, including Event Reports.

 Loading...