VMware vSphere* 4.1 Installation Guide for ESX*
23
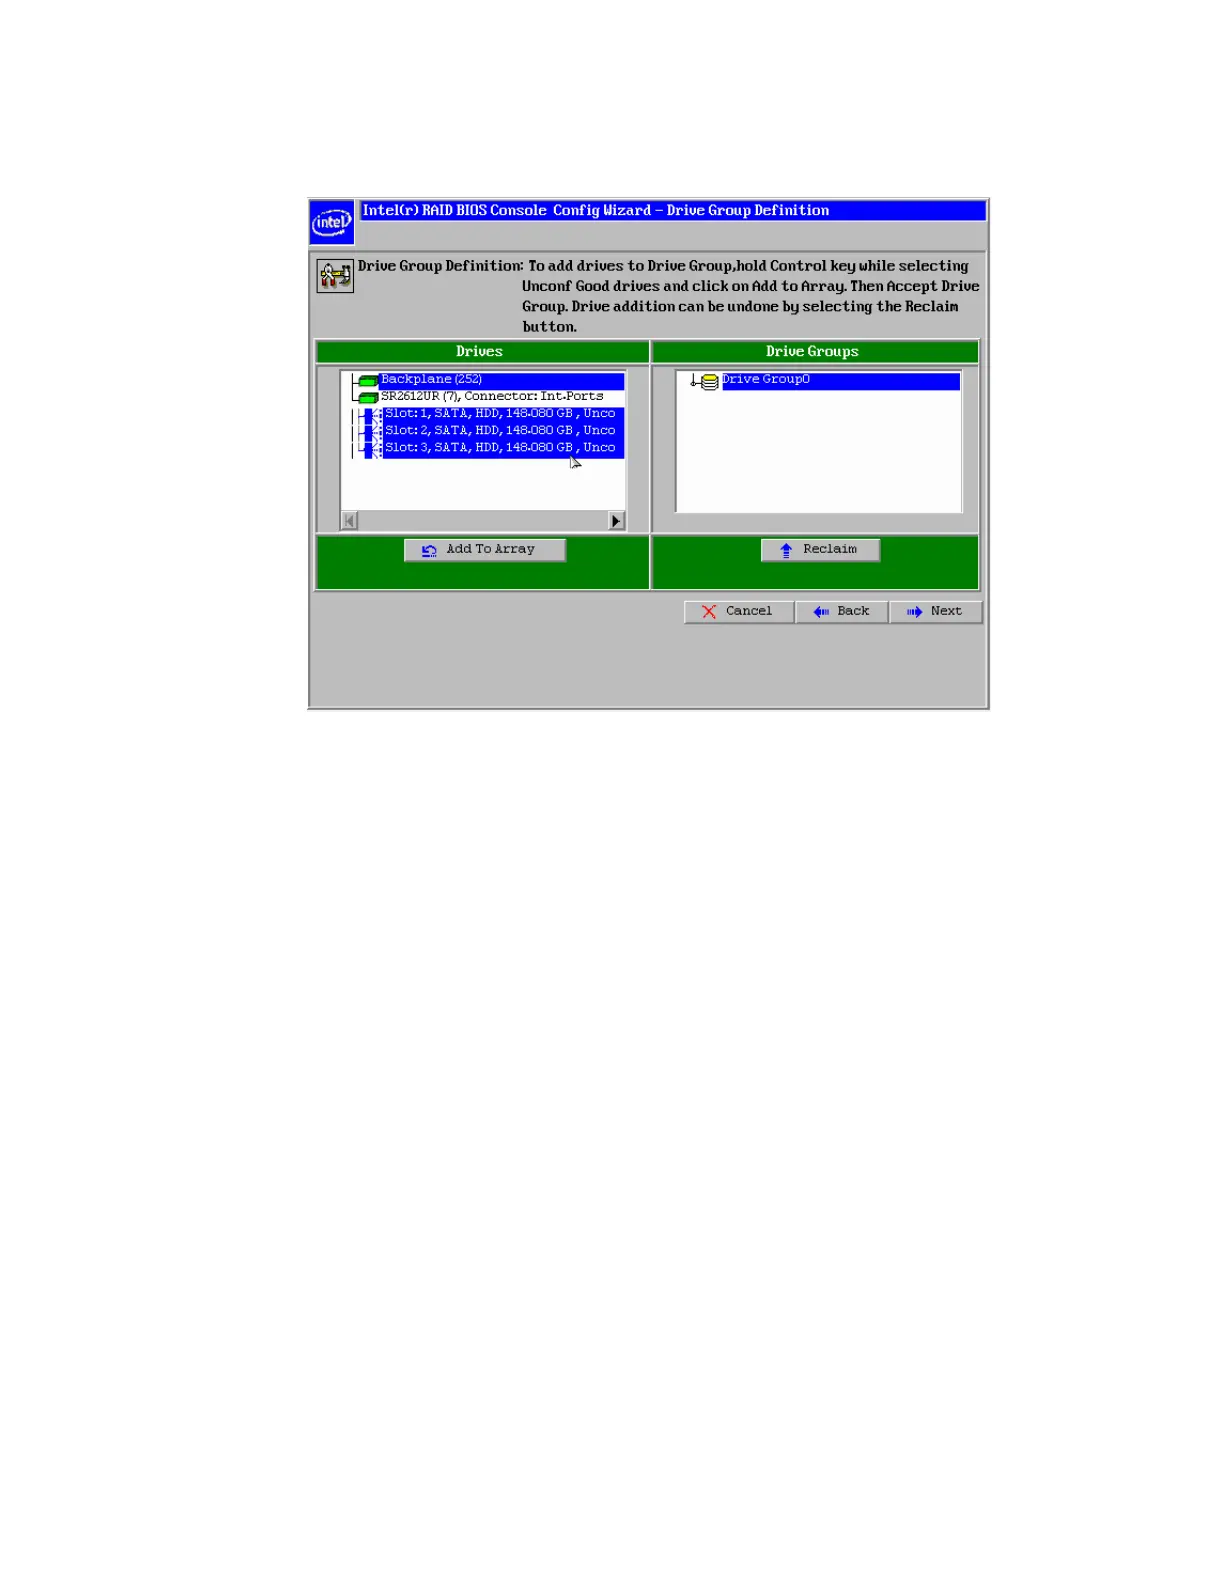
8) Select the drives to be used in the RAID array by holding down the <CTRL> key and selecting each drive
with the mouse as shown in Figure 5.
Figure 13 – RAID BIOS Console Config Wizard / Drive Group Definition
9) Click “Add to Array”.
10) Click “Accept DG” to create the drive array, then click “Next”.
11) Select “ADD SPAN”, then click “Next”.
12) Select RAID 5 as the RAID level and set the size to at least 50 G. Set the RAID policies that would be
best for the application. This Virtual Drive or LUN will be used to load the ESX* image. Click “Accept”.
13) Click “Back” to create another Virtual Drive or LUN.
14) Select “ADD SPAN”, then click “Next”.
15) Select RAID 5 as the RAID level. Keep the default drive size and set the RAID policies that are
appropriate for the application.
16) Click “Accept”. Optionally, multiple LUNS can be created to be used as DataStores for the virtual machine.
Using more than one LUN can help prevent bottlenecks in the application when multiple virtual
machines are accessing the same LUN. In this case, a single LUN is created. Click “Next.”
17) Click “Accept” at the configuration Preview.
18) Select “Yes” to save the configuration.
19) Select “Yes” when asked to initialize.
20) Select the first Virtual Drive (VD0), then select “Set Boot Drive”.
21) Click “Go”. The boot drive should indicate current = 0.
22) Click “Home”.
23) Click “Exit”, then “Yes” when asked to exit the application.
24) Reboot the server by pressing the <CTRL>+<ALT>+<DEL> keys.