VMware vSphere* 4.1 Installation Guide for ESX/ESXi* 4.1
26
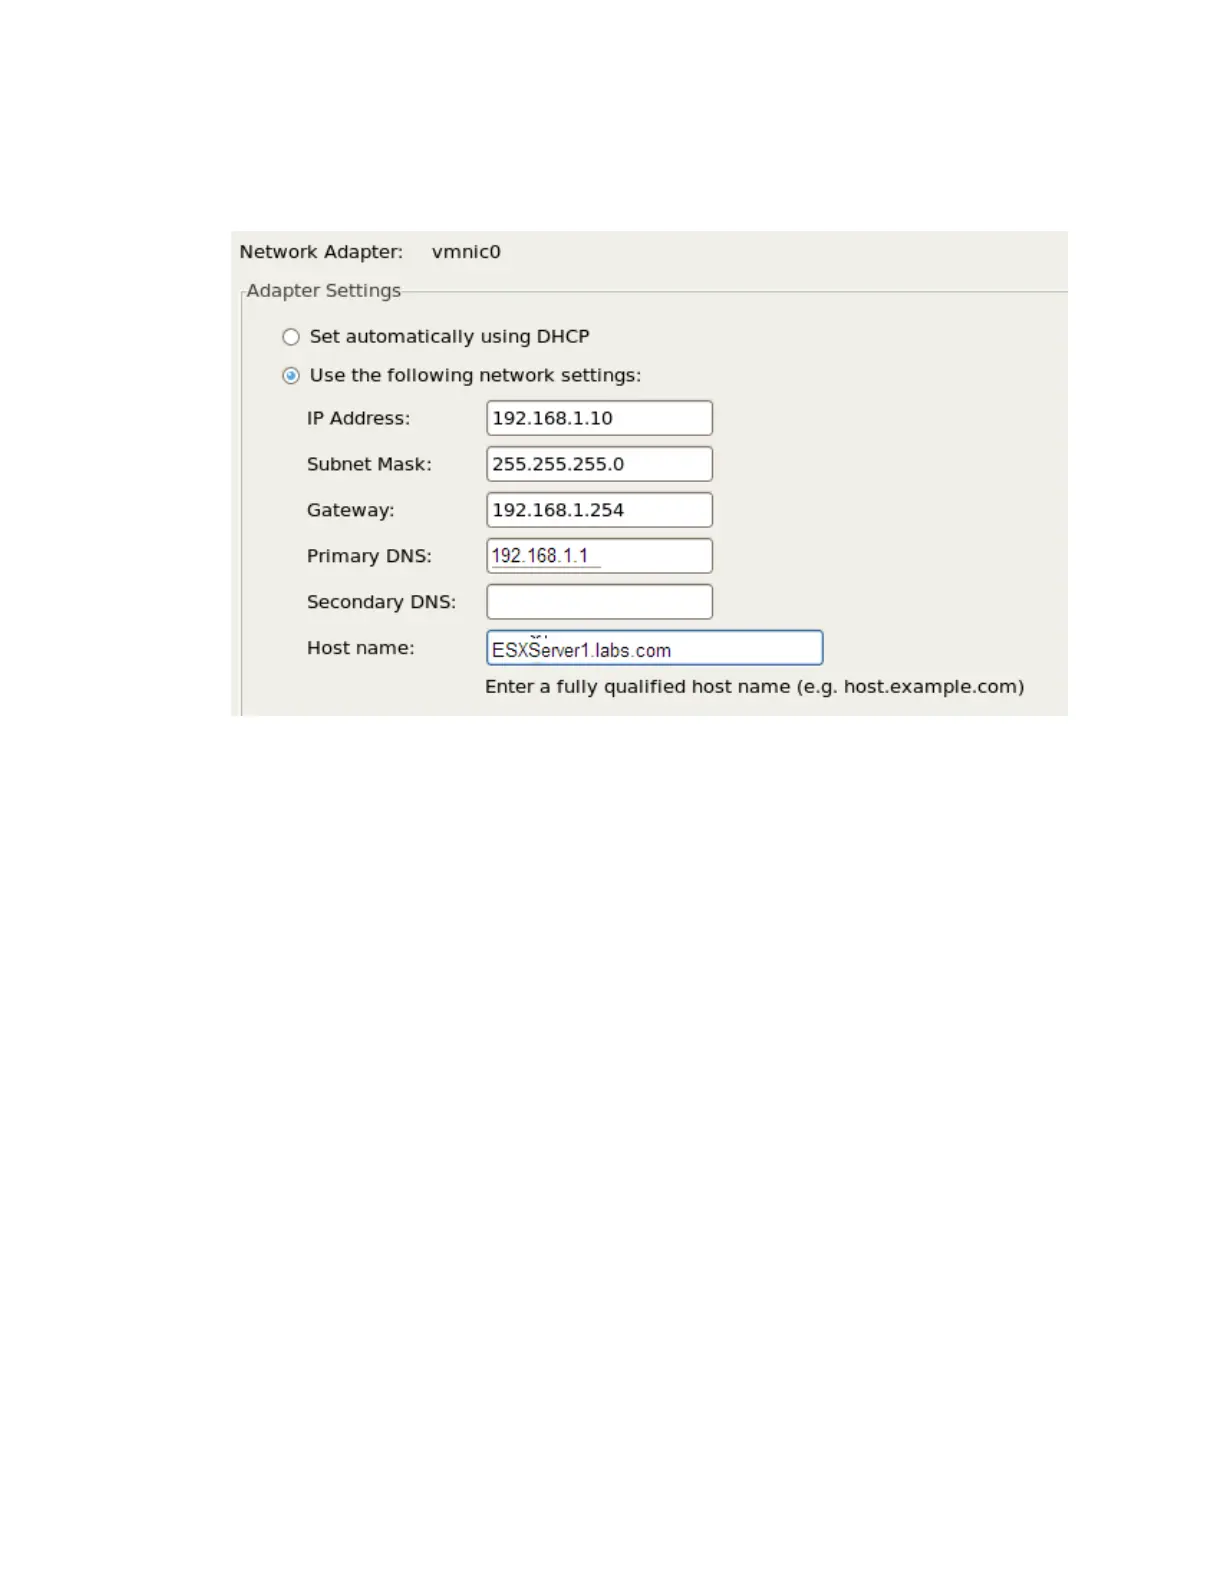
b) For the host name, type the complete host name including the domain. This option is available only
if using a static IP address.
17) For demo purposes, enter “ESXServer 1.labs.com”.
Figure 15 – Configure ESX* Network Settings
18) (Optional) Click “Test these settings” to test the network interface.
19) Select the standard setup option
Standard Setup
The installer configures the default partitions on a single hard drive or LUN where ESX* is installed. The
default partitions are sized based on the capacity of the hard drive or LUN.
1) Select the first LUN 0 to install ESX*.
CAUTION: The installer erases all content on the selected storage device. Installing ESX* on a USB
device is not supported.
2) Click “Next”, then click “OK” at the Data Loss Warning screen to confirm the selection.
3) Configure the time zone:
a) Configure the date and time settings. Select “Automatically”, then enter the IP address or host name
of an NTP server.
b) Select “Manually” to use the machine date and time detected by the installer or to set the date and
time manually. If selecting “Manually” and a functioning mouse is not available, the calendar month
and year can be changed by using the “Ctrl” and left-arrow keys and the “Ctrl” and right-arrow keys
for the month, and the “Ctrl” and up-arrow keys and the “Ctrl” down-arrow keys for the year.
4) Enter a root password. It must contain between 6 and 64 characters.
5) (Optional) Create additional users by clicking “Add”.
6) Confirm the installation configuration, then click “Next”.