VMware vSphere* 4.1 Installation Guide for ESX/ESXi* 4.1
42
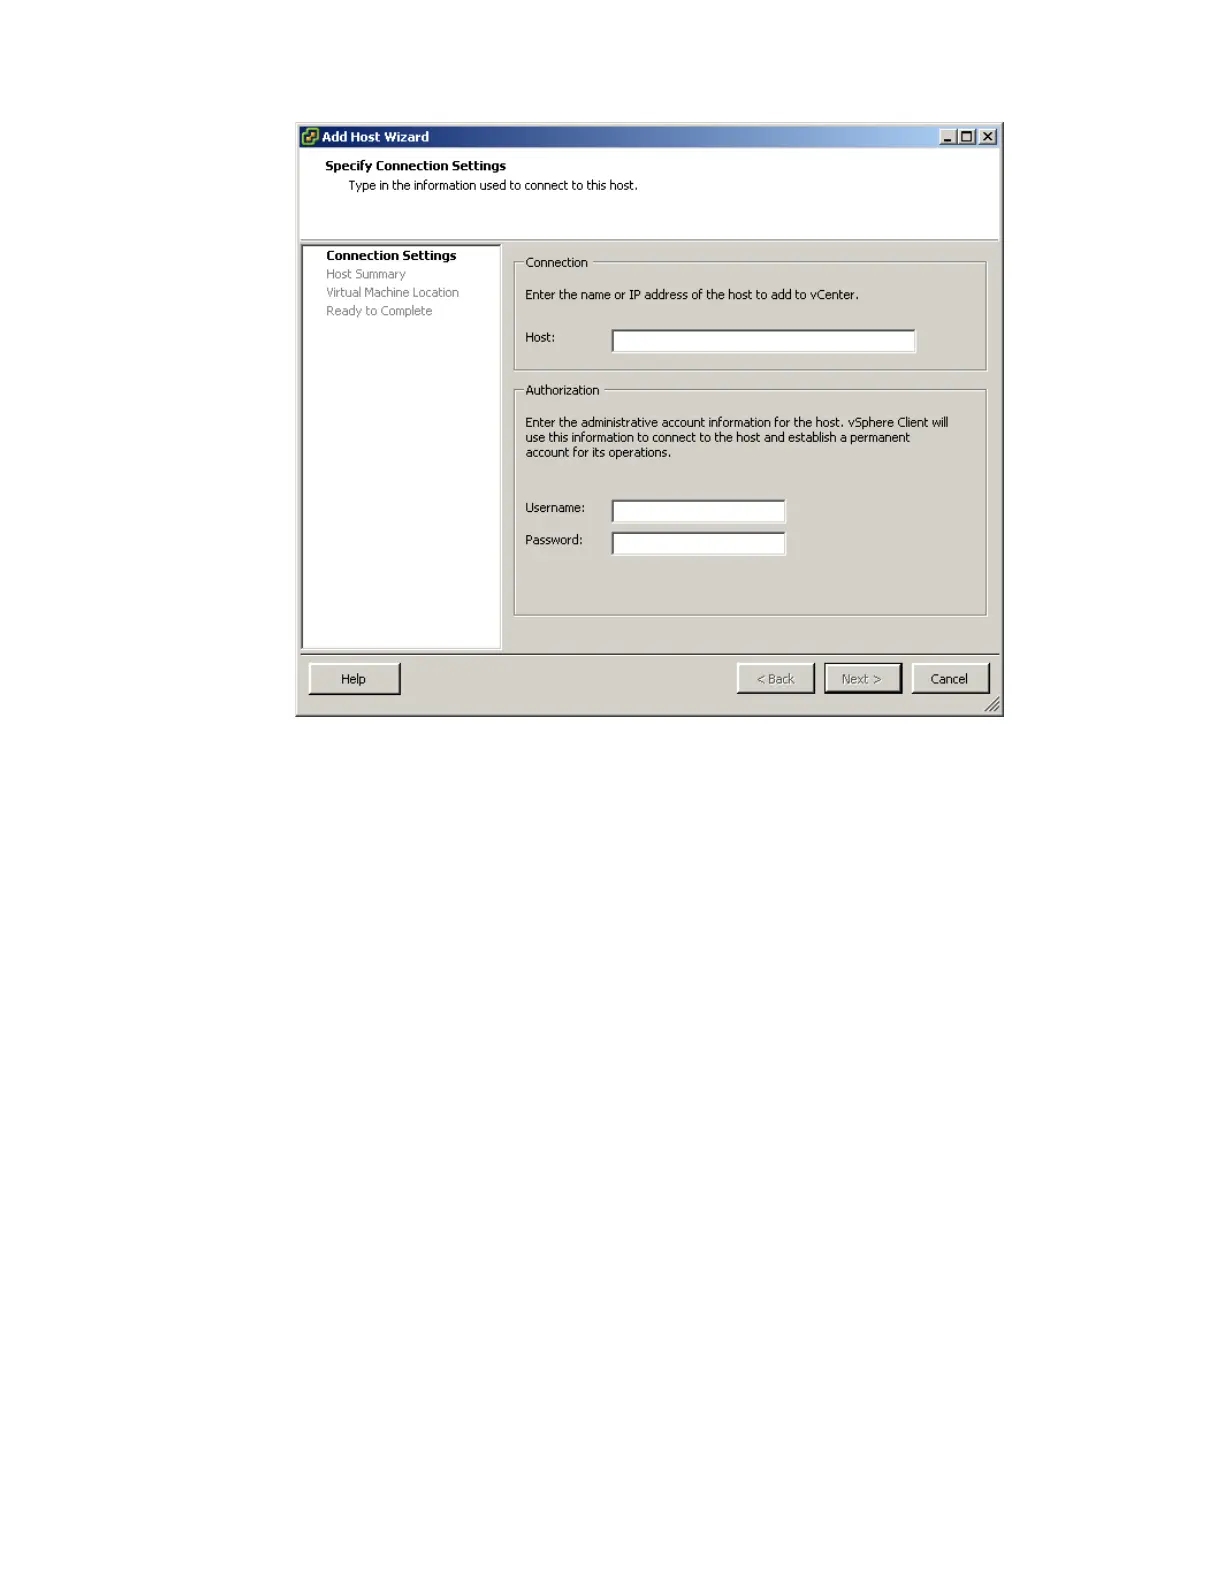
Figure 26 – Specify Connection Settings in the Add a Host Wizard
4) Click “Next”. Answer “yes” to trust the host if a security alert pops-up.
5) To confirm the Host Summary information, click “Next”.
6) Assign an existing or new license key to the host, then click “Next”.
7) Select the “Lockdown mode” checkbox to prevent remote users from logging into the host. Leave it
unchecked if desired. It can be enabled later by modifying the security settings in the configuration tab,
Click “Next”.
8) Select a location from the list of inventory objects, then click “Next”.
9) Click “Finish” to complete adding a host. The vSphere* Client displays a progress bar in the Recent Tasks
pane while the host is added. Adding a new host can take a few minutes and the Status percentage
might appear to pause at different increments during the process. When a new host is added, the host
might appear as “disconnected” until vCenter Server* completes the task. After the host is added, the
status changes to “connected”, indicating that the host connection is complete. The host installed and
setup earlier and the virtual appliance imported are added to the inventory managed by vCenter Server.
10) Repeat steps 1-9 to add the second host, using IP address 192.168.1.20.
Set Up VMkernal Port for VMotion* (Optional)
1) In the inventory panel, select the first host (192.168.1.10).
2) Select the Configuration tab.
3) Select “Networking” under the hardware pane.
4) Select the “Add networking” link in the right upper tab.
5) Select “VMKernel” to setup a network connection for supporting VMotion*.
6) Click “Next”.
7) Click “Use Vswitch 0” to create the VMkernal port on the first NIC.