CUTTING UNITS
4181384 First Edition 8-27
8
Disassembly and Assembly
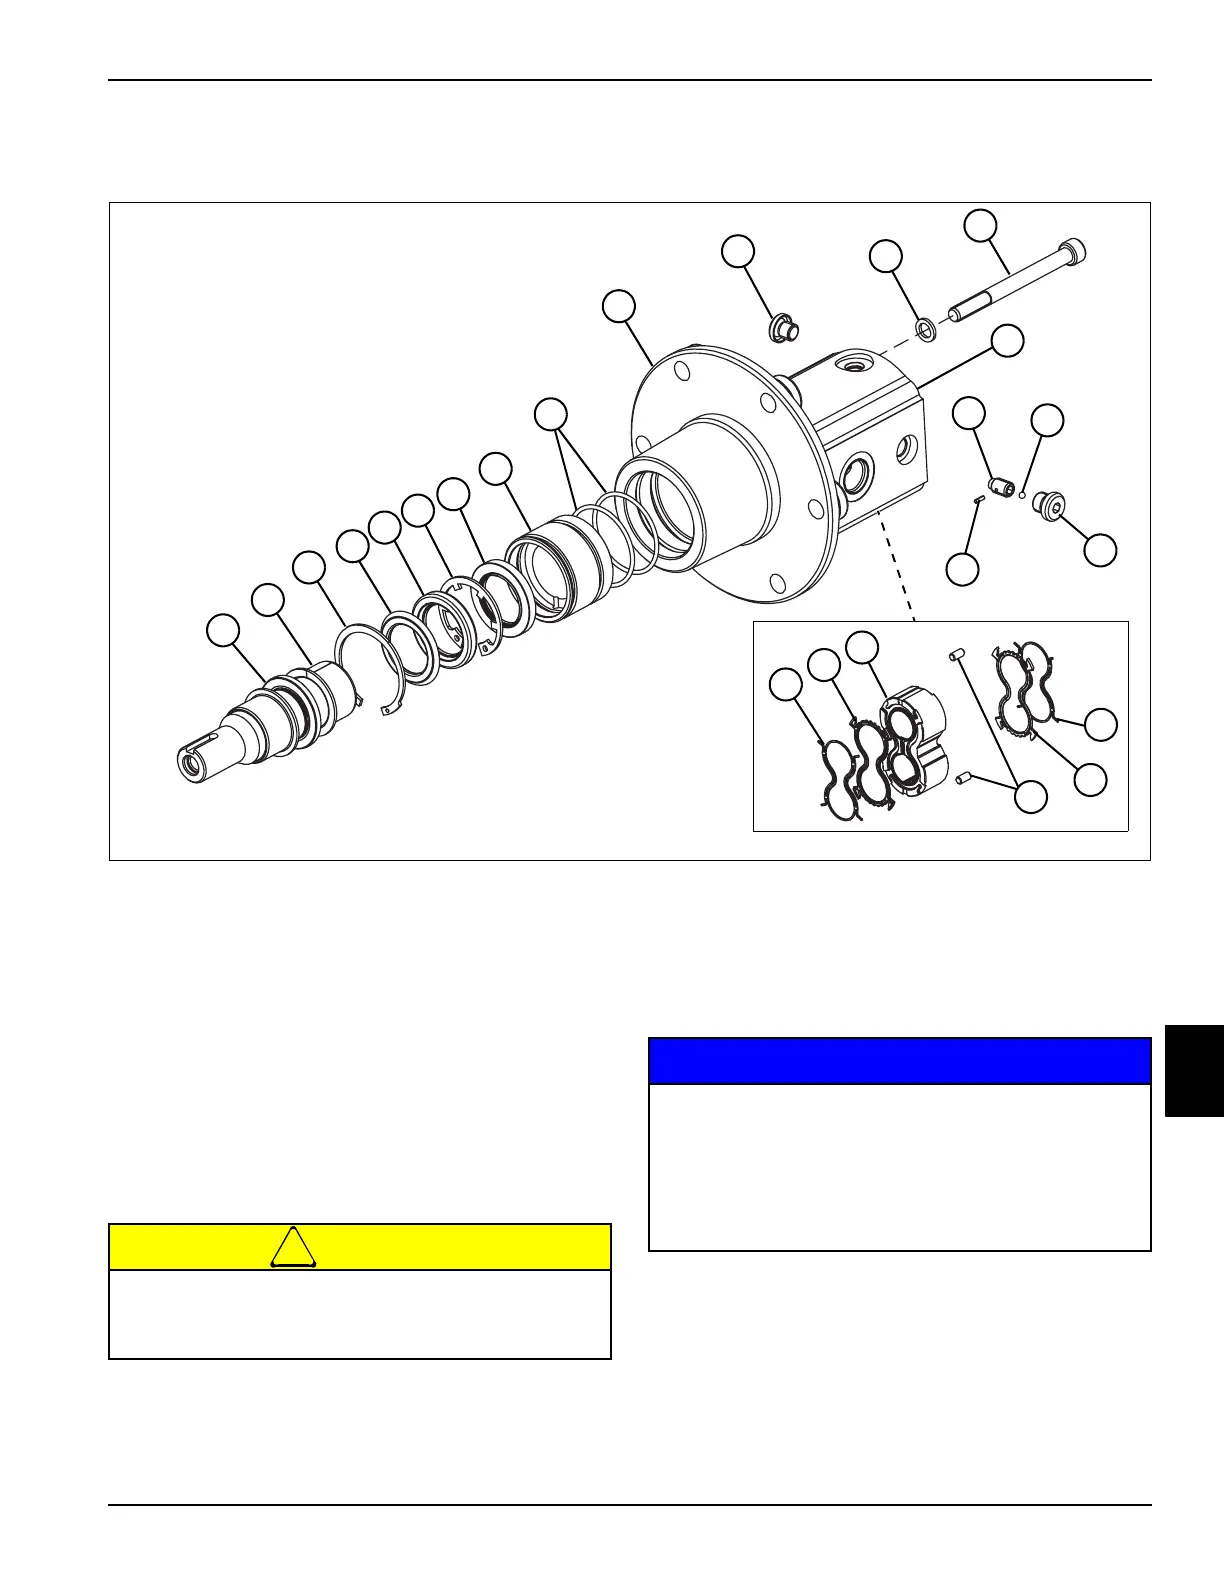
See Figure 8-7.
Figure 8-7
1. Park the mower safely. (See “Park Mower Safely” on
page 1-7.)
2. Remove deck drive motor. (See “Deck Drive Motor”
on page 8-25.)
3. Thoroughly clean the exterior of the motor, especially
the area surrounding the hydraulic hoses and fittings,
with a suitable solvent.
!
CAUTION
4. After removing screws, disassemble motor.
5. Place parts in an assembly order on a clean work
area as they are removed.
NOTICE
6. Clean all parts using clean solvent, and dry using
compressed air.
1 Support Shaft 7 Shaft Seal 13 Screw (4) 19 Seal (2)
2 Sleeve Bearing 8 Sleeve Bearing Holder 14 Pump Body 20 Thrust Plate
3 Retaining Ring 9 Seal (2) 15 Check Valve Body 21 Dowel Pin (2)
4 Shaft Seal 10 Front Cover 16 Ball
5 Shaft Seal 11 Steel Plug 17 Dowel Pin
6 Retaining Ring 12 Washer (4) 18 Backing Seal (2)
TN1227
1
7
11
18
9
11
8
16
2
13
15
19
18
10
5
3
4
6
12
14
17
19
20
21
Never pry components apart. Use a soft face
hammer, and gently tap housing and shaft to
separate pump body.
It is important that all motor parts are absolutely
clean, as contamination can result in serious
damage and/or improper operation.
Never use shop towels or rags to dry parts after
cleaning, as lint may clog passages. Dry parts
using compressed air.