LXi
™
Pool/Spa Heater Installation and Operation Manual Page 21
WARNING
Follow all fi lter manufacturer's
instructions. NEVER attempt to
assemble, dis as sem ble or adjust the
fi lter when there is pressurized air in the
system. Starting the pump while there
is any pressurized air in the system can
cause the fi lter lid to be blown off, which
can cause death, serious personal
injury or property dam age.
1. Turn off the electrical power to the heater. Turn
off the main gas supply to the heater at the meter
or the manual gas cock outside the heater.
2 Be sure that the fi lter pump is OFF and that it
will remain off during the entire procedure.
3. Open the relief valve on top of the fi lter and
leave it open during the procedure.
4. If the heater is below the surface level of the wa-
HEAT RISE
WARNING
TO BE ADJUSTED BY
QUALIFIED SERVICE
PERSONNEL ONLY
Drain
Plugs
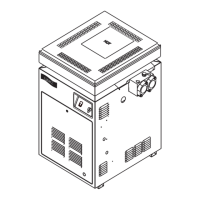
LXi Heater
CV Filter
SHP
Pump
Sweep Elbow
P/N SEAQL1001
Sweep Elbow
P/N SEFL1002
7½”
Minimum
ter in the pool or spa, be sure to close all shut-off
valves between the heater and the pool.
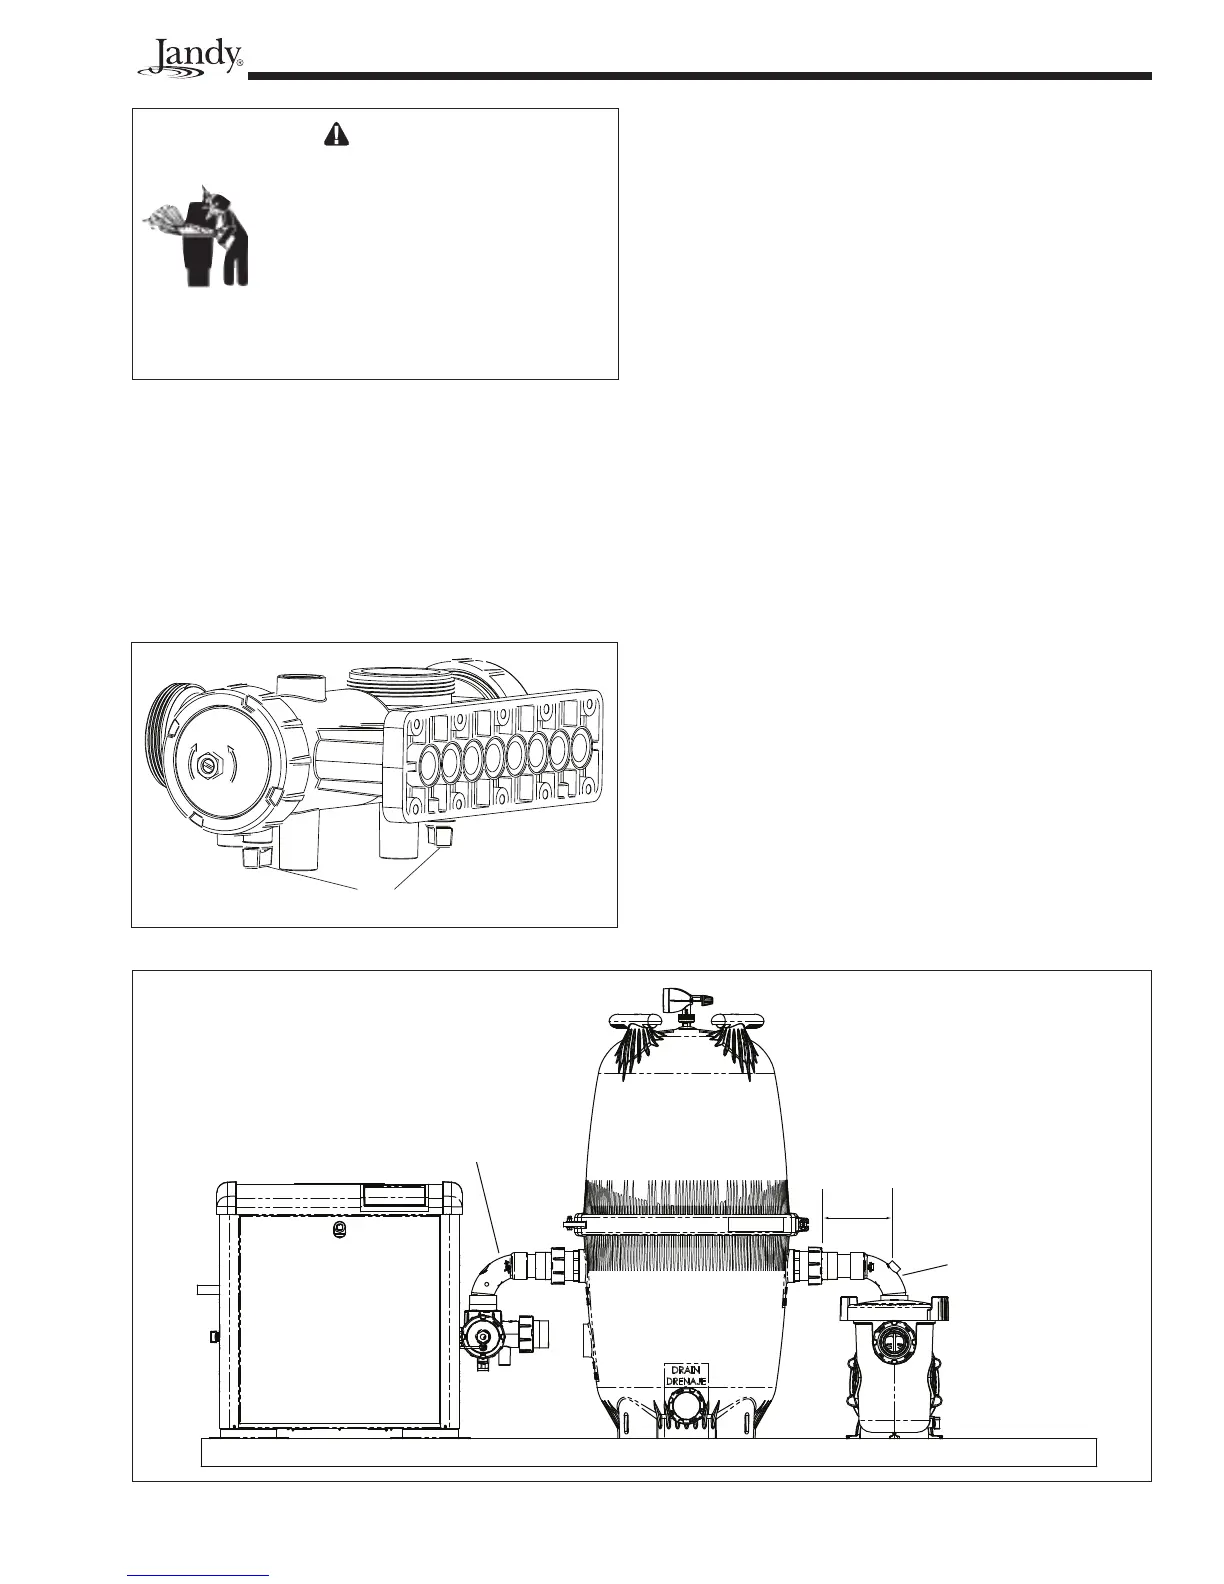
5. Remove the drain plugs and drain the heater. See
Figure 15.
NOTE: Be sure to use 2" or 2½" schedule 40 PVC
pipe.
6. Clean the cut ends of the pipe and both ends of
the sweep elbow(s) with an appropriate NSF
®
approved All Purpose cleaner/primer. Glue the
sweep elbow(s) onto the cut pipe ends using an
appropriate All Purpose NSF
®
approved adhe-
sive/glue. See Figure 16.
NOTE: Jandy recommends Weld-On 724 PVC to
CPVC Cement to glue Schedule 40 PVC.
7. After the glue is cured, close the pressure relief
valve on top of the fi lter, start the system and
check for proper water fl ow.
8. Replace the drain plugs.
9. Return all valves to their operating positions.
10. Restore power to the heater.
11. Turn on the pump to check for water leaks.
12. Restore the gas supply to the heater.
To connect a section of 2" PVC or CPVC pipe
to the heater, fi rst slip a coupling nut onto the pipe.
Then prepare the end of the pipe with the proper PVC/
CPVC primer and glue. Follow the manufacturer’s
instructions provided with the primer and glue for
Figure 15. Header Drain Plug Location
Figure 16. LXi Heater Sweep Elbow Installation