17
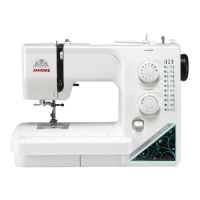
X
Threaderplatesupporter
Setscrew
Threader
positioning
plate
FIG. 3
Pin
Adjustmentofleftorrightdirection
Threaderplate
Hexagonalsocketscrew
Nut
Viewfrom"X"
Verticaladjustment
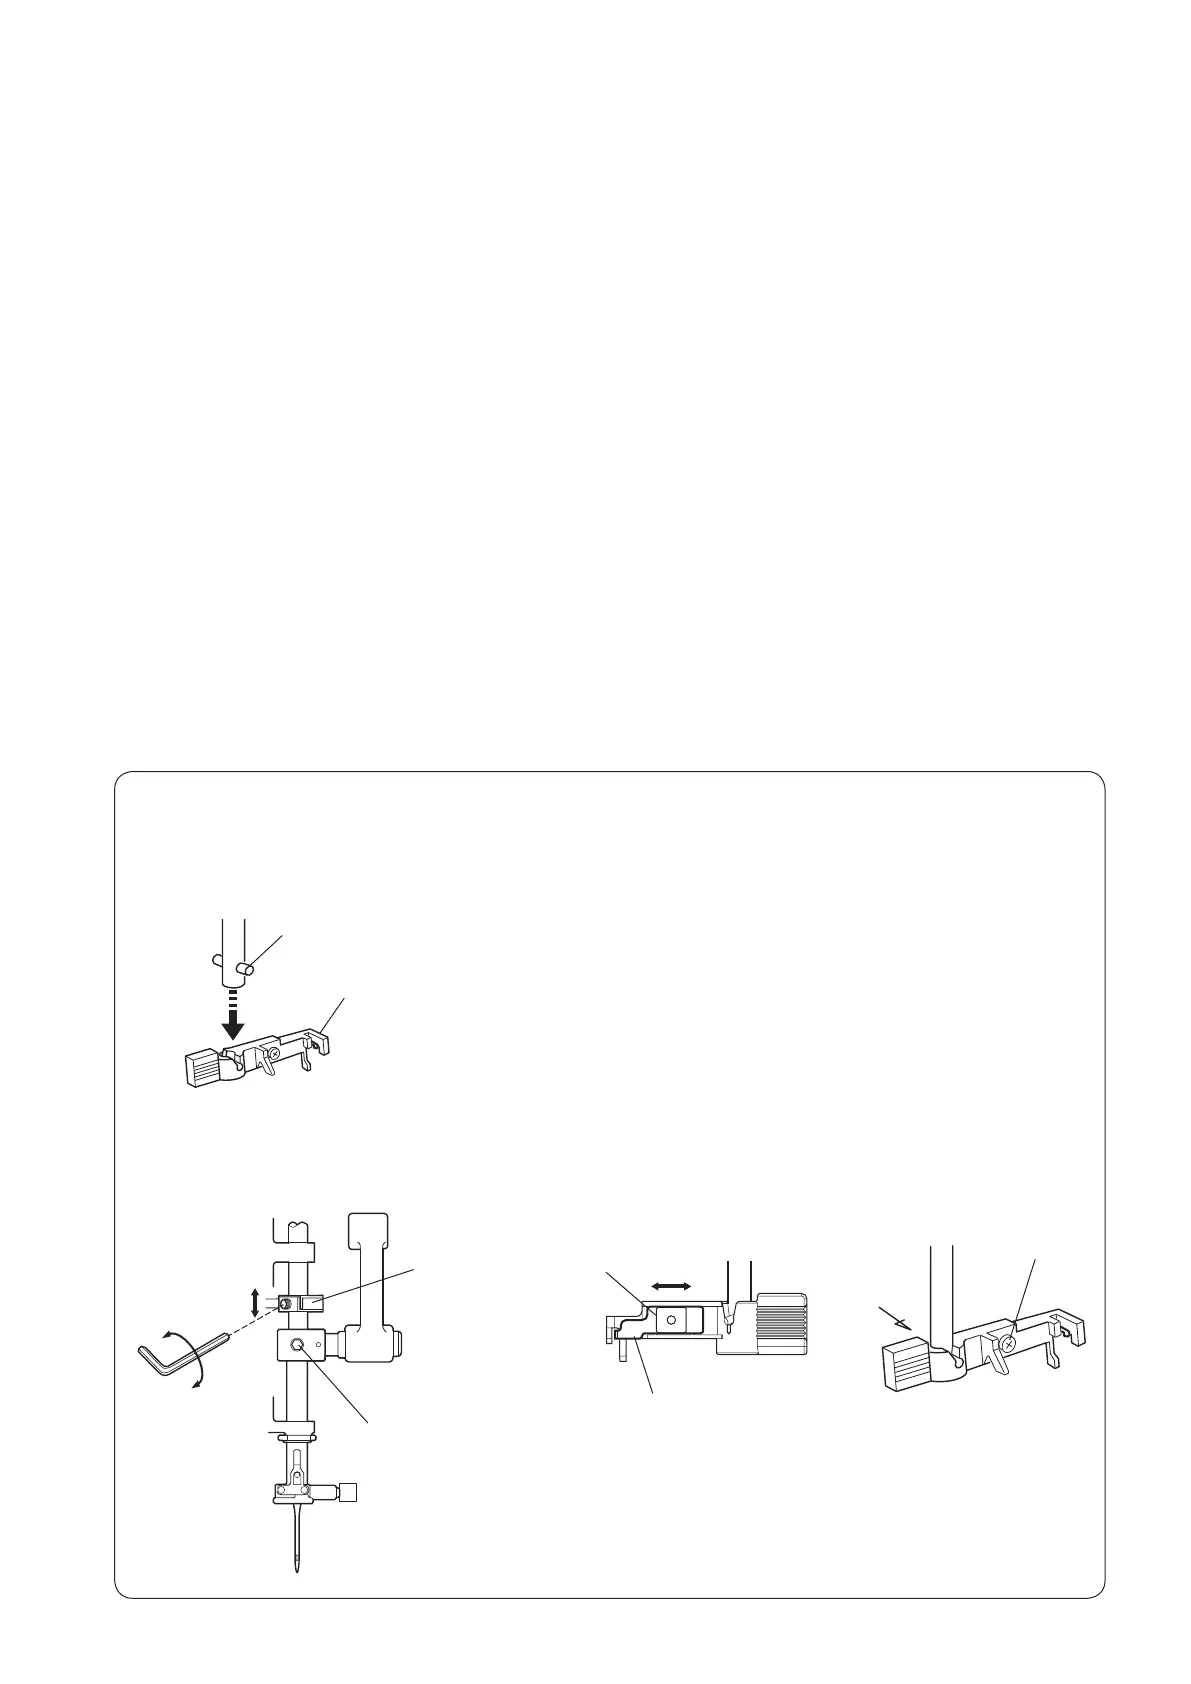
FIG. 1
FIG. 1
REPLACEMENT AND ADJUSTMENT OF THE NEEDLE THREADER PLATE
Ifthehookofthethreaderplateisdamaged,changeandadjustthepartasfollows:
TO CHANGE THE THREADER PLATE:
1. Pushdowntheneedlethreaderknobandpullthethreaderplatesupporterdowntoremoveit(seeFIG1).
2. Toinstalltheneedlethreaderplate,linethegrooveupwiththepinandpushituptosnapt.
TO ADJUST THE THREADER PLATE POSITION:
3. Ifthe hookon thethreader positioningplate touchesthe top or bottom side ofthe needle hole,loosen
hexagonalsocketscrewandadjustthehookposition(FIG.2).
4. Ifthehookonthethreaderplatetouchestheleftorrightsideoftheneedlehole,loosensetscrewandadjust
thehookposition(FIG3).
Replacingthethreaderplatesupporter
(withthethreaderplateattached)
MECHANICAL ADJUSTMENT