20 - 3
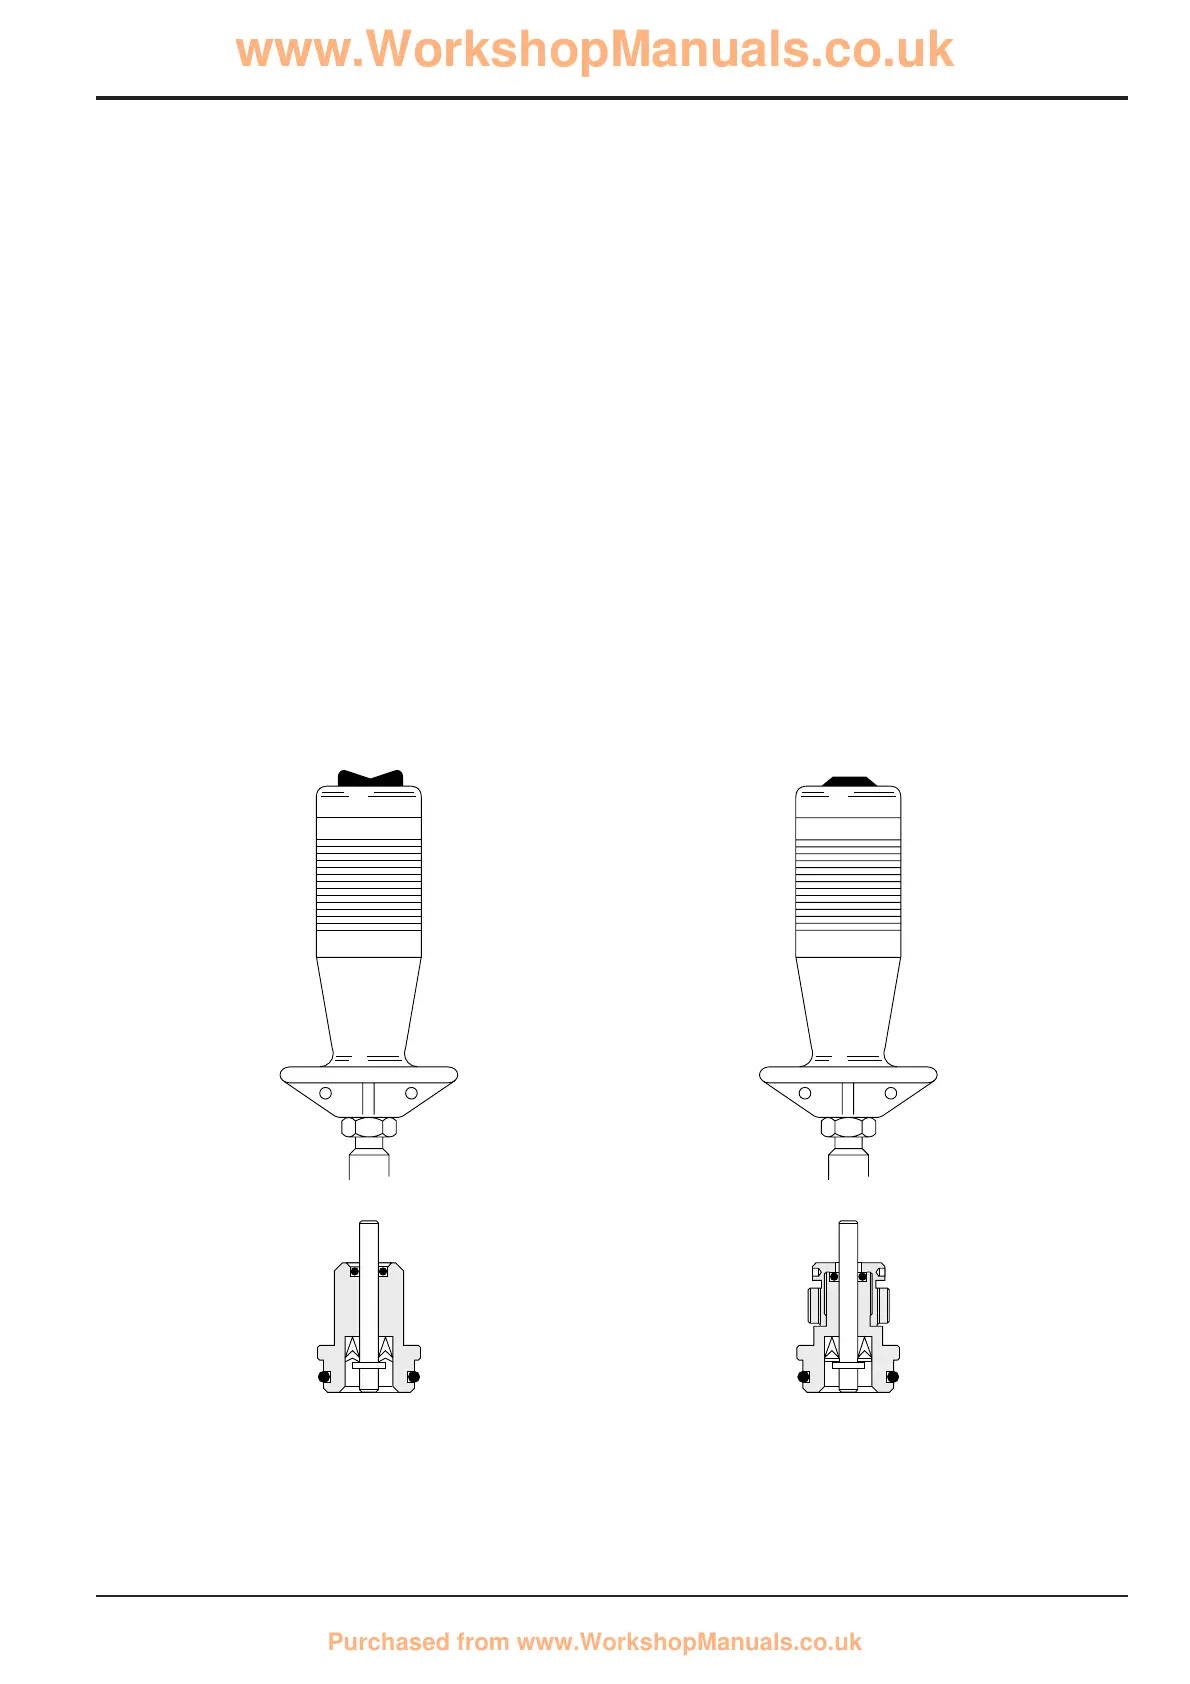
Joystick up to machine number 807146
Dismantling
The numerical sequence is intended as a guide to
dismantling, assembly is the reverse of this sequence.
To remove the handle assembly 3, lift up the gaiter 1 and
remove the four cap head screws 2. This will allow the handle
assembly to be separated from the valve body 6.
Note: Ensure that the components of valve units 14 are kept
together as sets and returned to their original locations in the
body. Do not mix components from different valve units.
A Handle assembly used on the loader control joystick.
Assembly
Lubricate all parts with hydraulic fluid before assembly. 'O'
rings and seals should be lightly coated with petroleum jelly
prior to assembly. See note opposite regarding valve units
14.
Torque Settings
Nm kgf m lbf ft
Bolts 2 (4 off) 12 1.2 9
Bolts 7 (2 off) 12 1.2 9
The handles complete with switches can be replaced as a
unit. Ensure that the correct assembly is used, see below.
B Handle assembly used on direction control joystick.
Section E Hydraulics
9803/8550
Section E
20 - 3
Issue 2*
Servo Joysticks