Do you have a question about the John Bean B 100 and is the answer not in the manual?
Reference to the CE conformity declaration document provided with the machine.
Information and remarks concerning the documentation provided with the product.
List of all documentation and manuals available for the wheel balancer.
Explanation of text styles used in the manual for emphasis and clarity.
List of all documentation supplied with the wheel balancer for user reference.
Environmental and storage conditions for optimal operation and longevity of the unit.
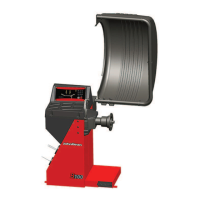
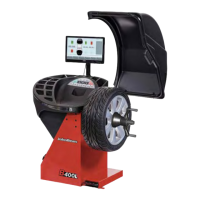
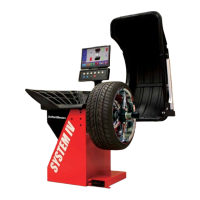
Describes the primary use and purpose of the wheel balancer.
Explanation of the main display screen and its indicators.
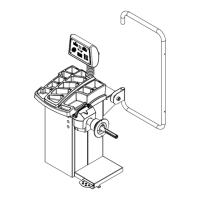
Description of the control panel, buttons, and their functions.
Explains indicators showing wheel rotation direction for correction.
Describes the indicator for correct weight placement.
Details on what information the display provides during operation.
Explains the indicator for weight units (grams/ounces).
Describes indicators for motorcycle balancing modes.
Explains the indicator for flange compensation feature.
Guides on applying weights based on position indicators.
Explains the function of the diameter selection key.
Explains the function of the rim width selection key.
Explains the function of the offset selection key.
Describes the function of the plus key for increasing values.
Describes the function of the minus key for decreasing values.
Explains the function key for accessing secondary functions.
Explains the fine key for adjusting reading accuracy and special functions.
Explains the weight mode selection key.
Explains the stop key for emergency and normal stopping.
Explains the key to switch between grams and ounces.
Explains the key to select static or dynamic balancing modes.
Explains keys for split weight and units selection.
Explains the key to start the measurement process.
Procedures for correctly mounting a car wheel onto the balancer.
Instructions for safely switching on the wheel balancer.
How to perform an emergency stop and its implications.
Steps for correctly powering off the machine after use.
How to change the unit of measurement for weights.
How to change the unit of measurement for dimensions.
How to perform balancing using standard weights for steel rims.
Procedures for balancing with light alloy rims and stick-on weights.
Balancing mode for hiding weights behind spokes.
Balancing modes for specific ALU P weight positions.
Procedure for static balancing of small wheels.
Instructions for manual data input when gauge arm malfunctions.
Procedure for manually entering the rim or tyre diameter.
Procedure for manually entering the rim width.
Procedure for manually entering the offset value.
Steps for balancing using the normal weight mode.
Steps for balancing using ALU weight modes.
Steps for balancing using HWM modes for ALU wheels.
Steps for balancing using ALU P weight modes.
Steps for performing static balancing.
Procedure for HWM modes for ALU wheels.
Balancing modes for specific ALU P weight positions.
How to initiate and manage the wheel spinning process.
Methods and procedures for applying weights to the wheel.
Instructions for attaching clip-on weights correctly.
Instructions for attaching stick-on weights correctly.
How to perform a check spin after weight application.
How to recalculate balancing results with new data.
How to switch to a different weight mode for recalculation.
Steps to follow for recalculating balancing results.
Mode for splitting weights behind spokes for aesthetic reasons.
Advanced mode for improving wheel running and reducing weights.
General principles and benefits of the optimisation process.
Overview of the steps involved in the optimisation program cycle.
Step-by-step guide for executing the balancing optimisation.
Instructions for resuming the optimisation process.
Important notes on tyre mounting and handling during procedure.
Interpretation of the OP.7 outcome and recommended actions.
Interpretation of OP.5 outcome and reference mark procedure.
Steps to continue the optimisation process based on readings.
Steps to exit the optimisation program and return to balancing.
Interpretation of the OP.6 outcome.
Summary of possible readings after a measurement run.
Explanation of different OP.7 readings and actions.
Interpretation of the H0 outcome and its implications.
Interpretation of the H2 outcome and its implications.
Procedure for turning the tyre over on the rim for OP.7.
Procedure for not turning the tyre on the rim for OP.7.
Procedure for aborting optimisation for OP.7.
Interpretation of the H0 outcome for minimisation.
Interpretation of the H2 outcome for minimisation.
Procedure for weight minimisation under H2 outcome.
Procedure for aborting optimisation under H2 outcome.
Steps to start the minimisation program.
Explanation of error code E9 and how to resolve it.
Procedure for not turning the tyre in minimisation.
Interpretation of the H0 outcome for minimisation.
Procedure for performing weight minimisation.
Procedures for initiating and running the minimisation program.
Interpretation of the Un.4 outcome in the minimisation program.
Interpretation of the Un.5 - H1 outcome and subsequent actions.
Steps for using a reference mark in the Un.5 procedure.
Steps to continue the minimisation process after Un.5.
Steps to exit the minimisation program.
Interpretation of the Un.6 outcome in the minimisation program.
Summary of possible readings after minimisation runs.
Explanation of different Un.7 readings and actions.
Procedure for turning the tyre over on the rim for Un.7.
Procedure for not turning the tyre on the rim for Un.7.
Procedure for aborting optimisation for Un.7.
Interpretation of the H0 outcome for minimisation.
Interpretation of the H2 outcome for minimisation.
Procedure for weight minimisation under H2 outcome.
Procedure for aborting optimisation under H2 outcome.
Steps to start the minimisation program.
Explanation of error code E9 and how to resolve it.
Procedure for not turning the tyre in minimisation.
Interpretation of the H0 outcome for minimisation.
Procedure for performing weight minimisation.
Function to prevent wheel skidding during measurement.
Step-by-step guide for performing user calibration.
Detailed steps for calibration using Code C14.
Instructions for setting and changing operating modes using codes.
How to save selected operating modes to permanent memory.
Information on clamping device compensation setting.
Steps to enter and set the operating mode and states.
Using Code C10 to save operating modes permanently.
Information on setting Code C4 for clamping compensation.
Explanation of Code C0 settings for operating modes.
Explanation of Code C1 settings for imbalance value definition.
Explanation of Code C2 settings for suppressing minor imbalances.
Explanation of Code C3 settings for display units (grams/ounces).
Explanation of Code C4 for clamping device compensation.
Explanation of Code C5 for wheel braking during operation.
Explanation of Code C6 for setting wheel spins per run.
Explanation of Code C8 for threshold value suppression.
Using Code C10 to save operating modes to permanent memory.
Explanation of Code C13 for starting measuring runs.
Referencing the user recalibration procedure.
Displaying program version and model number.
Accessing and managing saved error codes.
How to view and scroll through saved error codes.
Procedure for clearing the error memory.
Steps for proper storage of the unit.
Instructions for replacing the main fuse.
Initial steps to take when a problem occurs.
Troubleshooting steps for when the unit does not power on.
Troubleshooting steps for a beep sound on startup.
Troubleshooting steps for a frozen or locked display.
Troubleshooting steps when gauge arm inputs differ from wheel dimensions.
Causes and solutions for inconsistent balancing results.
Troubleshooting steps for a continuously active display segment.
Troubleshooting for a jammed key or pedal switch issue.
Troubleshooting for a faulty distance and diameter gauge.
Troubleshooting for a faulty wheel width gauge.
Interpretation of warning H0 regarding silent running.
Interpretation of warning H1 regarding further optimisation.
Interpretation of warning H2 regarding weight minimisation.
Interpretation of warning H20 regarding correction plane detection.
Interpretation of warning H21 regarding position mismatch.
Specific explanations for error and warning codes E1 through E8.
Explanation of error code E5 for compensation range exceeded.
Explanation of error code E6 for incorrect calibration weight attachment.
Explanation of error code E7 for weight positioning impossibility.
Explanation of error code E8 for valve position not set.
Explanation of error code E9 for incorrect optimisation/minimisation.
Explanation of error code E15 for calibration correction out of range.
Explanation of error code E16 for incorrect calibration weight attachment.
Explanation of error code E17 for wheel slip on clamping means.
Explanation of error code E83 for measurement interruption due to interference.
Explanation of error code E88 for exceeding main shaft speed limit.
Interpretation of warning H26 for fast gauge movement.
Interpretation of warning H28 for slow gauge movement.
Interpretation of warning H80 for calibration setup issue.
Interpretation of warning H82 for disturbed self-test.
Interpretation of warning H90 for slow wheel acceleration or weak braking.
Interpretation of warning H91 for speed variations during run.
Contact information for customer support and service agents.
Guidelines and regulations for disposing of the equipment.
Specific instructions for disposing of electrical and electronic waste in the EU.
Contains additional information and details about the unit.
Minimum space dimensions needed for safe and proper installation.
Specifications for the floor surface where the balancer will be placed.
Electrical power requirements and safety advice for installation.
Details on how the wheel balancer is shipped.
Steps for safely unpacking the wheel balancer and its components.
List of all items included in the shipment.
List of tools needed for installation and setup.
Instructions on how to move and position the balancer.
Guidance on correctly positioning the wheel balancer.
Instructions for mounting accessory support studs and plates.
Steps for cleaning and installing the stub shaft.
Instructions for fixing the wheel guard.
Instructions for attaching clamping devices to accessory studs.
Procedures for verifying the unit after installation.
Guidance for training new operators on unit operation and safety.
Instruction to show and explain the safety booklet to the operator.
Instruction to show how to switch the unit on and off.
Instruction to show how to perform an emergency stop.
Instruction on selecting wheel type, entering data, and applying weights.
| Brand | John Bean |
|---|---|
| Model | B 100 |
| Category | Wheel Balancers |
| Language | English |