156
MIDSECTION
EXHAUST HOUSING
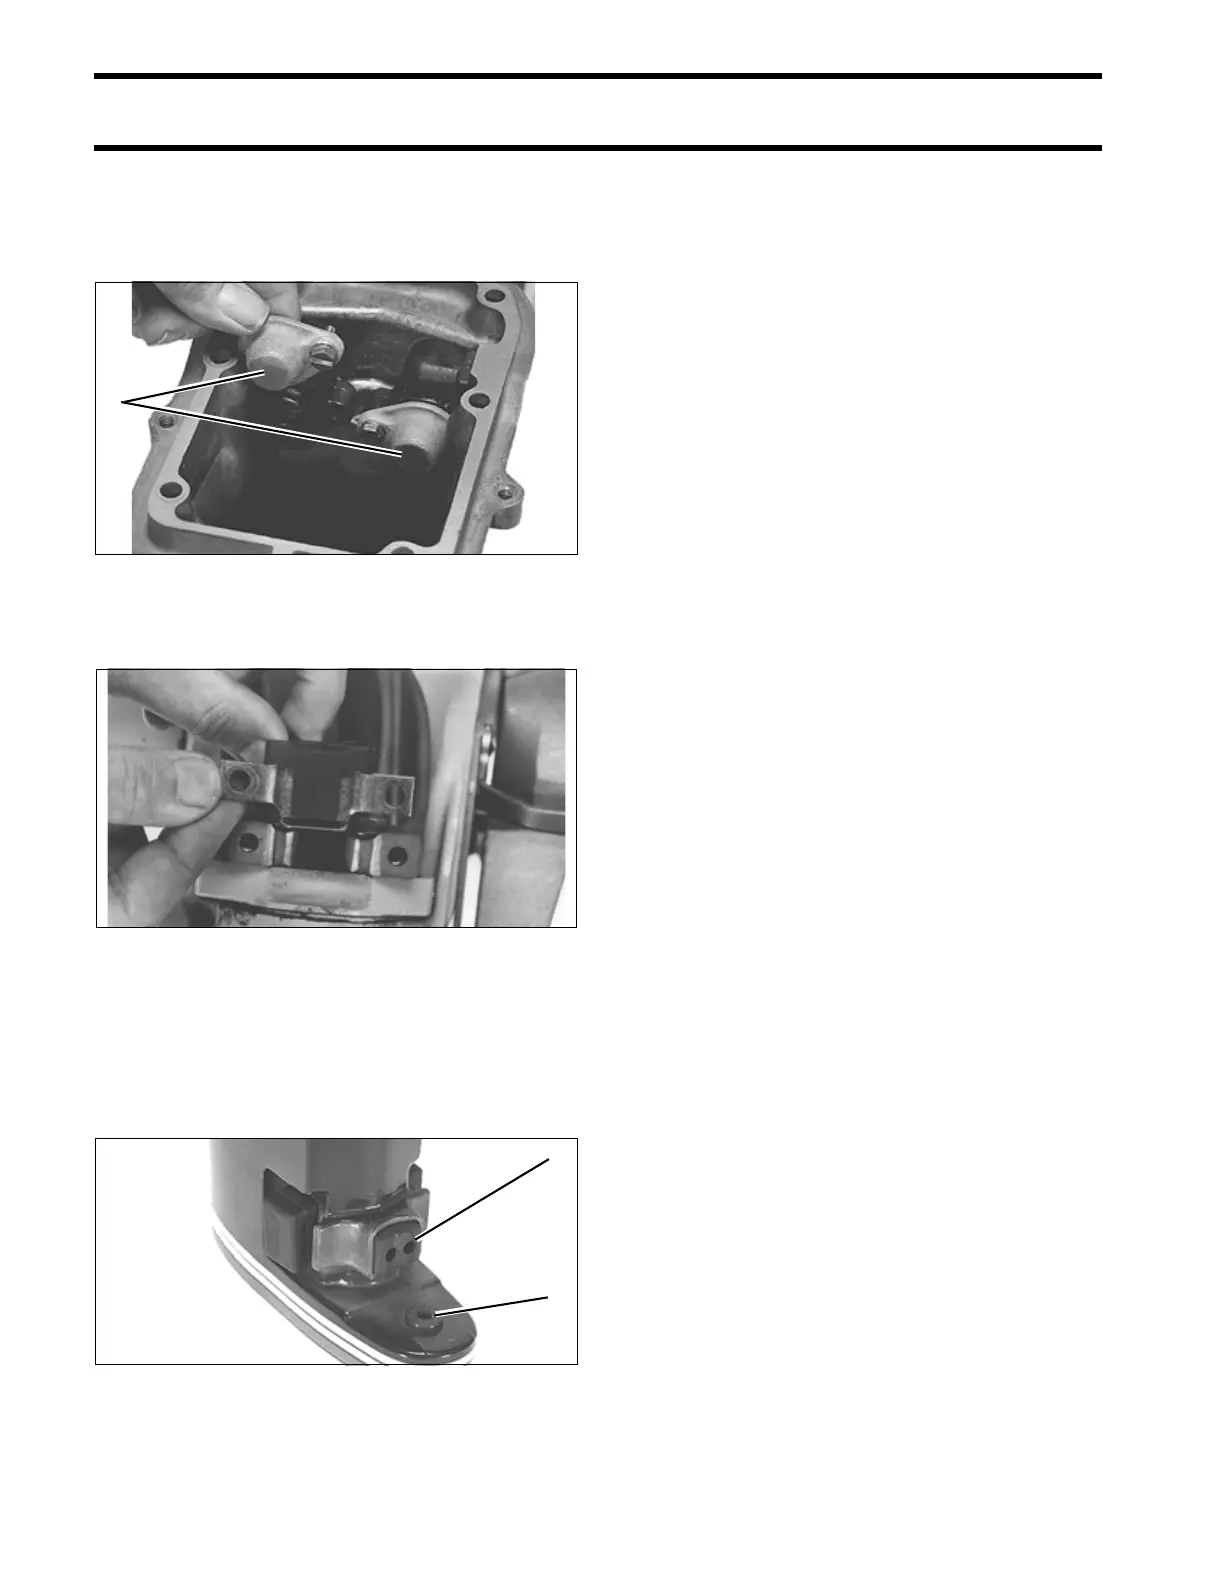
Remove the two upper mount to steering bracket
screw caps and discard O-rings. Remove the two
upper mount screws. Separate the exhaust hous-
ing from the swivel bracket assembly.
Remove the upper thrust mount and plate from
the swivel bracket assembly.
Remove the four screws (two port and two star-
board) retaining the two upper mounts to the
exhaust housing. Remove the two upper mounts.
Remove the lower thrust mount and shift rod
grommet.
Cleaning and Inspection
Clean all parts with parts cleaning solvent and dry
with compressed air. All nut and screw threads
coated with Screw Lock or Nut Lock must be thor-
oughly cleaned before reassembly. When using a
thread locking product, be sure to prime the
threads with Locquic Primer.
Examine the rubber motor mounts and replace if
deteriorated or damaged.
Inspect water tube for obstructions or kinks which
may restrict water flow.
Inspect shift components for wear. Replace if
deteriorated or damaged.
Clamp Screw
Inspect clamp screw assembly(s). Replace swivel
plate and retainer if bent or loose. To install a new
swivel plate, remove screw and old plate. Apply
Locquic Primer to the threads of the screw and
allow it to dry four to five minutes. Then apply
Ultra Lock to threads. Install a new swivel plate
with screw and tighten securely.
Exhaust Housing
Before checking the exhaust housing for distor-
tion, thoroughly clean the top and bottom mating
surfaces and remove all sealer and corrosion.
Check the exhaust housing for distortion. Place
the housing on a surface plate. Using a dial indi-
cator, check flatness by measuring the run-out on
the top edge of housing. The maximum allowable
run-out is 0.009 in. (0.228 mm). If you do not have
access to a dial indicator and surface plate, seek
the services of a machine shop. DO NOT attempt
to straighten a distorted housing; replace it.
1. Screw caps 33356
33355
1. Lower thrust mount
2. Shift rod grommet
32470
1
1
2