Do you have a question about the Joovv Mini and is the answer not in the manual?
Explains how Joovv emits light to create therapeutic health benefits.
States Joovv's approved uses for muscle spasms and minor aches.
Guide to using the device for the first time.
Advises checking for photosensitivity before use.
Details recommended distance and time for effective treatment.
Emphasizes regular treatment for optimal health benefits.
Discusses timelines for experiencing benefits and factors affecting them.
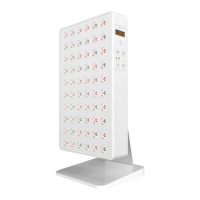
Lists all components included for Joovv Solo & Mini setup.
Steps 1 & 2: Prepare hardware, screw posts, and hang the door hook.
Steps 3 & 4: Connect cables to height-adjusting system and adjust device height.
Steps 5 & 6: Lower the device and connect the power cord and set pairing.
Steps 7, 8, 9: Set time, mode, and start/pause/resume treatment.
Lists all components included for Joovv Duo setup.
Steps 1 & 2: Lay out devices, screw posts, and connect cable supports.
Steps 3 & 4: Hang door hook and attach the lead device to it.
Step 5: Lift and connect the lower Joovv device to the upper one.
Step 6: Connect power to the lower device and patch cable between devices.
Steps 7 & 8: Set lead/follow modes and power on devices for pairing.
Steps 9, 10, 11: Set time, mode, and start/pause/resume treatment.
Lists components for Joovv Quad door mount setup.
Steps 1 & 2: Arrange devices and attach connection bars using screws.
Step 3: Plug in power and patch cables between devices.
Step 4: Set lead/follow modes and turn on power for pairing.
Steps 5 & 6: Attach cable supports and hang door hooks.
Steps 7 & 8: Connect upper devices to hooks and then lower devices.
Steps 9 & 10: Plug in power and set the treatment time.
Steps 11 & 12: Select wavelength mode and start/pause/resume treatment.
Lists components for Quad bracket and wall setup.
Steps 1 & 2: Lay out devices and attach the Quad bracket.
Steps 3 & 5: Attach connection bars and connect patch cables.
Step 6: Set lead/follow modes on all devices.
Steps 7 & 8: Plug in power and set the treatment time.
Steps 9 & 10: Select wavelength mode and start/pause/resume treatment.
Lists all components included for Joovv Elite setup.
Steps 1, 2, 3: Lay out devices, attach Elite bracket and connection bars.
Step 5: Connect power cables and patch cables between devices.
Steps 6 & 7: Set mode switches and plug in power for pairing.
Steps 8, 9, 10: Set time, select mode, and start/pause/resume treatment.
Steps to resolve issues when the Joovv device will not turn on.
Steps to resolve problems with Joovv devices not pairing together.
Explanation of how to use the treatment timer on the control panel.
Information on requesting a larger door hook if the standard one is too small.
Steps to resolve issues when the Joovv device is flashing.
Explanation for why phone support is not provided by the company.
Recommends 10-minute sessions at 6-inch distance for optimal cellular health.
Discusses eye safety and why near infrared LEDs are not visible.
Differentiates benefits of red and near infrared light wavelengths.
Clarifies that clothing is optional, but skin must be exposed.
Advises consulting a doctor regarding medications or use with children.
Discusses timelines for results and the purpose of cooling fans.
Provides device specifications like model, irradiance, voltage, and wavelength.
Lists essential warnings and precautions for safe device operation.
Details safety measures related to electricity, water, and device handling.
Instructions for device care, cleaning, and environmentally responsible disposal.
States the product is not intended to diagnose, cure, or prevent disease.
Information on the device's warranty period and the process for returns.
| Device Type | Red Light Therapy Device |
|---|---|
| Light Source | LED |
| Wavelengths | 660 nm and 850 nm |
| Power Output | 60W |
| Irradiance | 100 mW/cm² at 6 inches |
| Weight | 6 lbs |
| Power Supply | AC Adapter |
| Treatment Time | 10 minutes per area |
| Treatment Area | Targeted areas of the body |
| Timer | Yes |
| LED Type | Medical-grade LEDs |