19
On the comment input screen, as many as 14 char-
acters can be input. The characters that can be input
are alphabets, numbers and symbols.
Press ITEM SELECT key
to specify the in-
put position. Press DATA CHANGE key
to
select the characters to be entered.
When you press RESET key
, the charac-
ter at the current input position is erased. When you
keep RESET key
held pressed, all charac-
ters which have been input are erased.
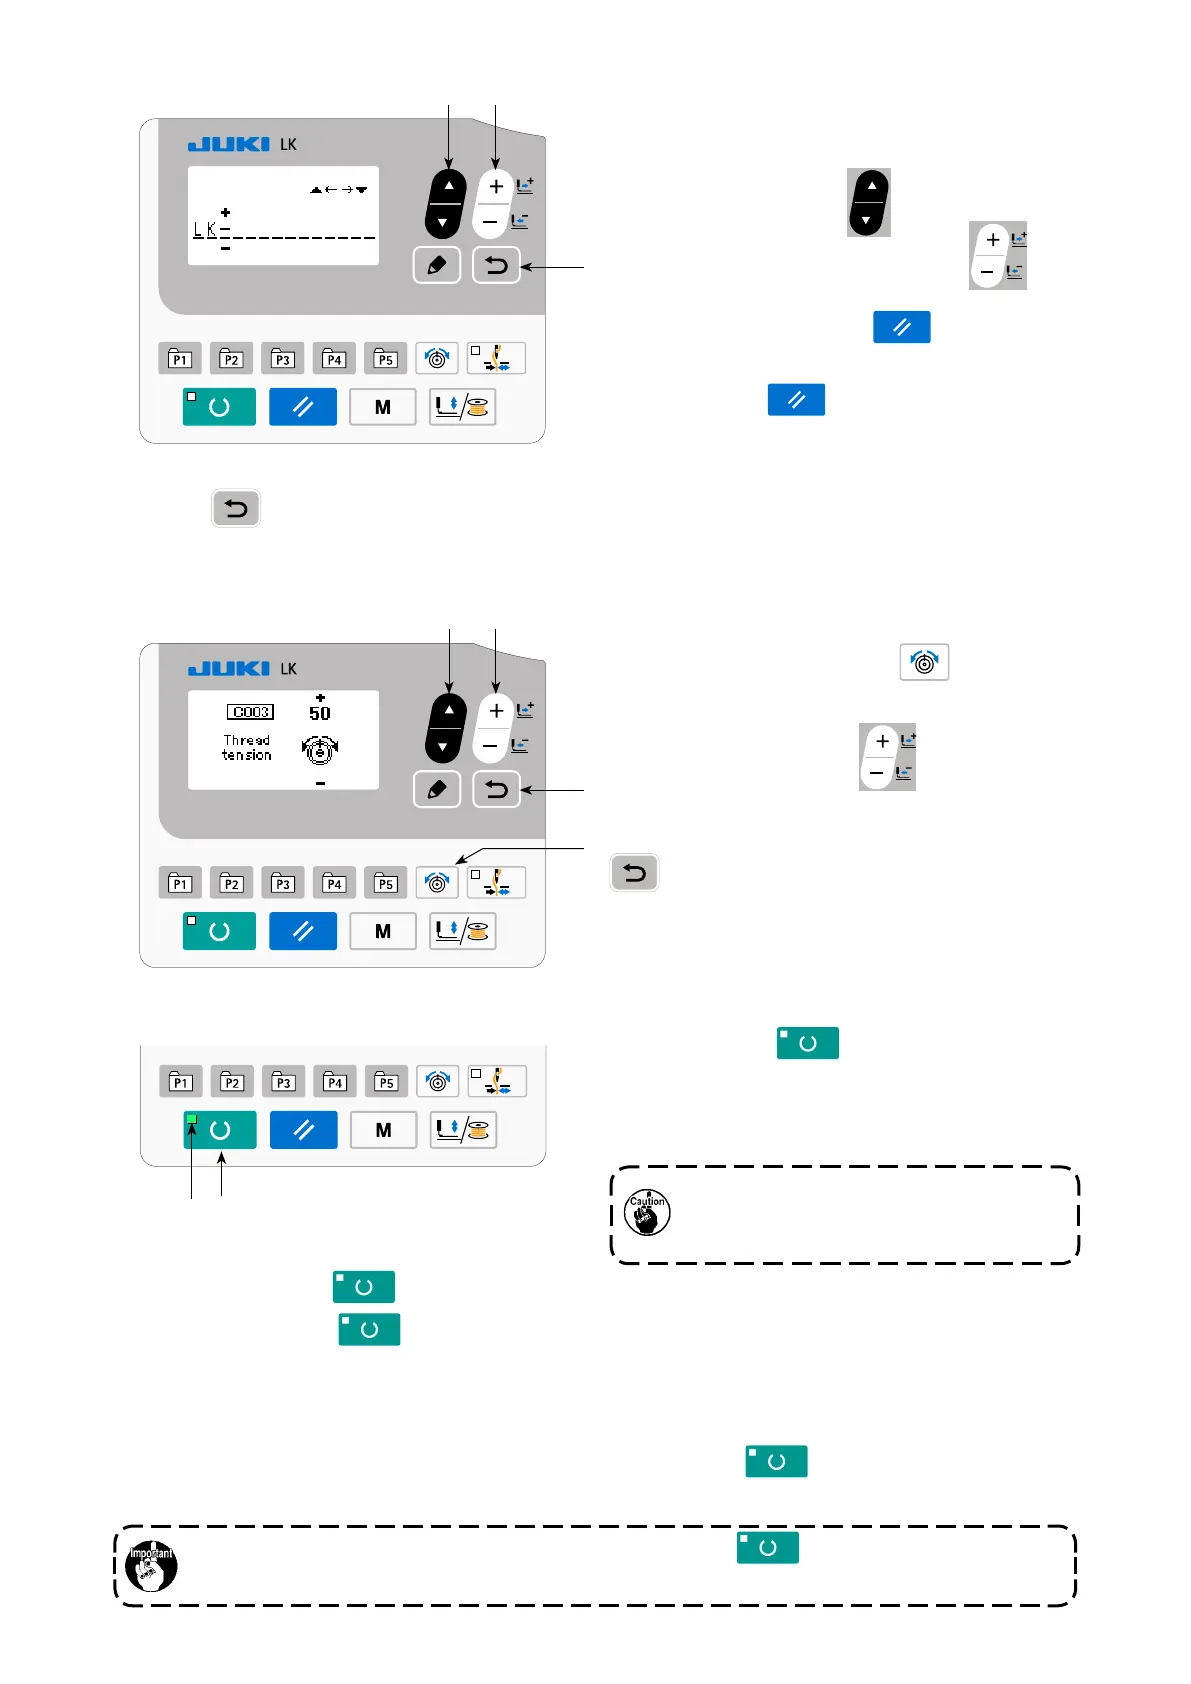
(5) Setting the thread tension
Press THREAD TENSION key
to display
the C003 thread tension.
Press DATA CHANGE key
to display the
value you desire. (Input range: 0 - 200)
After setting the sewing data, press RETURN key
to return to the input screen.
(6) Completing the setting
Press READY key
.
The work clamp moves. Then, SET READY LED
lights up after the work clamp has gone up to enable
sewing.
When the presser is raised, be careful that
ngers are not caught in the presser since
the presser moves after having lowered.
*
When READY key
is pressed, the set values of pattern No., X/Y scale, etc. are memorized.
* When READY key
is pressed, SET READY LED
goes out. Setting of each item can be
changed.
* The thread tension can be changed even when the SET READY LED lights up. The thread tension is
stored in memory with the start switch.
*
Check the pattern number before use. If you press READY key
with pattern number 0 dis-
played, error display E010 will be shown on the screen. At this time, re-set the pattern number.
When turning OFF the power without pressing READY key
, the set values of pattern
No., X/Y scale, number of max. rotation, and thread tension are not memorized.
After the completion of input of a comment, the screen is returned to the previous screen by pressing RE-
TURN key
.

 Loading...