51
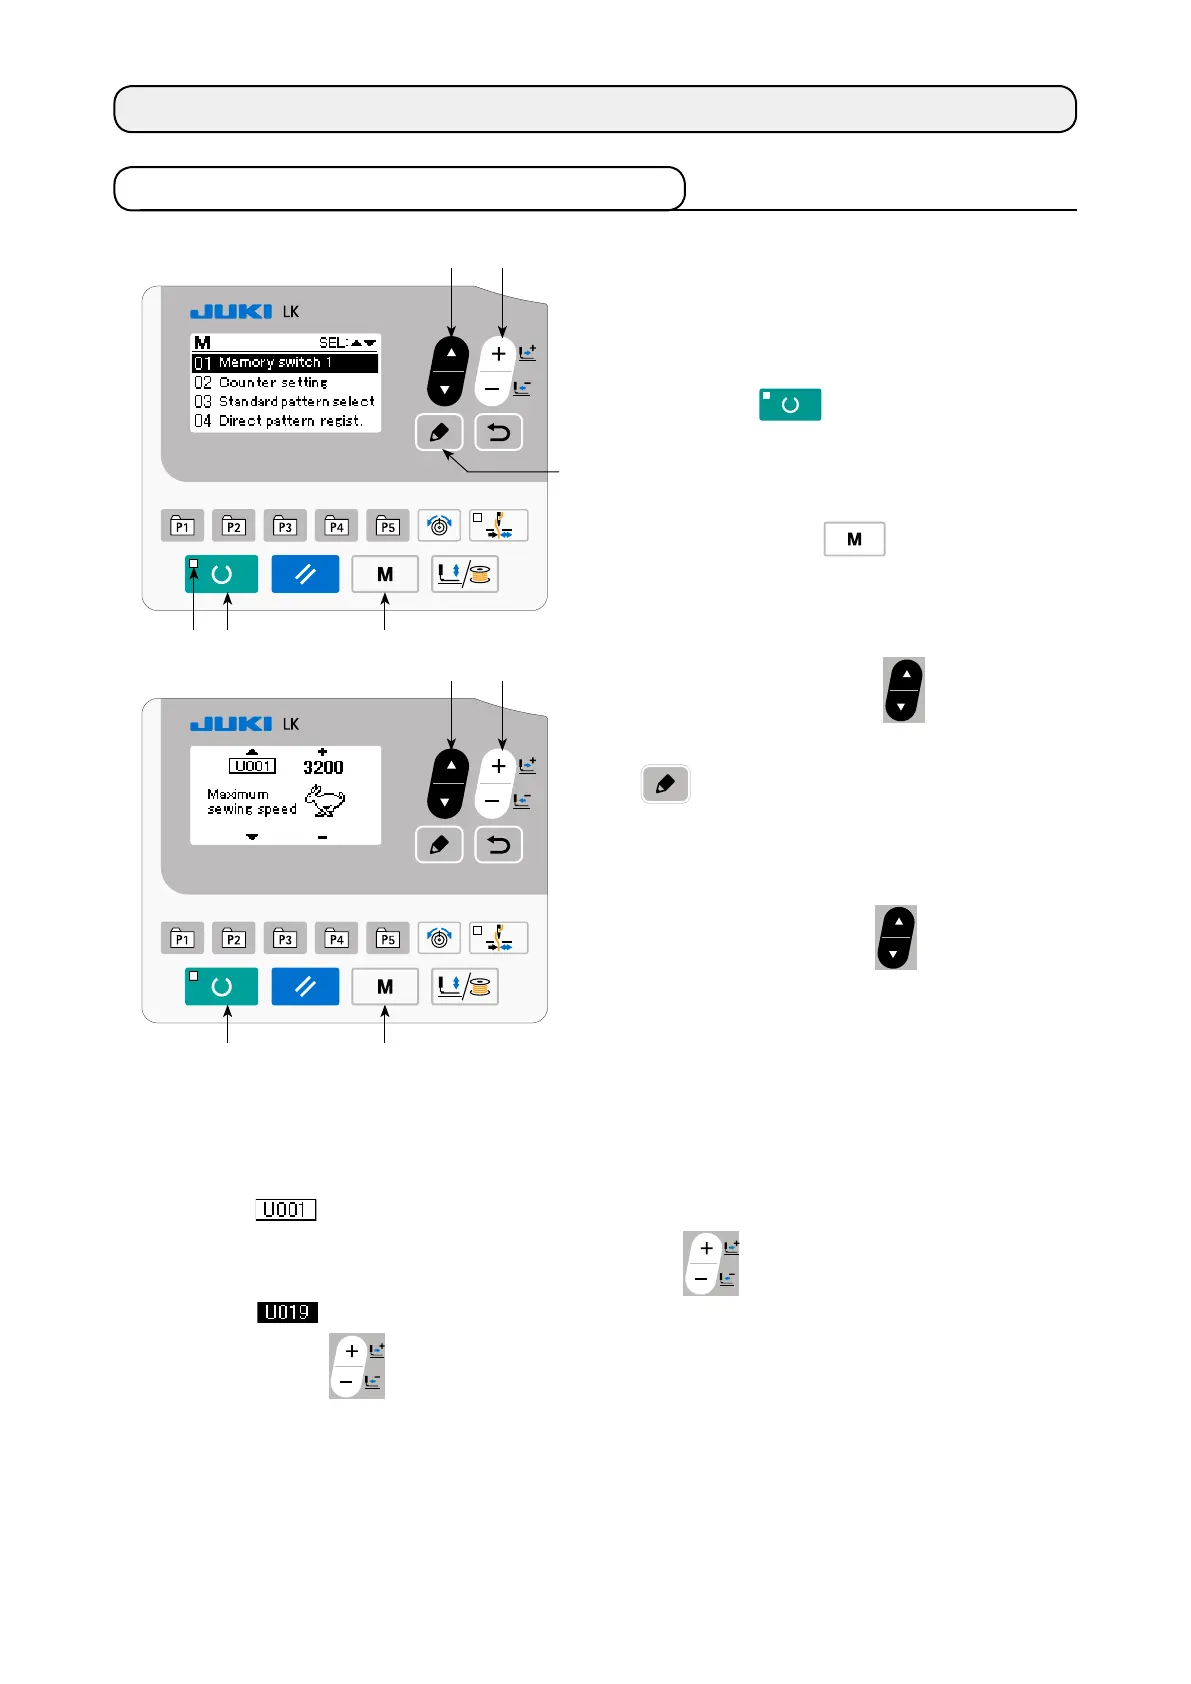
1) Set the mode to input mode.
Under the input mode where SET READY LED
goes out, change to the memory switch data
is enabled.
If the current mode is the sewing mode, press
READY key
to change over the mode
to the input mode.
2) Call memory switch data edit screen.
When MODE key
is pressed, the
mode screen (operator level) is displayed.
On this screen, select the memory switch data
(level 1).
Press ITEM SELECT key
to select "01
Memory switch 1". When you press EDIT key
, the memory switch data screen ap-
pears.
3) Select memory switch data to change.
Press ITEM SELECT key
and select the
data item which you desire to change.
8-1. Method of changing memory switch data
8. HOW TO USE THE MEMORY SWITCH
4) Change data.
There are one data item to change the numerical value and the other data item to select the pictograph in
the memory switch data.
No. such as is attached to the data item to change the numerical value. Set value can be changed
by increasing/decreasing the value with DATA CHANGE key
.
No. such as is attached to the data item to select the pictograph. Pictograph can be selected with
DATA CHANGE key
.
→
For the details of memory switch data, refer to
"I.8-2. List of the memory switch functions" p.52
.

 Loading...