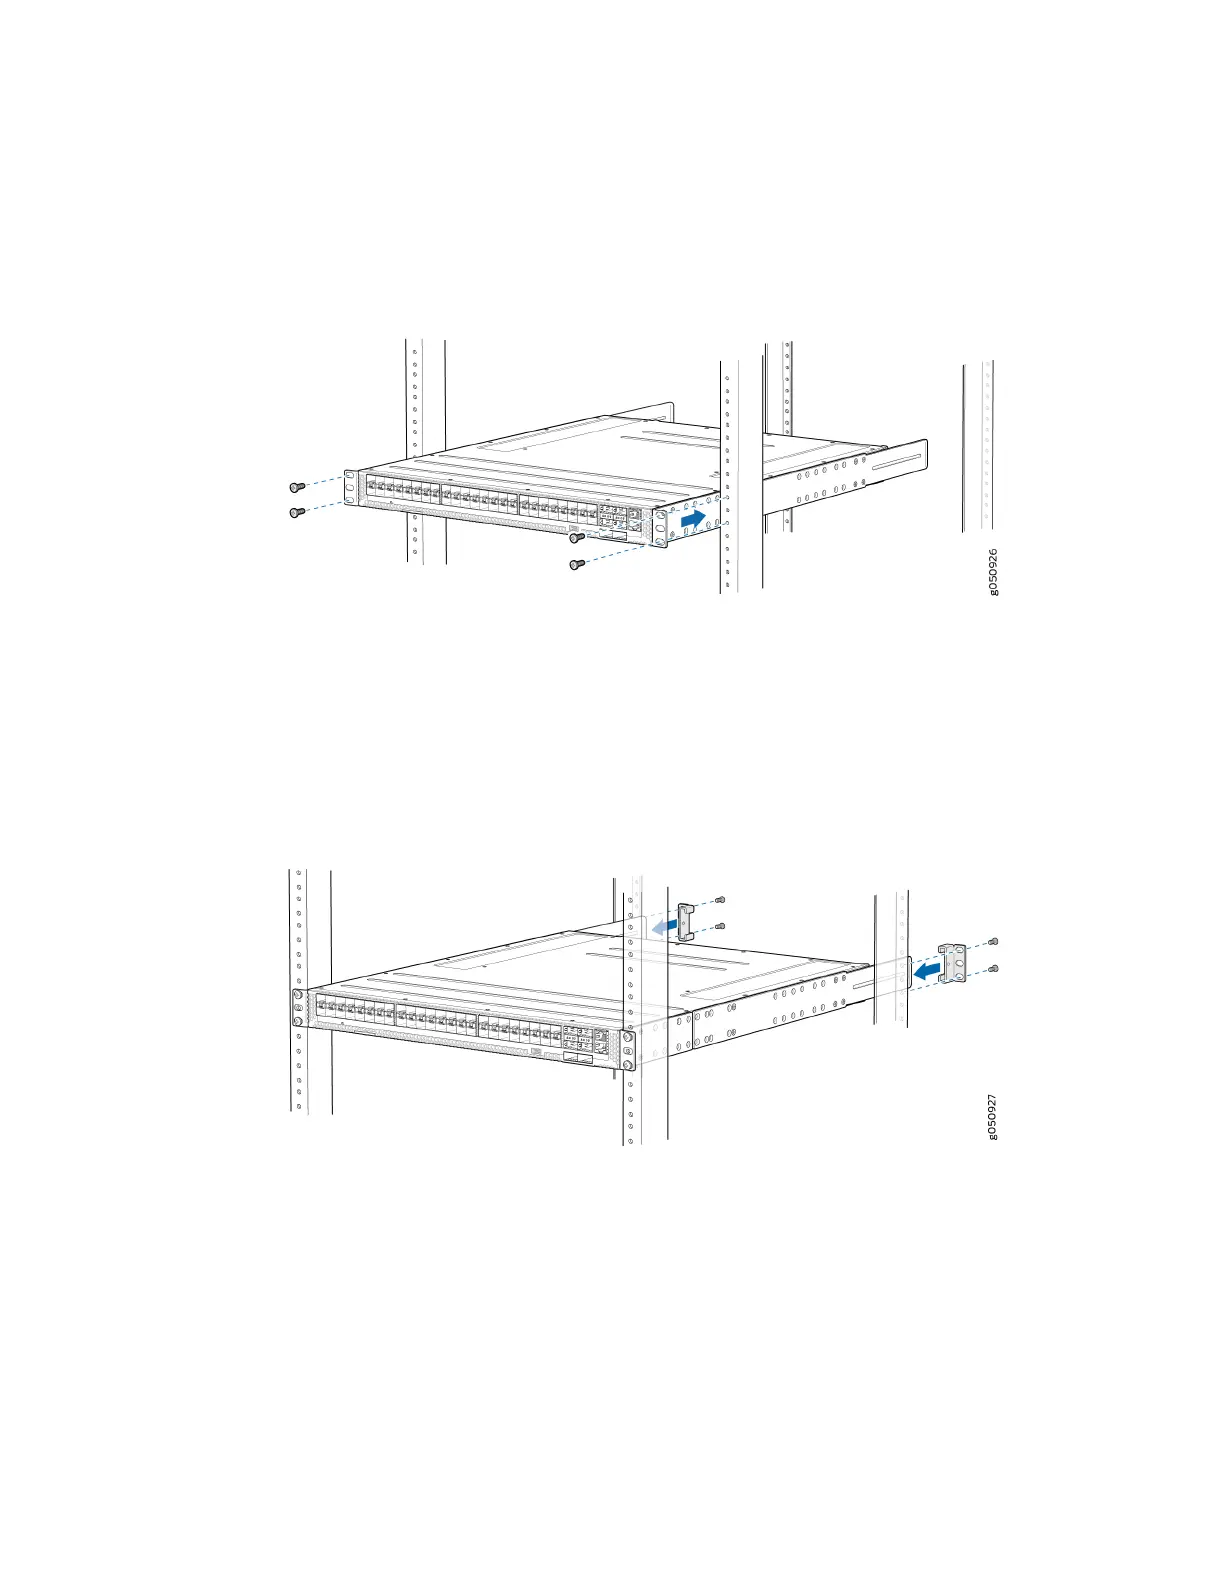
11. Have a second person secure the front of the device to the rack using four mounng screws (and
cage nuts and washers if your rack requires them). Tighten the screws. See Figure 41 on page 104.
Figure 41: Aach the Front Mounng Bracket to the Rack
12. Connue to support the switch while sliding the rear mounng brackets into the channel of the
adjustable mounng blades and securing the blades and the brackets to the rack. Use four
mounng screws (and cage nuts and washers if your rack requires them) to aach the blades and
rear mounng brackets to the rack. Tighten the screws. See Figure 42 on page 104.
Figure 42: Slide Blades into Mounng Rails and Aach to the Rack
13. Ensure that the chassis is level by verifying that all the screws on the front of the rack are aligned
with the screws at the back of the rack.
104