101
OTHERS – Optional devices –
VIDEO
LINE
IN
OUT
MONITOR
OUT
DC12V
DV
IN/OUT
IN OUT
OFF
AUDIO
REMOTE2
IN
B-YR-Y
SYNC IN
TIME CODE
IN OUT
Y
COMPONENT
OUT
CH 1/3 CH 2/4
IN
OUT
MONITOR
OUT
REMOTE1
TIMER
REC PLAY
SERIAL
REMOTE
SIGNAL
GND
Y/C
A
B
C
C
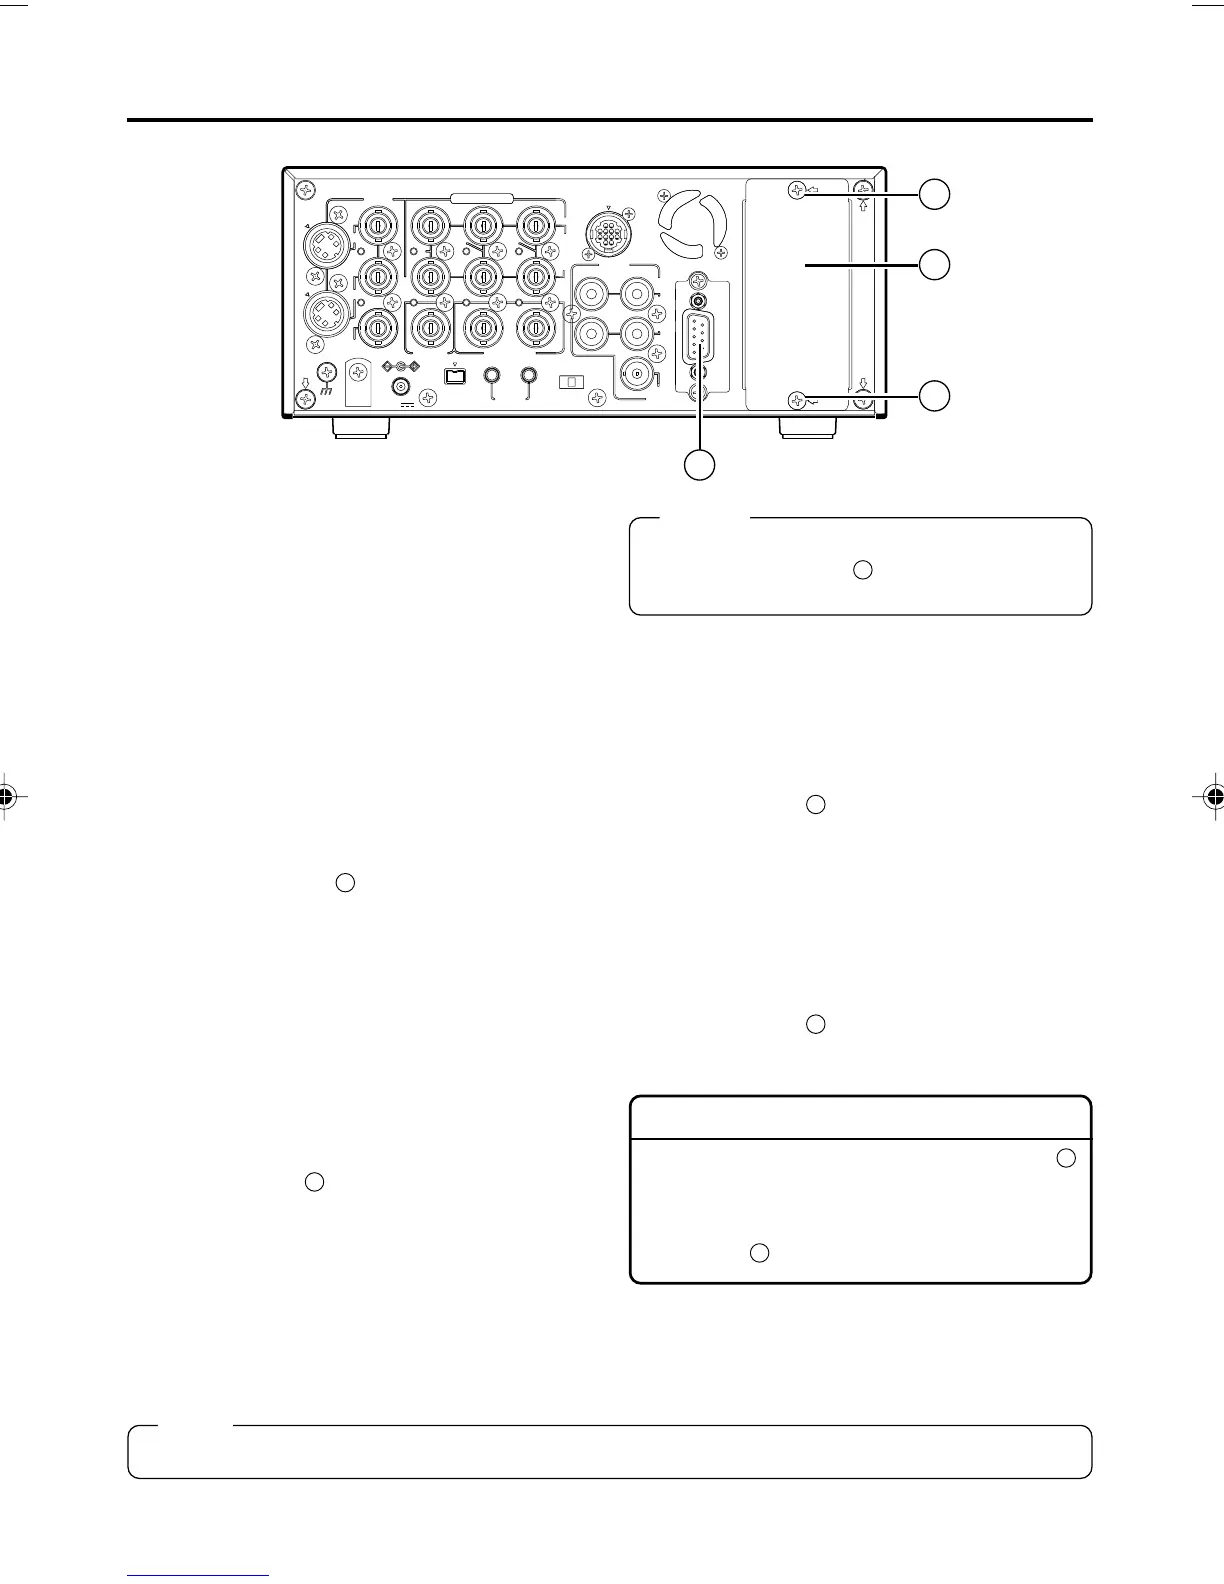
Memo
Install an optional board, SA-DV6000, SA-
X61U, or SA-X62U to
B
as shown in the dia-
gram above.
Note
Contact your JVC authorized service agent before installing the above optional boards.
XLR IN board: SA-X61U
This is an audio input board with two XLR ter-
minals.
• Connect it to
B
.
•To enable audio input from the terminals, set
AUDIO INPUT SEL in the AUDIO Menu
screen to XLR. (☞ Page 78)
XLR OUT board: SA-X62U
This is an audio output board with two XLR ter-
minals.
• Connect it to
B
.
RS-232C interface board: SA-K46U
This is an interface board for controlling BR-
DV6000 with the RS-232C interface. Connect it
to BR-DV6000 with the RS-232C cable. Use a
reverse-type cable.
• Replace it with the RS-422A REMOTE (9-
PIN) terminal of
A
. (☞ Page 102)
•To control BR-DV6000 with RS-232C, set
REMOTE SEL 232 in the REMOTE (1/2).
Menu screen to “ON”.
• Details of the command: (☞ Page 84)
Network board: SA-DV6000
This network board can be used to record
streaming data of video and sound of BR-
DV6000 on to CF card, and to transmit stream-
ing data to the PC via a LAN card.
• Connect it to
B
.
•To control BR-DV6000 with SA-DV6000, set
REMOTE SEL NET in the REMOTE (1/2)
Menu screen to ON or LOC+REM.
• With the SA-DV6000 installed, the network-
related menus will be added.
For details, refer to the user’s guide of SA-
DV6000.
Installing SA-X61U or SA-X62U
1. Remove the slot cover by removing the two
C
screws, which are securing the cover.
2. Insert SA-X61U or SA-X62U into BR-DV6000.
3. Fix SA-X61U or SA-X62U to BR-DV6000 with
the two
C
screws, removed in 1.
DV6000U_72-104_Eng.p65e 06/03/03, 11:42 PM101