102
OTHERS – Installing SA-K46U RS-232C interface board –
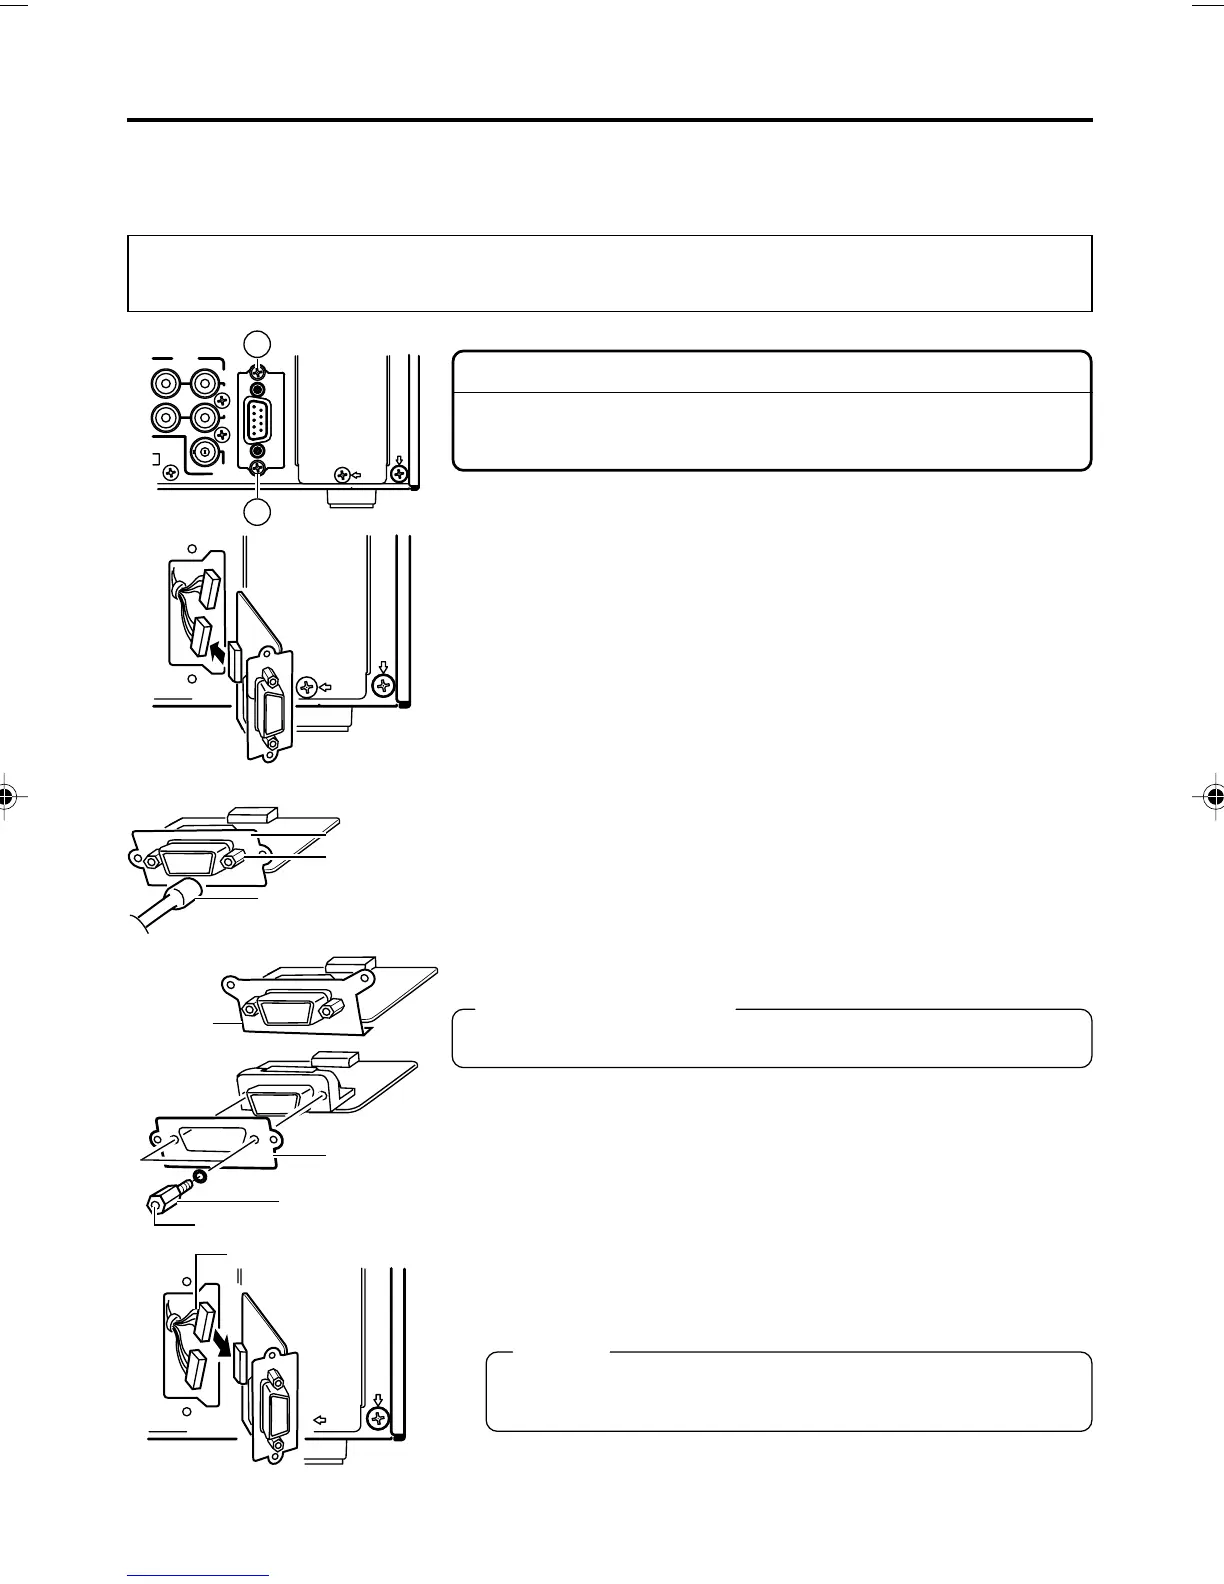
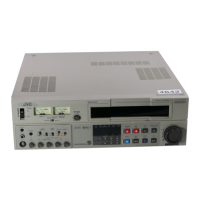
The RS-422A REMOTE 1 terminal of BR-DV6000 can be replaced with SA-K46U RS-232C inter-
face board. Use the plate for the RS-422A REMOTE 1 terminal for installing SA-K46U RS-232C
interface board.
The replacement procedure is described below. However, to prevent electrical shock or injury, the
work should be performed only by a qualified personnel or a JVC authorized service agent.
Caution
To prevent electrical shock, remove the AC adaptor before install-
ing SA-K46U.
1.
Remove the RS-422A REMOTE 1 terminal.
1 Remove the two screws Å and pull out the RS-422A REMOTE
1 terminal.
2 Remove the connector cable connected to the connector of
the RS-422A REMOTE board.
❈
Remove the cable carefully not to damage it.
2.
Remove the plate of RS-422A REMOTE 1 terminal.
•For removing the plate, remove the two hexagonal screws first
with a tool such as a socket wrench.
3.
Remove the SA-K46U plate in the same procedure above.
4.
Fix the plate of RS-422A REMOTE 1 terminal, removed in
2
above, to SA-K46U.
Hexagonal screws
The screw holes for the hexagonal screws are of the inch system.
5.
Install the SA-K46U.
1 Connect the connector cable with red wires to the connector of
the SA-K46U board.
Memo
BR-DV6000 connector cable colors
RS-232C: Red RS-422A: Yellow
2 Fix SA-K46U to BR-DV6000 with the two screws Å, removed
in
1
- 1.
REMO
REMO
IN
OUT
MONITOR
OUT
PLAY
AUDIO
CH 1/3 CH 2/4
REMOTE 1
A
A
RS-422A REMOTE
Plate
Hexagon
screw
Socket wrench
Wire (Red)
Screw hole
SA-K46U
Plate
Plate
Hexagon screw
DV6000U_72-104_Eng.p65e 06/03/03, 11:42 PM102