“Deleting the Currently Displayed File” (A p. 65)
6
LCD Monitor 3D/2D Display Switching Button
0
Switches the display on the LCD monitor between 3D and 2D.
7
Menu Button
“Operating the Menu” (A p. 99)
8
Operation Buttons
“Operation Buttons for Still Image Playback” (A p. 55)
Index Screen
.
1
Date Button
“Operation Buttons for Video Playback” (A p. 53)
“Operation Buttons for Still Image Playback” (A p. 55)
2
Recording/Playback Mode Button
0
Switches between recording and playback modes.
3
Index Screen Switching Button (Still image only)
0
Switches between the group or full index screen displays.
4
Delete Button
“Deleting Selected Files” (A p. 65)
5
Playback Media Button
0
Switches between SD card and built-in memory.
6
Menu Button
“Operating the Menu” (A p. 99)
7
Page Forward/Back Button
“Operation Buttons for Video Playback” (A p. 53)
“Operation Buttons for Still Image Playback” (A p. 55)
Menu Screen
.
1
Help Button
2
Menu Items
3
Return Button
4
Common Menu Button
5
Close Button
“Operating the Menu” (A p. 99)
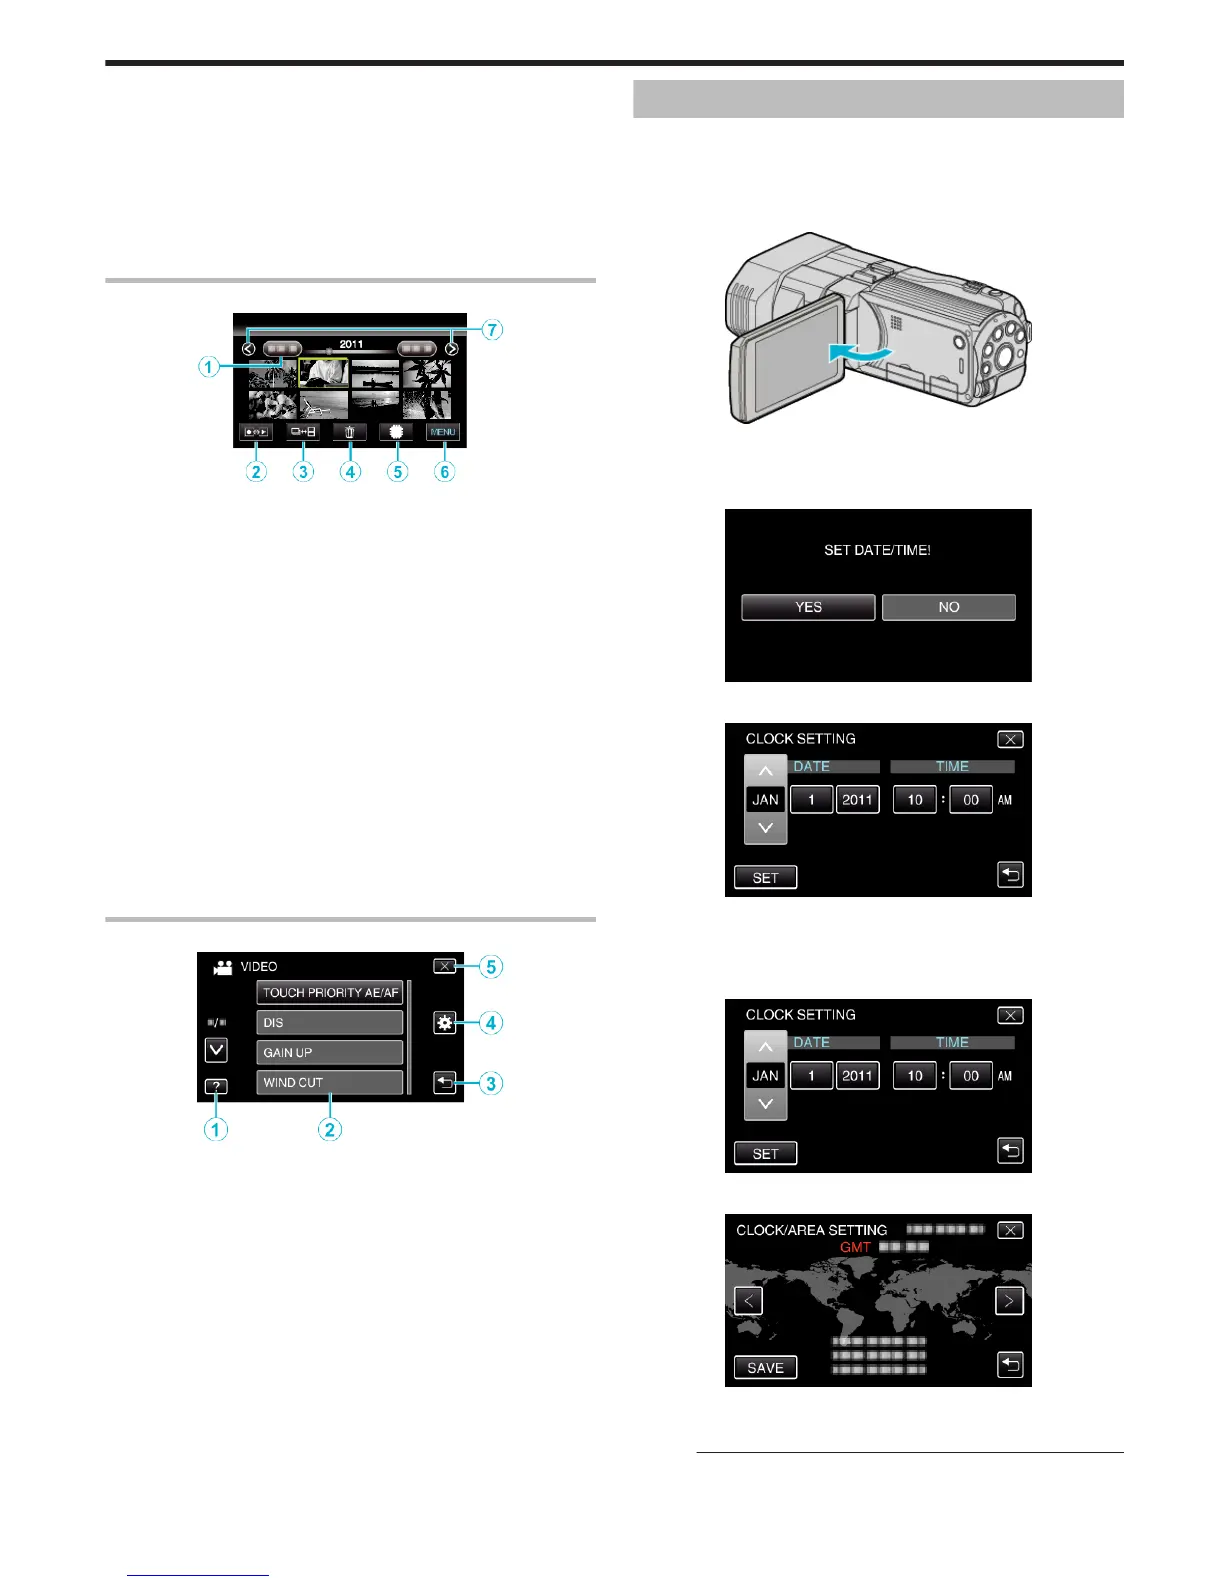
Clock Setting
The “SET DATE/TIME!” screen appears when you turn on this unit for the
first time after purchase, when it has not been used for a long time, or when
the clock is not set yet.
Set the clock before recording.
1
Open the LCD monitor.
.
0
The unit turns on.
0
When the LCD monitor is closed, the unit turns off.
2
Tap “YES” when “SET DATE/TIME!” is displayed.
.
3
Set the date and time.
.
0
When the year, month, day, hour, or minute item is tapped, “∧” and
“∨” will be displayed.
0
Tap ∧ or ∨ to adjust the year, month, day, hour, and minute.
4
After setting the date and time, tap “SET”.
.
5
Select the region where you live and tap “SAVE”.
.
0
The city name and time difference are displayed.
0
Tap “<” or “>” to select the city name.
Memo :
0
The clock can be reset again later.
“Resetting the Clock” (A p. 20)
Getting Started
19
 Loading...