EasyManua.ls Logo

JVC GY-HD201E - User Manual

JVC GY-HD201E
114 pages
To Next Page IconTo Next Page
Loading...
INTRODUCTION
CONTROLS,
INDICATORS AND
CONNECTORS
PREPARATIONS
PREPARATIONS
FOR OPERATION
SETTING AND
ADJUSTMENTS
BEFORE SHOOTING
SHOOTING
OPERATION
PLAYBACK MODE
USING EXTERNAL
COMPONENTS
MENU SCREENS
FEATURES OF THE
CAMERA SECTION
OTHERS
HD CAMERA RECORDER
INSTRUCTIONS
(B)
GY-HD200U/CHU
GY-HD200E/CHE
GY-HD201E/CHE
Thank you for purchasing this JVC product. Before operating this
device, please read the instructions carefully to ensure the best
possible performance.
For Customer Use:
Enter below the Serial No. which is located on the body.
Retain this information for future reference.
Model No.
Serial No.
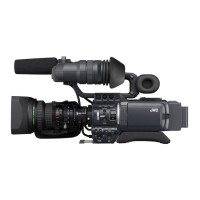
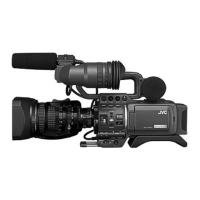
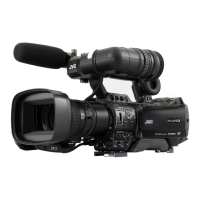
* The illustration shows the GY-HD200U/
GY-HD200E/GY-HD201E HD CAMERA
RECORDER with the provided lens,
viewfinder and microphone attached.
© 2008 Victor Company of Japan, Limited
E
GY-HD200/GY-HD201
HD CAMERA RECORDER
LST0512-001BLST0512-001B
e_hd200_cover_7.fm Page 1 Friday, February 1, 2008 4:06 PM

Table of Contents

Questions and Answers:

JVC GY-HD201E Specifications

General IconGeneral
BrandJVC
ModelGY-HD201E
CategoryCamcorder
LanguageEnglish

Summary

Important Safeguards

Safety Precautions

For USA and Canada

Safety information specific to users in the USA and Canada.

Information for USA

FCC compliance and interference information for the USA.

Information for Canada

Compliance with Canadian ICES-003 standards.

Safety Precautions (Contd)

For Europe

Safety and compliance information for European directives.

Information for Users on Disposal of Old Equipment

INTRODUCTION

Precautions for Proper Use

Important considerations for safe and optimal device operation.

Routine and Periodical Maintenance

Guidelines for maintaining the device's performance over time.

Precautions for Head Cleaning Tape

Specific instructions and warnings for using head cleaning tapes.

Battery Pack and Videocassette Usage

Information on compatible batteries and videocassettes.

Device Phenomena and Storage

Explains condensation, CCD characteristics, and tape storage.

CONTROLS, INDICATORS AND CONNECTORS

ZOOM Lens Controls

Details the functions and operation of the zoom lens.

Front Section Controls

Describes controls located on the front of the device.

Rear Section Controls

Describes controls and indicators on the rear of the device.

LCD Door Controls

Explains controls and displays found on the LCD door.

Right Side Section Controls

Details controls situated on the right side of the device.

Left Side Section Controls

Explains controls and connectors on the left side of the device.

Top Section Controls

Describes controls and features on the top section of the device.

Status Indications and Screens

Explains various status displays on the LCD and viewfinder.

Camera Mode Status Screens

Details status screens displayed in camera mode.

VTR Mode Status Screen

Explains status information shown in VTR playback mode.

Magnified Status Indications

How to display status information in magnified size.

LCD;Viewfinder Display Switching

How to switch between LCD monitor and viewfinder displays.

PREPARATIONS

Basic System Setup

Overview of the basic system components and connections.

Attaching Camera Components

Instructions for attaching the zoom lens, microphone, and viewfinder.

SD Memory Card Operations

Procedures for inserting, removing, and using SD memory cards.

Tripod Base Attachment

Steps for attaching the optional tripod base for stability.

AC and Battery Operation

How to operate the device using AC power or battery packs.

PREPARATIONS FOR OPERATION

Powering the Device On;Off

Instructions for turning the device's power on and off.

Loading and Unloading Cassettes

Procedures for inserting and removing videocassette tapes.

Setting Date and Time

How to set the device's internal clock and date.

Displaying Time Code

How to display time code and user's bits on screen.

Presetting Time Code and User Bits

Methods for presetting time code and user's bit data.

Recording Time Codes

How to record time codes continuously.

Synchronizing Time Codes

Steps to synchronize time codes with an IEEE1394 master unit.

Screen and Viewfinder Adjustments

How to adjust LCD monitor and viewfinder settings.

Back Focus Adjustment

Procedure for adjusting the lens' back focus for optimal sharpness.

White Balance Adjustment

How to set the white balance for accurate color reproduction.

White Shading Adjustment

Procedure to correct color differences at screen edges.

SETTING AND ADJUSTMENTS BEFORE SHOOTING

Setting the Video Format

How to select the video format for recording and playback.

Camera Settings

Basic camera settings like Gain, Iris, and ND filter.

Screen Size Mode Selection

How to select the aspect ratio (4:3 or 16:9) for recording.

Audio Input Signal Selection

How to select audio input sources for channels CH-1 and CH-2.

Adjusting Audio During Recording

How to manually adjust audio input levels during recording.

Monitoring Audio During Recording

How to monitor audio input through speakers or headphones.

SHOOTING OPERATION

Basic Recording Operation

Step-by-step guide to start and perform basic recording.

Record-Standby Mode

How the device behaves in record-standby and tape protect modes.

Recording Check Function

How to review recorded content without stopping standby mode.

HEADER REC Function

Describes the function for recording a header sequence before main content.

PLAYBACK MODE

Playback Procedure

Steps to load tape and start playback.

Fast-Forward and Rewind

How to fast forward and rewind the tape during playback.

Search Function

How to search for specific points on the tape during playback.

Outputting Audio

How to output audio during playback.

USING EXTERNAL COMPONENTS

Connecting the IEEE1394 Cable

Instructions for connecting devices via IEEE1394.

Dubbing with AV Devices

Procedure for analog signal dubbing with AV devices.

HDV;DV Dubbing

How to perform digital dubbing using HDV/DV signals.

Backup Recording

How to record camera images and sound to an external device for backup.

Connect Remote Control Unit

Instructions for connecting and using a remote control unit.

MENU SCREENS

Menu Screen Configuration

Explains the layered structure of the menu screens.

Setting Menu Screens

General steps for navigating and changing menu settings.

TOP MENU Screen

Main menu structure and available options.

VIDEO FORMAT[1;2] Menu Screen

Settings for video format, frame rate, and recording options.

VIDEO FORMAT[2;2] Menu Screen

Additional video format settings, including playback tape detection.

CAMERA OPERATION Menu Screen

Settings related to camera operational modes.

CAMERA PROCESS[1;2] Menu Screen

Adjustments for picture quality, detail, and frequency.

CAMERA PROCESS[2;2] Menu Screen

Advanced picture adjustments like black level, knee, and DNR.

ADVANCED PROCESS Menu Screen

Settings for cinema, color matrix, gamma, and color gain.

COLOR MATRIX ADJUST Menu Screen

Fine-tuning color matrix properties like gain and rotation.

SKIN COLOR ADJUST Menu Screen

Adjusting skin detail function and color range.

WHITE BALANCE Menu Screen

Settings for manual and automatic white balance adjustments.

SWITCH MODE Menu Screen

Assigning functions to user buttons and setting shutter modes.

AUDIO;MIC[1;2] Menu Screen

Settings for audio input, levels, and wind cut.

AUDIO;MIC[2;2] Menu Screen

Audio output selection and FAS recording level settings.

LCD;VF[1;4] Menu Screen

Settings for zebra patterns, safety zones, and focus assist.

LCD;VF[2;4] Menu Screen

LCD mirror mode settings for display orientation.

LCD;VF[3;4] Menu Screen

Settings for displaying video format, tape remaining, and battery info.

LCD;VF[4;4] Menu Screen

Adjustments for LCD contrast, black & white display, and VF signal format.

TC;UB;CLOCK Menu Screen

Settings for time code, user bits, date, and time.

HEADER REC Menu Screen

Settings for the HEADER REC function.

TIME;DATE Menu Screen

Options for date and time display styles and clock adjustments.

OTHERS[1;2] Menu Screen

Settings for analog output, pause time, and tally lamps.

OTHERS[2;2] Menu Screen

Settings for IEEE1394 trigger, backup recording, and resets.

FILE MANAGE Menu Screen

Functions for saving, loading, resetting, and formatting settings.

FEATURES OF THE CAMERA SECTION

How to Use Skin Detail

How to use the skin detail function for smoother skin tones.

Outputting Color Bars

How to output color bars for calibration or testing.

OTHERS

Warnings and Responses

Explains warnings and error messages displayed on the device.

Troubleshooting

Common symptoms and their remedies for device issues.

How to Display the Hour Meter

How to access the drum and fan motor usage times.

Specifications

Detailed technical specifications of the device.

External Dimensions

Diagrams showing the device's physical dimensions.

Related product manuals