Do you have a question about the JVC KD-V6B and is the answer not in the manual?
General warnings about electrical shock and handling the unit safely, including symbol explanations.
Enables immediate monitoring of recorded signals with independent record, playback, and erase heads.
Features 2-color fluorescent meters with digital peak indication and memory/peak hold.
A 2-way digital counter with 4-digit tape counter and 2 memory points.
Essential safety guidelines for operation, handling cords, and avoiding damage.
Recommendations for placing the unit in suitable environmental conditions.
Instructions on loading tapes, avoiding slack, and using safety tabs.
Procedure for adjusting the unit's voltage selector to match the mains supply.
Important information on connecting the unit to AC mains power supplies, including wire color codes.
Guidance on connecting the deck to a stereo amplifier and other audio devices.
Controls the timer function for recording or playback, with a safety lock mechanism.
The main power switch to turn the unit on and off.
Indicates recording input and playback signal levels, holding peaks for about 2 seconds.
Lights up to indicate the type of tape (NORM, CrO2, METAL) automatically detected.
Provides a direct digital readout of peak recording or playback levels.
A 2-way counter functioning as a tape counter or lap timer.
Connection for headphones, with volume adjusted by the output level control.
Adjusts output levels for the unit and headphone jack, independent of the peak level meter.
Adjusts the balance between the left and right audio channels.
Used for FM broadcasts with Dolby NR to prevent pilot tone interference.
Switches the Noise Reduction System (Dolby B/C) on/off and selects the type of NR.
Allows comparison of source signal with recorded signal by switching between SOURCE and TAPE.
Used to call up stored peak levels or reset the memory.
Operates the memory function for tape stopping at specific points.
Works with the memory switch to repeatedly play back a selected tape section.
Selects the mode for the digital counter (Stopwatch or Counter).
Resets the digital counter to zero.
Lights up during record muting operation.
LEDs indicating tape movement direction and operating mode (record, play, scan, pause).
Lights up during recording and record standby modes.
Opens the cassette holder.
Locates and plays back the beginning of each tune sequentially.
Skips to the beginning of the desired tune.
Connection for an optional remote control unit.
Explanation of the electronic counter's modes: Stopwatch and 4-digit tape counter.
Step-by-step guide on storing and recalling memory points for tape control.
Important notes regarding memory function limitations and usage.
How to perform playback from a stored memory point or after tape end detection.
Using the auto repeat switch with memory to repeatedly play a section.
Information on using and compatibility of noise reduction systems like Dolby B/C and ANRS.
Procedures for erasing recordings, either during new recording or without recording.
How to switch between playback and recording modes without stopping the tape.
Compares the precision of the Digital Peak indicator with FL Peak meters.
Guidance on adjusting recording levels based on tape type and observed indicators.
Steps to automatically create non-recorded sections of approximately 4-5 seconds.
How to create non-recorded sections longer than 5 seconds by holding the button.
Procedure to create a 4-5 second silent section before starting recording.
How to create non-recorded sections shorter than 4 seconds.
Alternative methods for creating silent sections, including eliminating click noise.
Monitoring the input signal level from the source during recording.
Monitoring the recorded signal from the tape for quality checks.
Instructions for setting up the timer for automatic recording.
Instructions for setting up the timer for automatic playback.
Explains why regular cleaning of heads, capstan, and pinch roller is crucial for performance.
Step-by-step guide on how to clean the tape path components.
Checks for issues when the power cannot be turned on.
Troubleshooting for tape not engaging, no sound, or improper tape movement.
Addresses poor sound quality, recording failures, and tape speed irregularities.
Details the characteristics and benefits of using metal tape.
Graph and explanation of recording/playback frequency response for different tape types.
Explains the principles and benefits of the Dolby C noise reduction system.
How Dolby C system enhances linearity at high frequencies for better signal reproduction.
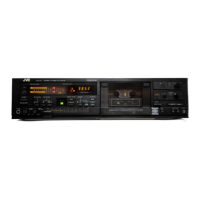
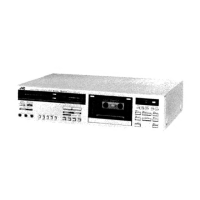
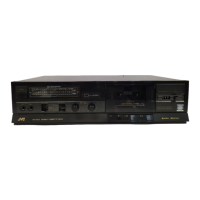
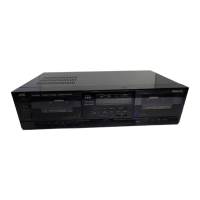
Identifies the unit as a stereo cassette deck with a 4-track, 2-channel system.
Lists the tape speed and frequency response characteristics for various tape types.
Specifies the Signal-to-Noise ratio and Maximum Output Level (MOL) for different tapes.
Technical details on tape speed stability, signal isolation, and head types used.
Details the DC motors used for capstan, reel, and mechanical drive.
Specifications for line input/output and headphone jack impedance and levels.
Information on power requirements, consumption, and physical dimensions of the unit.
Lists included accessories and the unit's weight.
| Track System | 4-track, 2-channel stereo |
|---|---|
| Noise Reduction | Dolby B |
| Frequency Response | 30 Hz - 15 kHz |
| Dimensions | 178 x 50 x 159 mm |
| Weight | 1.2 kg |
| Brand | JVC |
| Model | KD-V6B |
| Tape Type | Normal |
| Input | Line in |