14 k2evo702en-2012-05 Kaba c-lever
Installation Installation instructions
4 Installation
4.1 Tools required
• Drill jig or drilling template for the Kaba c-lever
• C-clamp - recommended when working with drill jig.
• Power drill with 9mm and 13mm drill bits
• Various slotted and Philips head screwdrivers
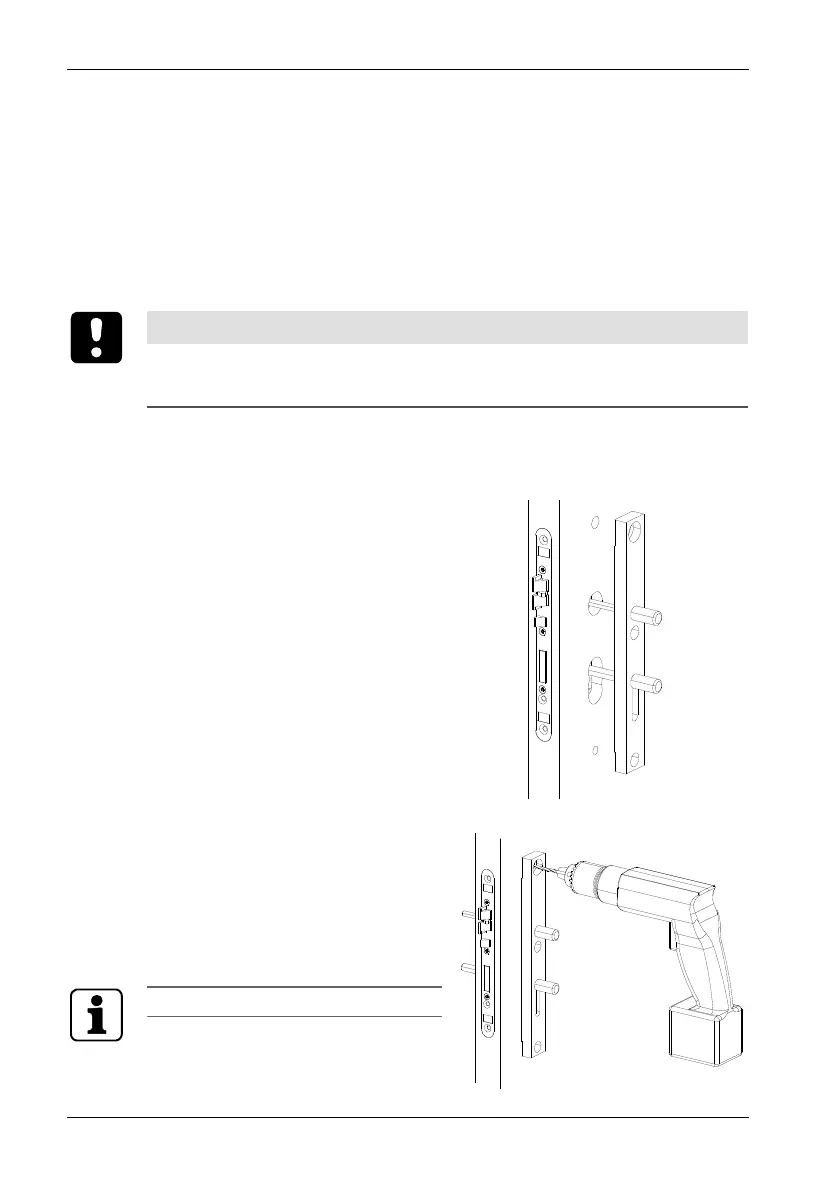
4.2 Drilling the fastening holes with the drill jig
AT TENTION
A lock that is already in place can be damaged.
To avoid damage, remove the lock before starting to drill.
Preparing the door
1. Remove the existing furniture.
Positioning the drill jig
2. Position the drill jig with guide pin
for cylinder (without mount) on
the door from the outside.
3. Insert the appropriate pin for the
spindle through the lock hub.
4. Fasten the drill jig to the door with
c-clamps.
Drilling the fastening holes
5. Drill the upper fastening hole up
to the door lock with a 13mm drill
bit.
6. Also drill the lower fastening hole
up to the lock with a 9mm drill bit.
Never drill through a fitted door lock.

 Loading...