3.3 Distribution network
All regular electrical devices without special circuits gen-
erate harmonic currents into distribution network. High
rates of harmonic current may cause losses and distur-
bance to some equipment.
X3 Power Source 400 / 400 AU
This equipment complies with IEC 61000-3-12 provided
that the short-circuit power Ssc is greater than or equal to
4.7 MVA at the interface point between the user’s supply
and the public supply network. It is the responsibility
of the installer or user of the equipment to ensure, by
consultation with the distribution network operator
if necessary, that the equipment is connected only to
a supply with a short-circuit power Ssc greater than or
equal to 4.7 MVA.
X3 Power Source 500
This equipment complies with IEC 61000-3-12 provided
that the short-circuit power Ssc is greater than or equal to
5.2 MVA at the interface point between the user’s supply
and the public supply network. It is the responsibility
of the installer or user of the equipment to ensure, by
consultation with the distribution network operator
if necessary, that the equipment is connected only to
a supply with a short-circuit power Ssc greater than or
equal to 5.2 MVA.
3.4 Connecting cables
3.4.1 Mains connection
The X3 Power Source is connected to a 380 – 440 V three-
phase network. On the back side of the machine, there
is a mains cable that does not hava a plug. Before use,
check the mains cable and install a suitable mains plug.
If the cable does not comply with the local electrical
regulations, replace it with a compliant cable.
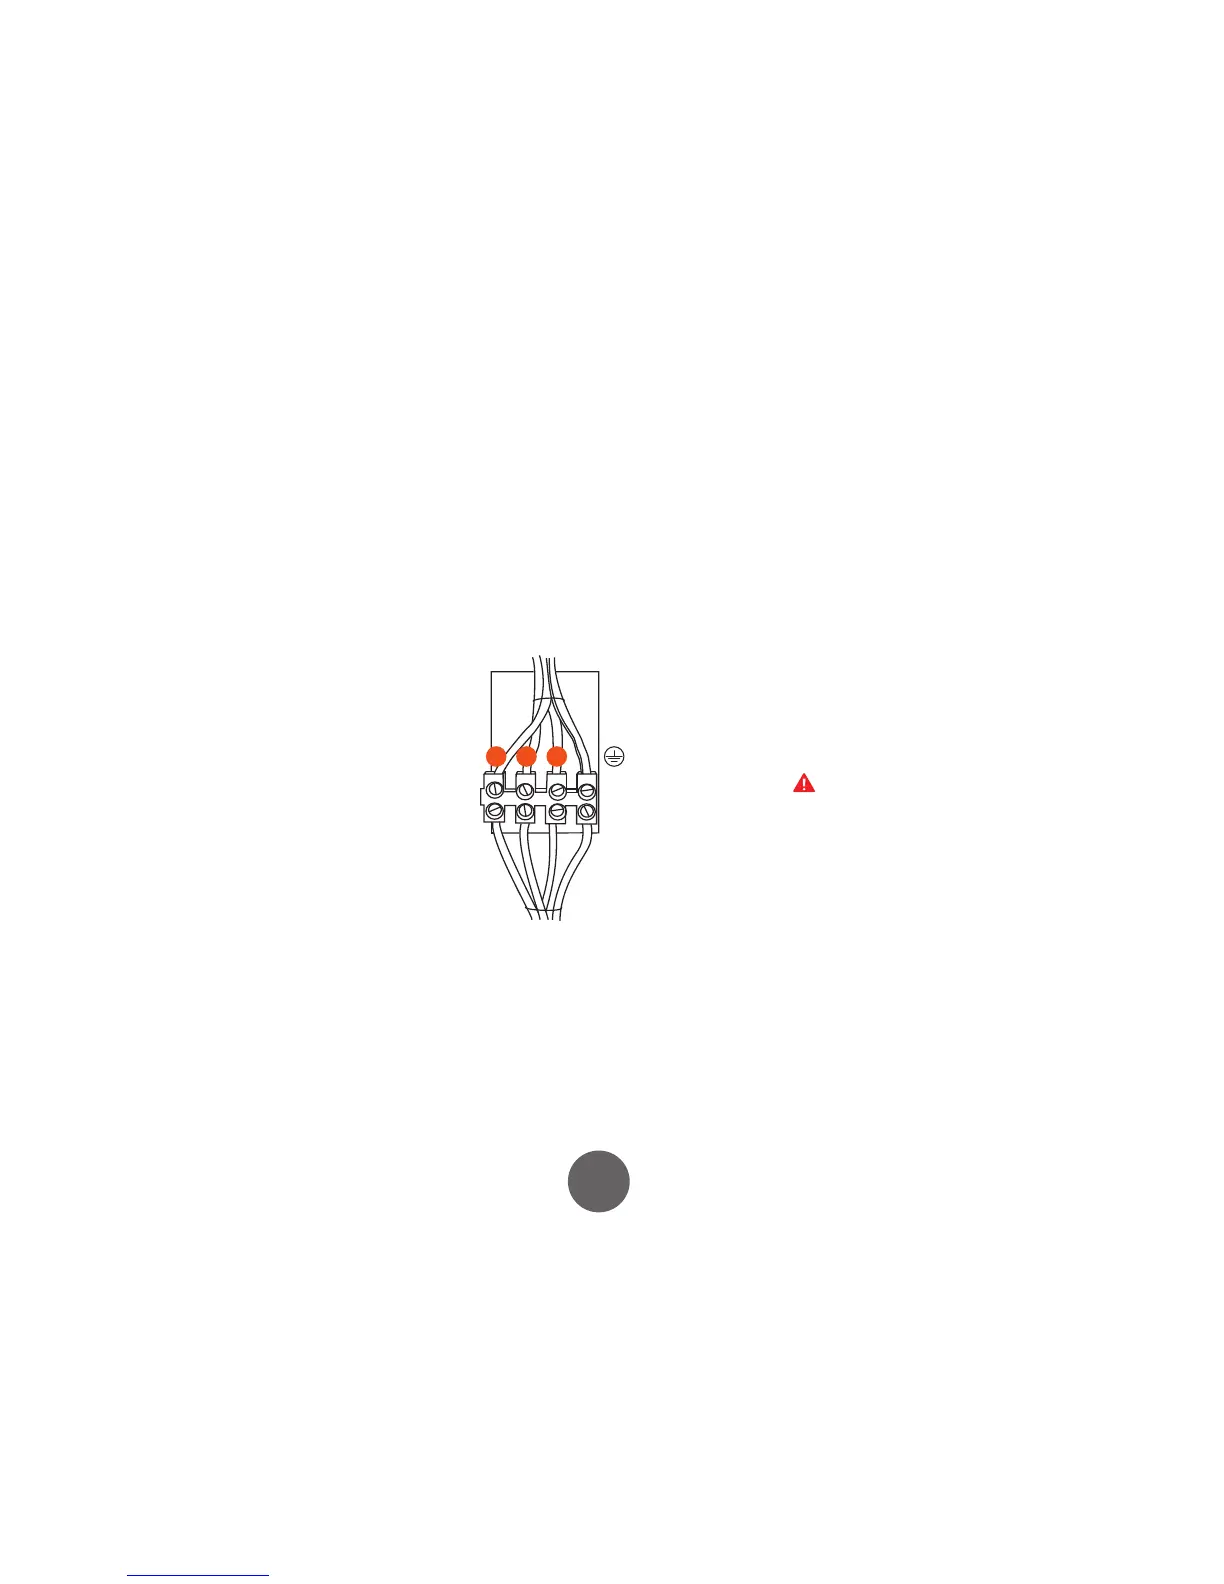
L1 L2 L3
Replacement of the mains cable:
1. Unscrew the mounting screws on the cover plate
of the machine, and remove the case by lifting it.
2. Disconnect the phase leads from connectors L1,
L2, and L3, and disconnect the protective earth
lead.
3. Pass the cable to the machine through the mains
cable inlet ring at the rear of the machine, and
secure the cable with a cable clamp.
4. Connect the cable’s phase leads to connectors L1,
L2, and L3.
5. Connect the yellow-green protective earth lead to
its connector
6. Screw the cover plate back in place.
The mains cable or wall plug may be installed or re-
placed only by an electrical contractor or installer author-
ised to perform such operations.

 Loading...