25
7.3.2 Multiple Orion’s on one date line (bus)
When after starting-up the Polyx, the line ‘Hit any key within 5s to run diagnostics...’
appears and a key is pressed within five seconds, the diagnostics program is started.
The main menu has the following appearance:
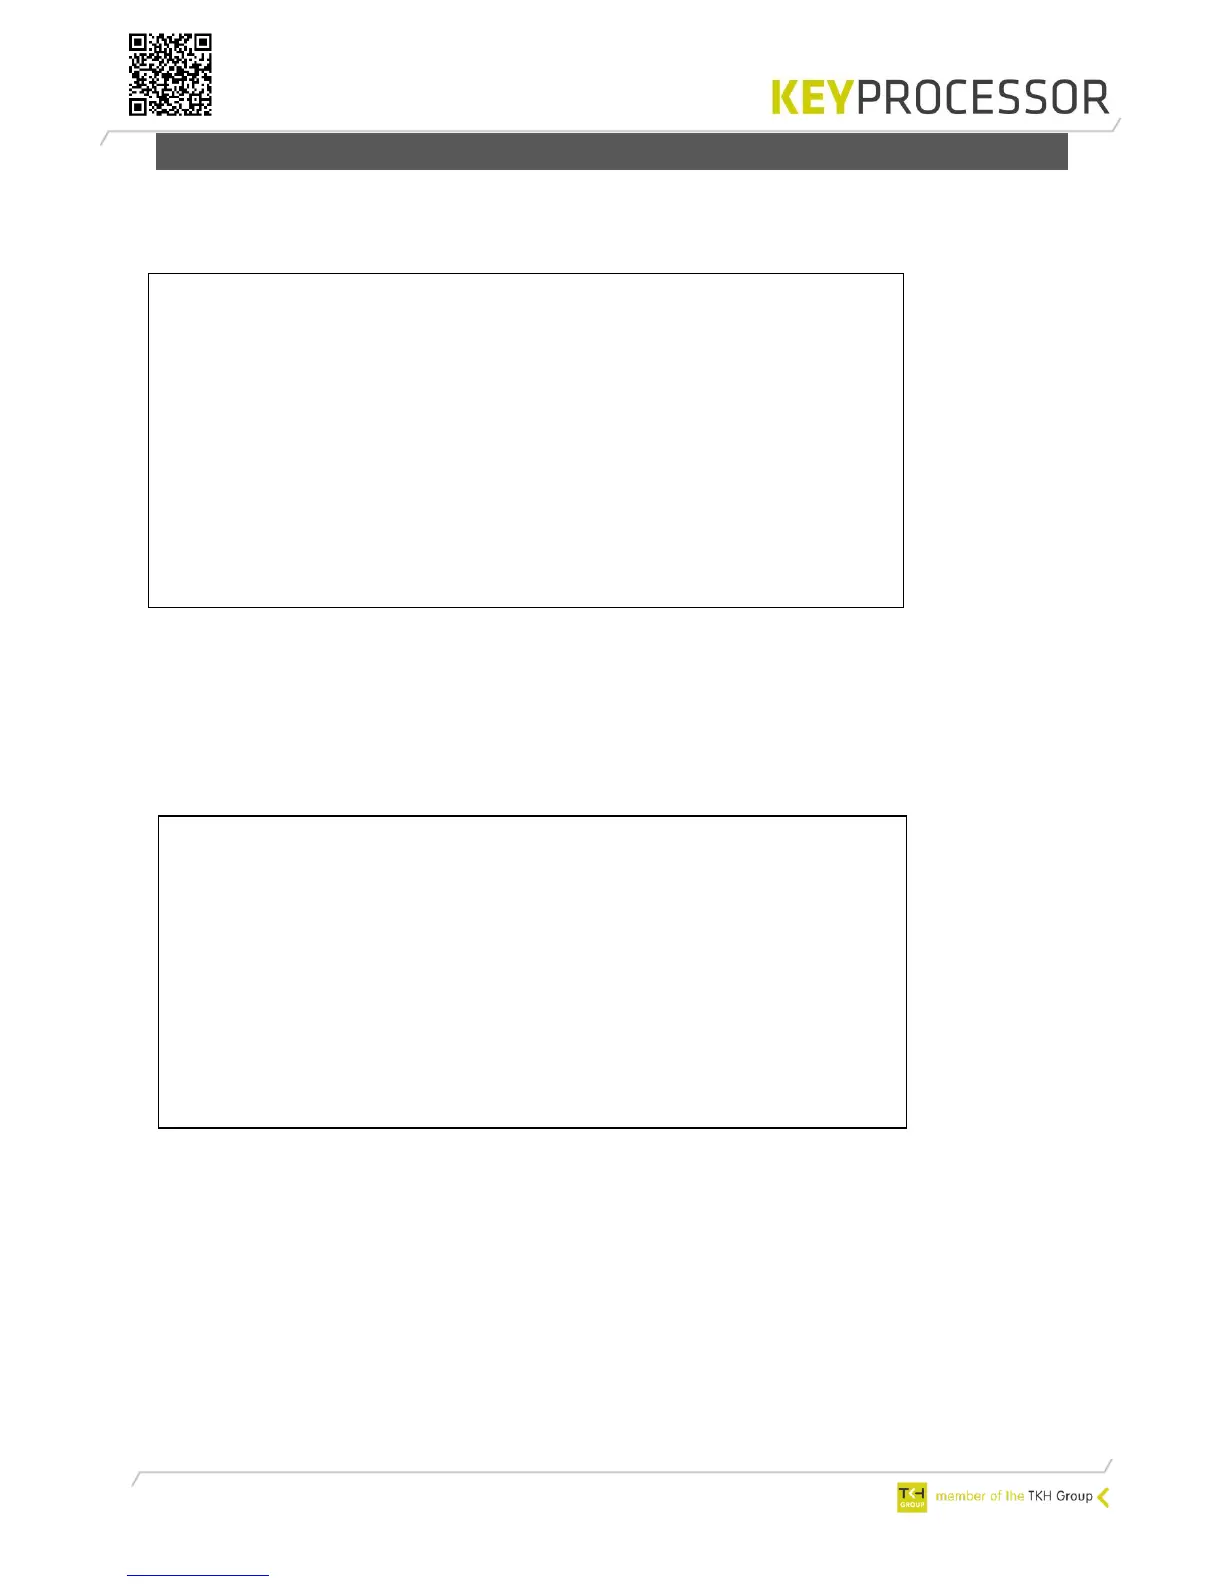
Polyx Diags version V3.0.5
1) Environment settings
2) Test onboard I/O
3) Test RS422 devices (loopback)
4) Test profi-device Communications
5) Test profi-device functionality
6) Test Orion device
7) Clean nodemgr
8) Test Watchdog
9) Clean system
c) Clean /etc/rc.d/* to /etc/save.d/*
v) Version
p) Polyx menu
q) Start application
r) Restart system
Enter menu option:
Screen 1: Main menu Polyx Diagnostics
Only options 6 is needed for the installer to test the Orion. (Polyx Diags version ≥V3.05 is
needed).
Optie 6: Orion device functionality
When option 6 is selected “Test Orion device”, select the communication port of the Polyx
PRT2 (1) - PRT3 (2) (on which port the Orion(s) are connected).
--- Device functionality test ---
Enter the interface to test 1..2) :
Scanning done, please select an Orion device:
1) Orion snr: 140025, V1.0.20
2) Orion snr: 140026, V1.0.20
3) Orion snr: 140028, V1.0.20
4) Orion snr: 140040, V1.0.20
5) Orion snr: 140042, V1.0.20
6) Orion snr: 140043, V1.0.20
7) Orion snr: 140045, V1.0.20
8) Orion snr: 140046, V1.0.20
Enter the device to id to test 1..8) : 1
Screen 2: Device functionality test
In the screen above PRT2 (1) has been chosen. The connected Orions will be detected
automatically. The serial numbers of the Orions will be displayed.
By making a choice 1-8 (in our example 1, with serial number 140025) the following screen
appears and the specific Orion can be tested.