Do you have a question about the Keysight DCA-X Series and is the answer not in the manual?
Details the integrated PC, its OS, and rear-panel connectors.
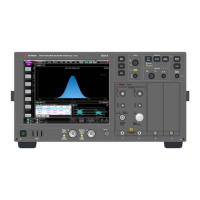
Describes the controls and ports on the instrument's front panel.
Details the ports and connectors located on the instrument's rear panel.
Explains the types of input modules compatible with the N1000A mainframe.
Provides essential guidance on maintaining and protecting instrument connectors.
Offers instructions for safely cleaning the N1000A instrument's exterior.
Lists optional accessories and adapters available for use with the N1000A.
Covers critical safety precautions, installation categories, and warnings.
Instructions for checking the instrument and accessories upon arrival for damage and completeness.
Guidelines for setting up an ESD-safe environment for handling sensitive electronic components.
Recommendations for placing the instrument to ensure proper airflow and suitable operating environment.
Procedures for inserting electrical or optical input modules into the N1000A mainframe.
Instructions for connecting optional USB keyboard and mouse to the N1000A.
Steps for safely connecting the instrument to a power source using the provided power cord.
Guide on how to power on the N1000A instrument and initial boot-up process.
Steps to set up a Local Area Network connection for remote control and file sharing.
Information on how to install optional software licenses using a provided certificate.
Instructions for connecting a printer to the N1000A via LAN or USB ports.
Guidance on connecting an external monitor to the N1000A using VGA or Display Port.
Procedures for performing module calibration to optimize measurement accuracy and compensate for environmental factors.
Directions on accessing help systems for instrument usage, programming, and specifications.
Step-by-step instructions for safely removing the instrument's internal removable hard drive.
Procedures for clearing sensitive data, including calibration data, from the instrument's memory.
Defines various safety and compliance symbols found on the N1000A instrument.
Lists compliance details for safety, EMC standards, and Canadian requirements.
Detailed guide on how to package and return the instrument for service or repair, including required information.
| Measurement Modes | Eye diagram, jitter |
|---|---|
| Connectivity | LAN, USB, GPIB |
| TDR/TDT | Yes |
| Jitter Analysis | Yes |
| Input Impedance | 50 Ω |
| Bandwidth | Up to >70 GHz (electrical), >70 GHz (optical) |


