IV. Details of operations
After the software installation and device connection are complete, we could sample the signal
and analyze it. In this chapter we will see how to use the logic analyzer step by step. Some of these
steps need to be configured only once, and in future operations we could just skip them.
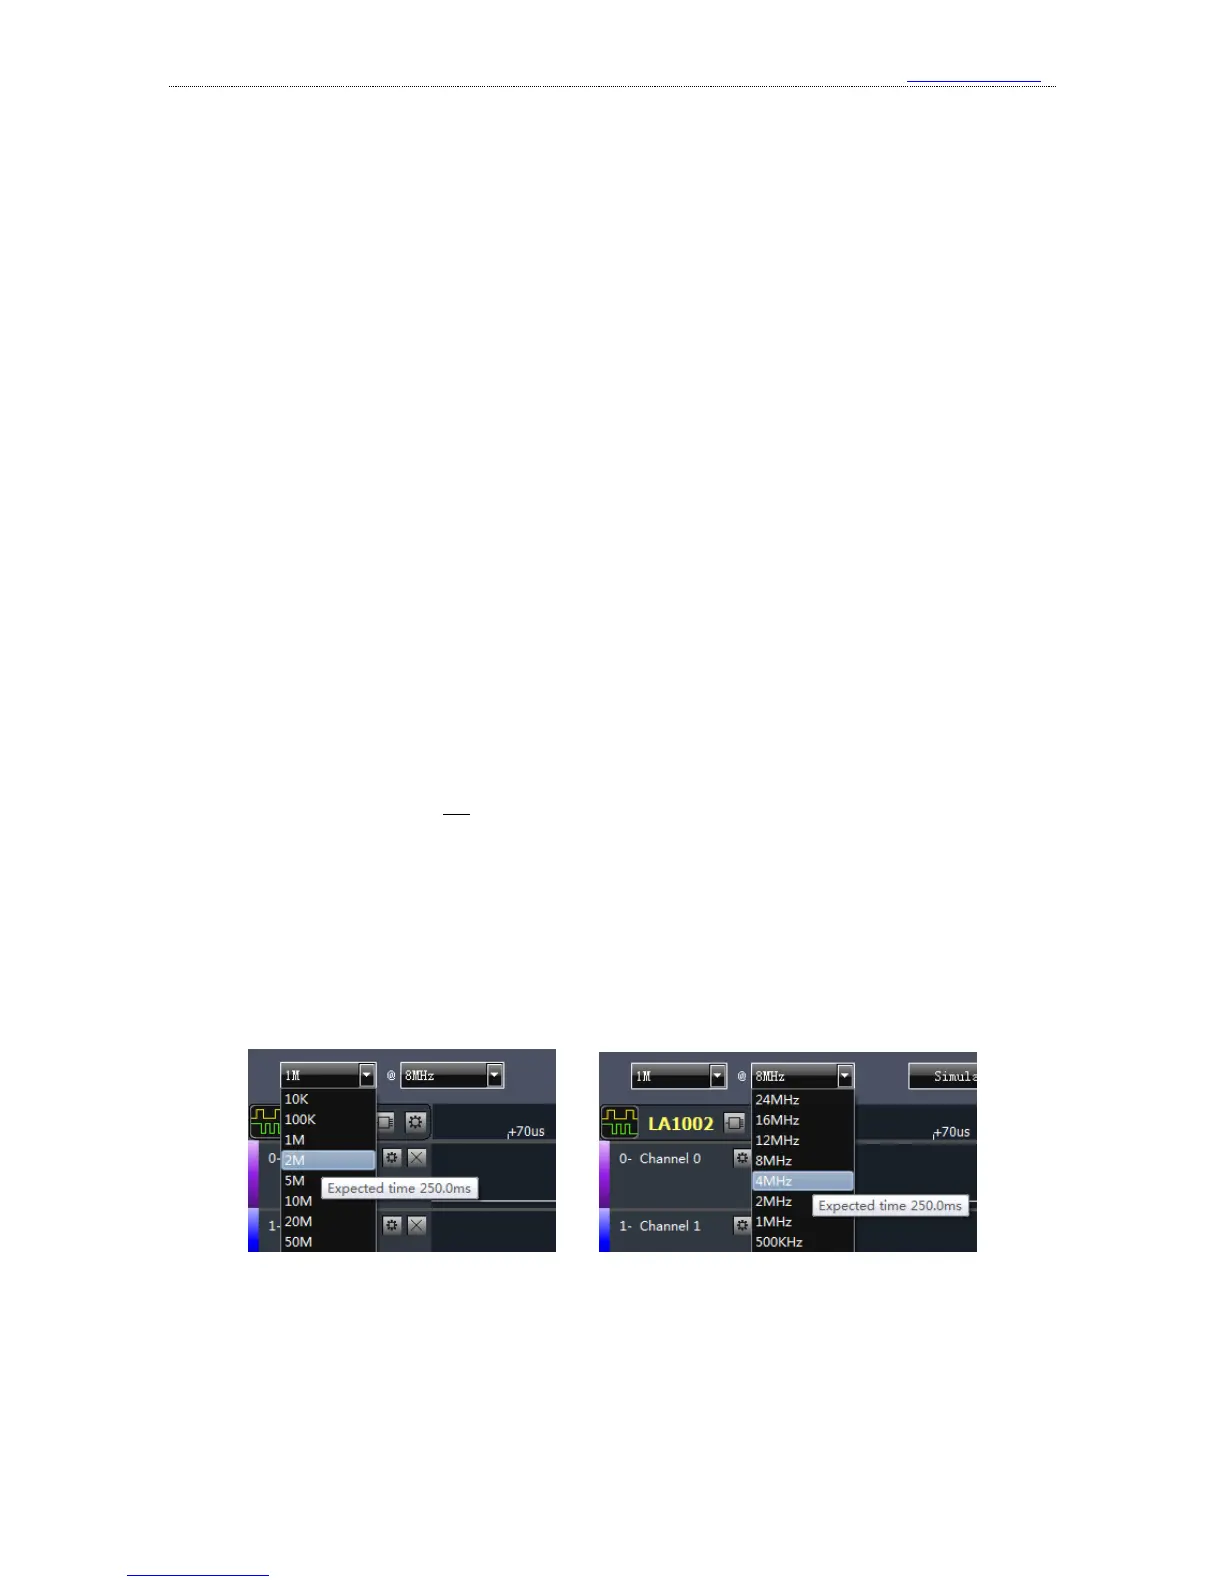
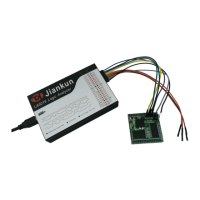
1、 Sampling depth and sampling rate settings
Sampling depth: the number of sample points that is collected in one sampling process. It
defines how much data the device could sample. The bigger the depth is, the more data the device
could sample for one time.
Sampling rate: also called sampling speed. This is the frequency the device samples, and it
equals the number of sample points per second. It defines the time accuracy of the sample result.
The higher the sampling rate is, the higher the time accuracy is. The time one sample point takes
equals “1 / Sampling rate”, that is also one sampling period.
The time one sampling process last equals “sampling depth÷sampling rate”. Before sampling,
you should first evaluate the signal under test, including the maximum frequency, the sampling
time, then we could select the sampling rate from the maximum frequency. To do this, the rule we
should follow is “Sampling rate must be 5 times more than the maximum frequency of the tested
signal, but 10 times would be better”. The higher the sampling rate is, the time accuracy is higher.
But the sampling rate should not be too high, as in the same sampling depth, the higher sampling
rate would result in the shorter sampling time. So when we think about the sampling time needed,
the sampling rate should be a little more than minimal requirements.
The first combo box in the left side of Kingst VIS software toolbar is sampling depth, and
second one is sampling rate. When we move the mouse on the dropdown options, the software will
calculate the estimated sampling time, and shows it in the position of the mouse as a tool tip. On
the other hand, when we deal with the sampling rate, we will get the same thing.
2、 Trigger condition settings
If we have set the sampling depth to 1M and the sampling rate to 8M, we could sample the
data for 125ms. In the default settings with no trigger set, after we press the “start” button, the logic
analyzer would begin sampling immediately, and it would stop automatically in 125ms. The
waveform of signals under test would display in PC screen. But in real environment, the signal may