it has got the sample points (sampling depth) required. It would upload the data to the computer.
The software would restore the waveform and maybe measures or analyzes the data later.
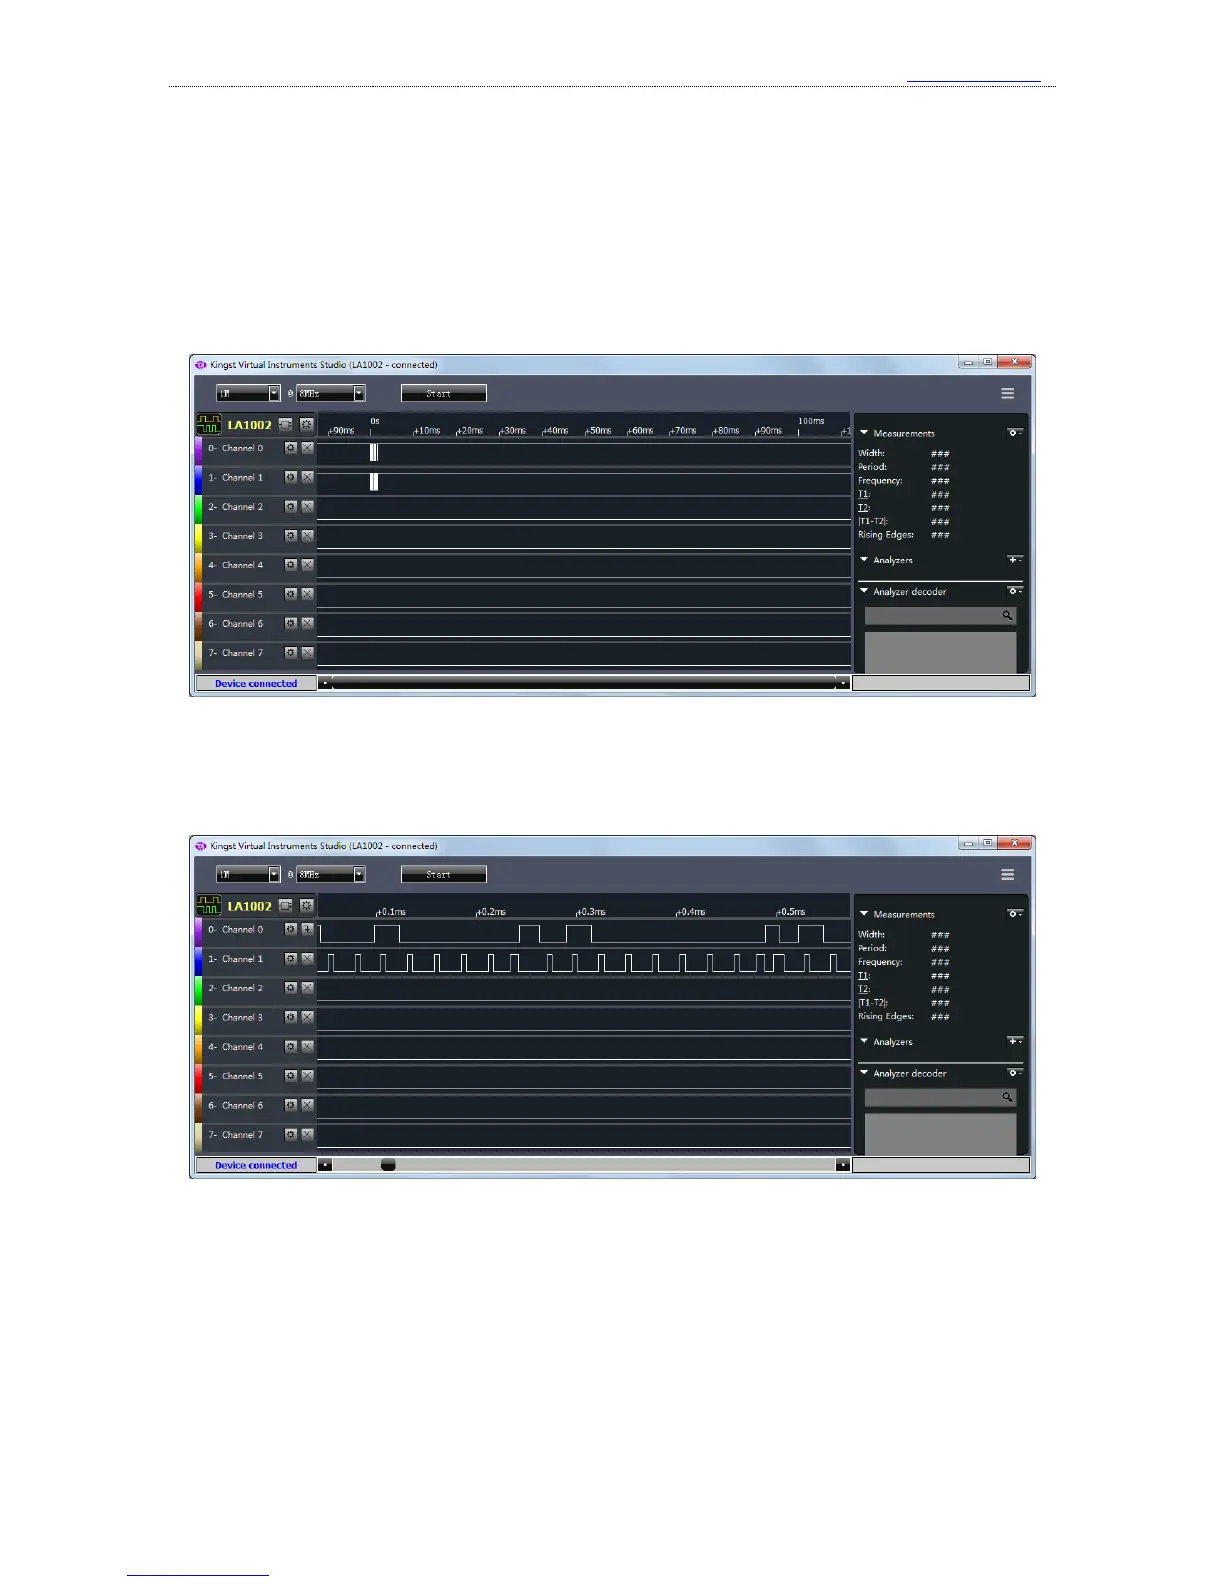
4、 Waveform check and operations
After the sampling process is complete, the waveform would be displayed in the screen. We
will continue this topic with an I2C communication example, and this example is based on KST-51
development board.
From this figure, we can see the coordinate values of the time axis are too large, and the
effective waveform is within a very short period. You can click the left button of the mouse to
zoom out the waveform; while the right button would zoom it in. And you can get these done with
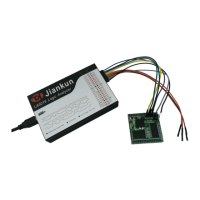
the mouse wheel too. After the waveform is zoomed up, you could see:
The waveform window supports several mouse operations:
①. press the right button: zoom out the waveform
②. press the left button: zoom in the waveform
③. wheel up: zoom out the waveform
④. wheel down: zoom in the waveform
⑤. dragging with left button pressed: move the waveform to the left or right
⑥. press the button left side of the channel: jump to previous edge of signal from this channel
⑦. press the button left side of the channel: jump to previous edge of signal from this channel