Issue: 08/2012
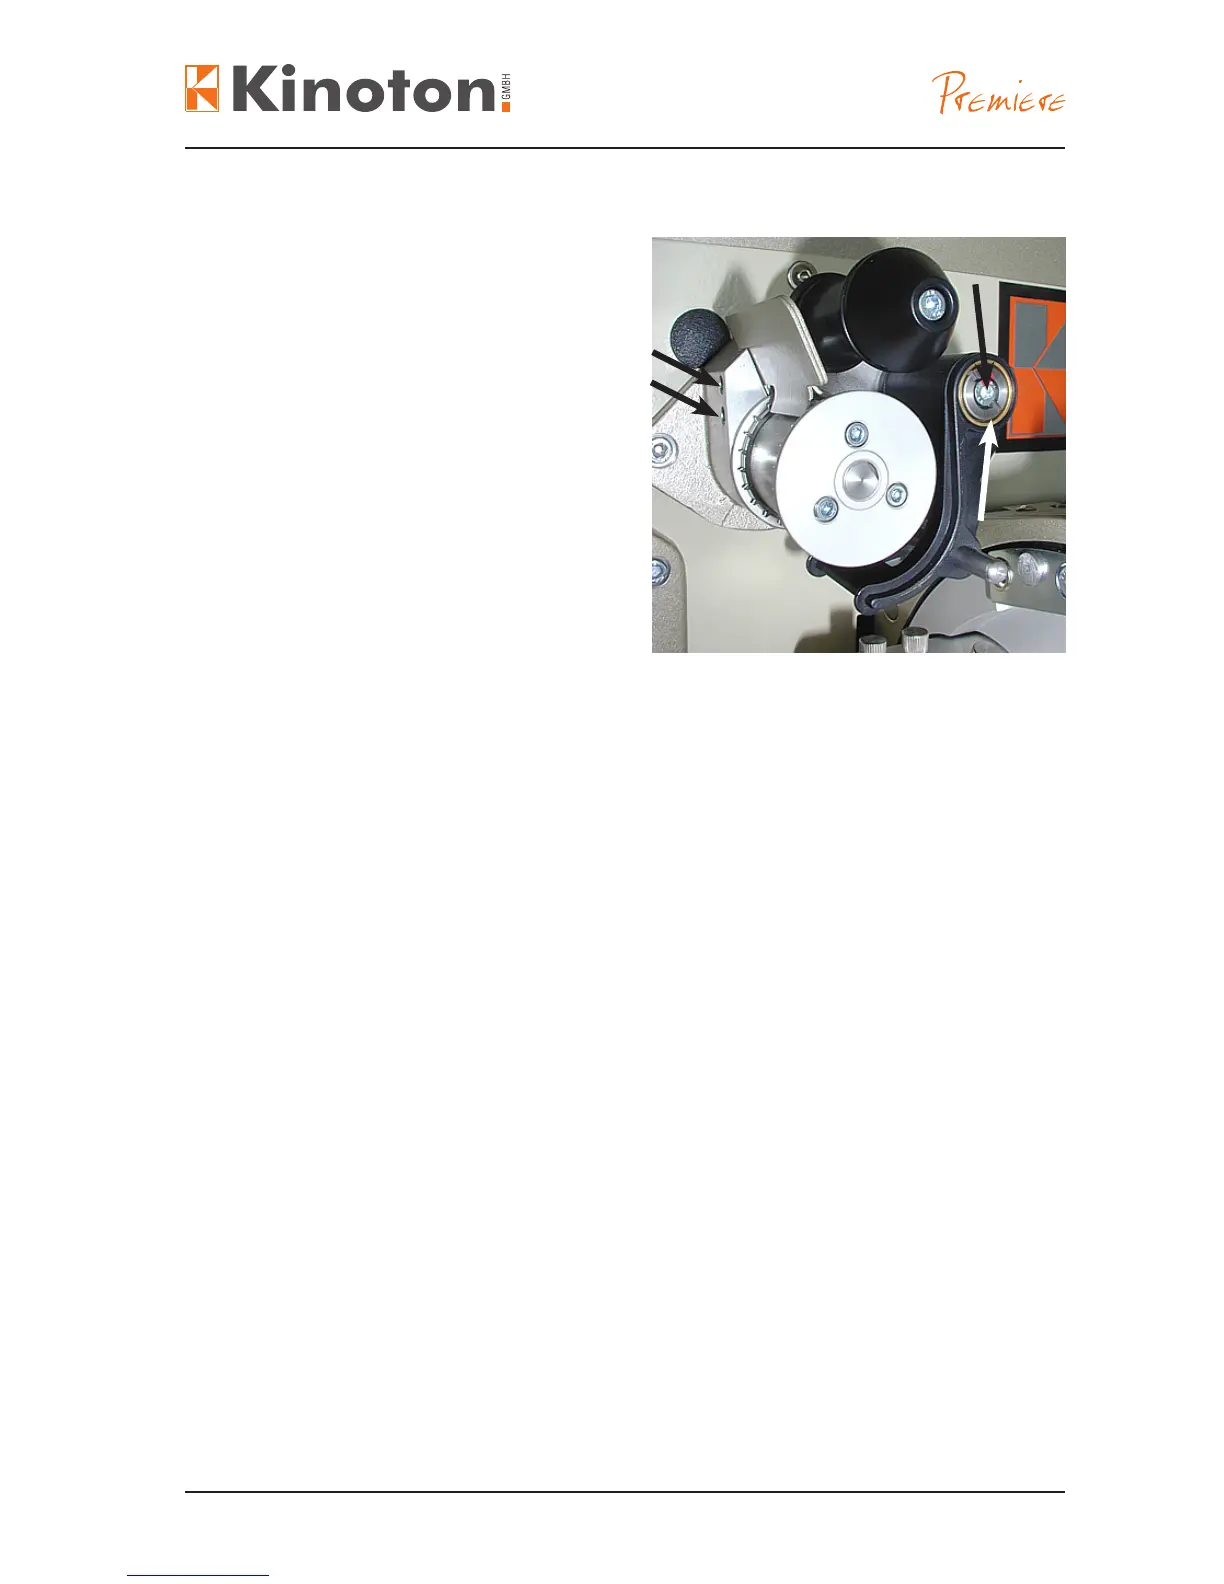
• Loosen the locking nut (black arrow)
and the adjusting nut (white arrow) of
the pad shoe with the special tool –
the spring will relax.
• Pull the pad shoe from its shaft.
• Loosen the lm stripper setscrews
(two black arrows) and remove the lm
stripper.
• Turn the sprocket locking screw (on
sprocket surface) anticlockwise ve to
six turns to loosen the sprocket.
• Pull the sprocket from its shaft.
X
If the teeth of sprocket are worn on one
side only, you can turn it and use the
other side (not with combined sprockets). Otherwise you must replace the sprocket.
• Install the sprocket onto the shaft with a slight counter-pressure on the belt wheel in
the projector.
• Tighten the locking screw on the sprocket again.
X
The sprocket end play should be between .0004” (0.01 mm) and .001” (0.03 mm).
• Put on the lm stripper again and fasten the 2 stripper setscrews in a way that it does
not touch the sprocket surface.
• Grease the pad shoe shaft with Cardan oil and then put the pad shoe onto the shaft.
• Place the torsion spring in the hole of spring cage and place the whole assembly in
pad shoe again.
X
Be sure that spring end is placed exactly in hole of pad shoe.
Repair and Adjustments