Issue: 06/2011
3
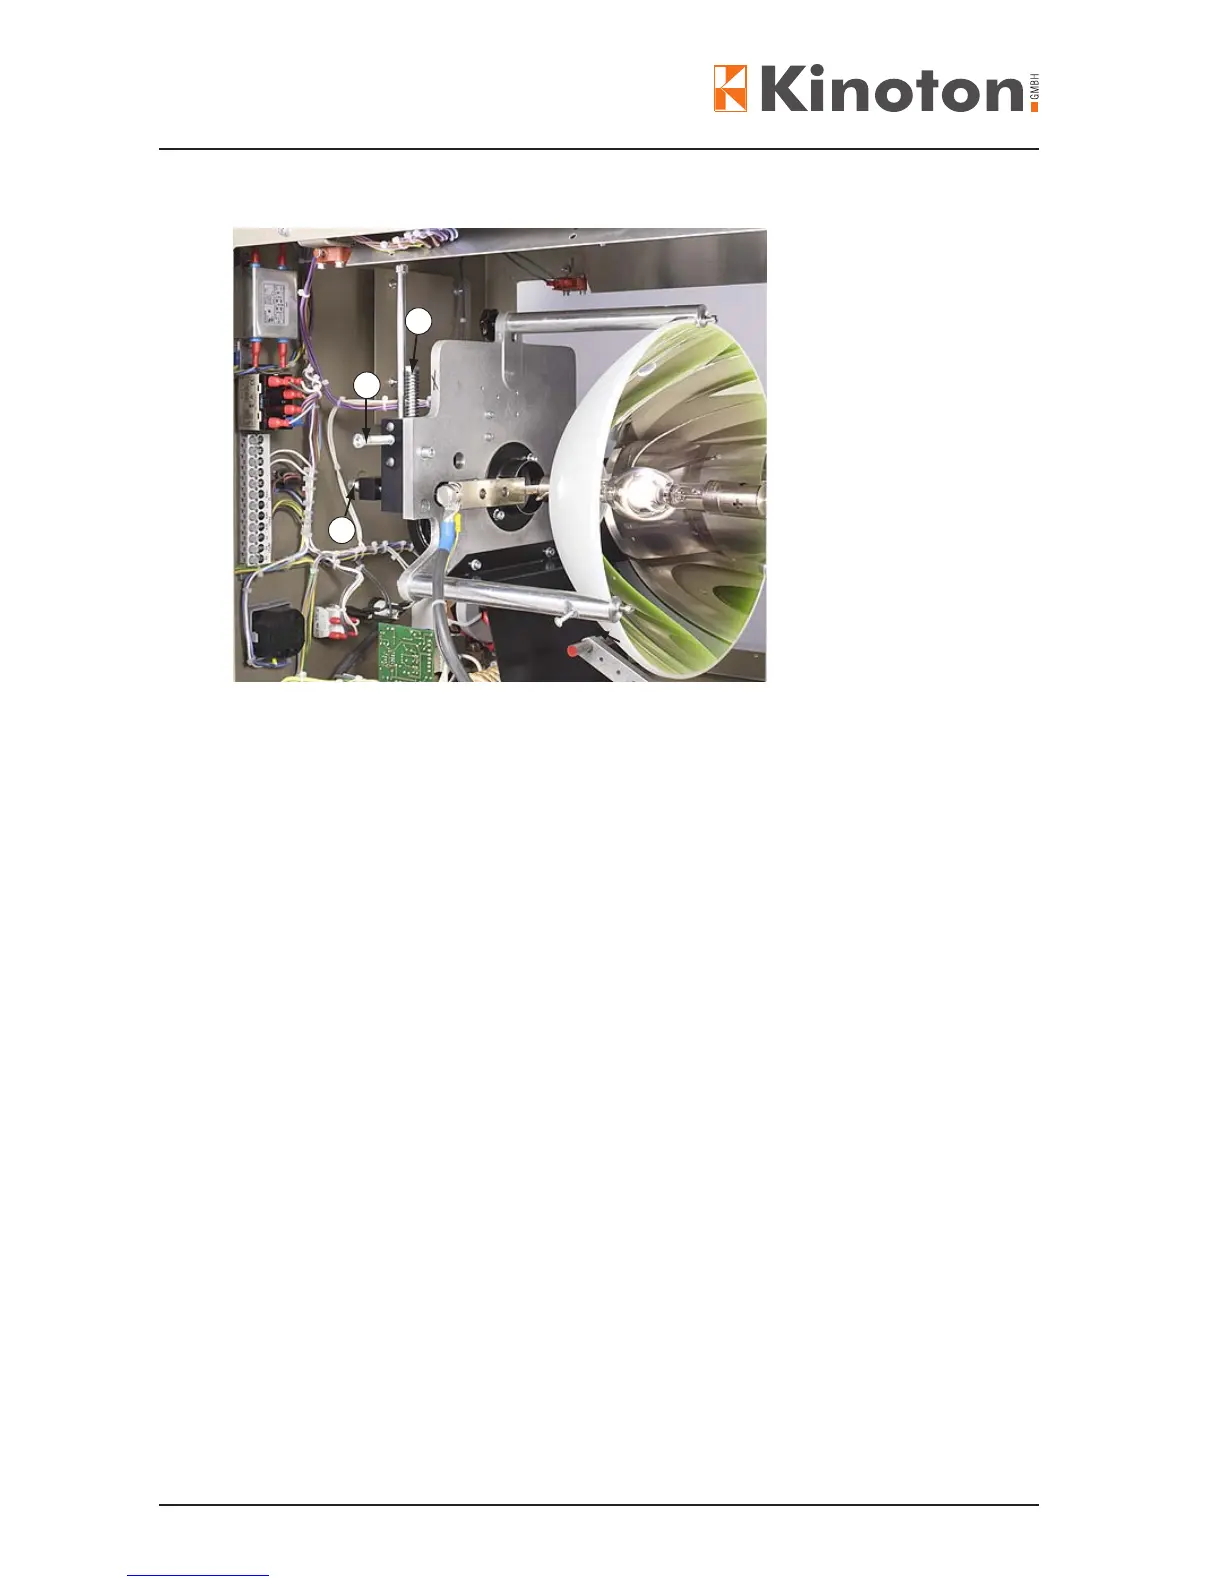
2
1
Vertical adjustment
Á Horizontal adjustment
 Axial adjustment
The xenon bulb’s position can be adjusted relatively to the mirror in three axes
(horizontal, vertical and axial).
• Insert the CS lens.
• Start the projector and select the CS format. Immediately check the intensity of
currents, if necessary adjust, see next chapter.
• Using an Allen wrench on Â, the xenon lamp can be adjusted as much along the
optical axis until only a reduced round illuminated spot can be seen on the screen
(focal length adjustment).
• By turning the adjusting screws right – left (horizontally) Á and up – down (vertically)
you bring this light spot precisely into the middle of the screen.
• Turning the adjusting screw  (axial) you draw up the spot until the screen illumina-
tion is even. If necessary adjust the horizontal and vertical axis again.
• Switch off the projector and within the lamphouse.
• Open the lamphouse after a waiting period of at least 10 minutes.
• Adjust the bulb support to the anode base.
$The bulb support should barely touch the anode base - leave 1/10 mm space for the
expansion of the hot xenon bulb.
X
If there is no visible gap between the anode and the bulb support, but it is still possible
to slide a piece of paper between them, the bulb support is adjusted properly.