8
INSTALLATION
INSTALLATION
■
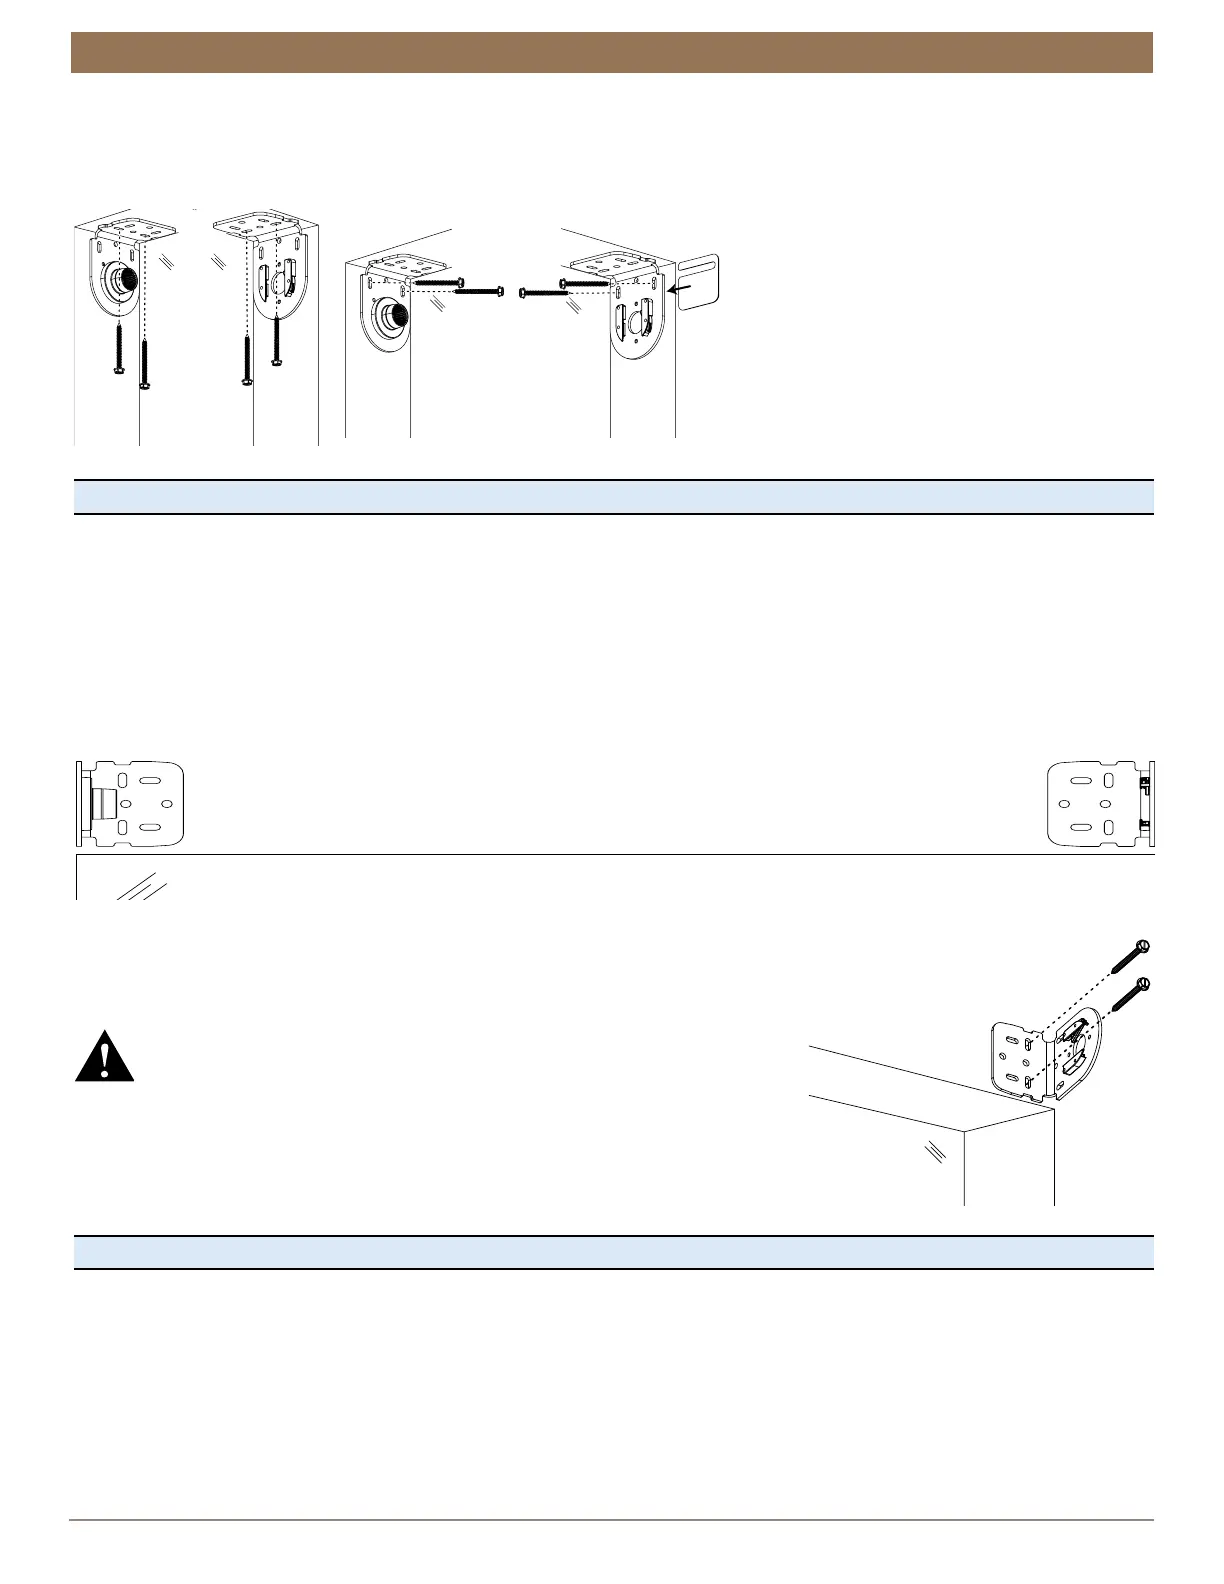
Attach the installation brackets using the screws provided.
➤
End Mount Shims (Optional). To ensure light gap is even on both sides, you
may need to shim the bracket. Do not tighten the screws fully. Orient the shim as shown. Slide the shim in between the
bracket and window casement. Tighten the screws fully.
Proceed to “STEP 3: Install the Shade” on page 18.
Outside Mount — Standard Shades
■
Determine the bracket locations.
➤
Center the ordered width -
1
⁄
8
” over the window at the desired height and mark its location.
■
Place the outside edge of each bracket on the previously made marks, then mark each of the screw holes.
➤
Standard M shades. A minimum 2
1
⁄
8
” flat vertical surface is required to mount the brackets.
➤
Standard L shades. A minimum 3” flat vertical surface is required to mount the brackets.
➤
The top of the installation brackets should be at the desired height of the shade.
■
Drill the screw holes using a
3
⁄
32
” drill bit for Standard M shades or
1
⁄
8
” for Standard L shades.
■
Use a level to check that the mounting surface is level. Shim the brackets if
necessary. Attach the installation brackets using the screws provided.
WARNING: Product is heavy. Mount into wood/metal studs or into concrete
with concrete anchors. Drywall anchors are not recommended.
Proceed to “STEP 3: Install the Shade” on page 18.
End Mount
Shim
(Optional)
Left
Bracket
Right
Bracket
Window Opening
 Loading...