54
Assembling (continued)
Chapter 1 Handling the Product
1
AssemblingConnecting Cables
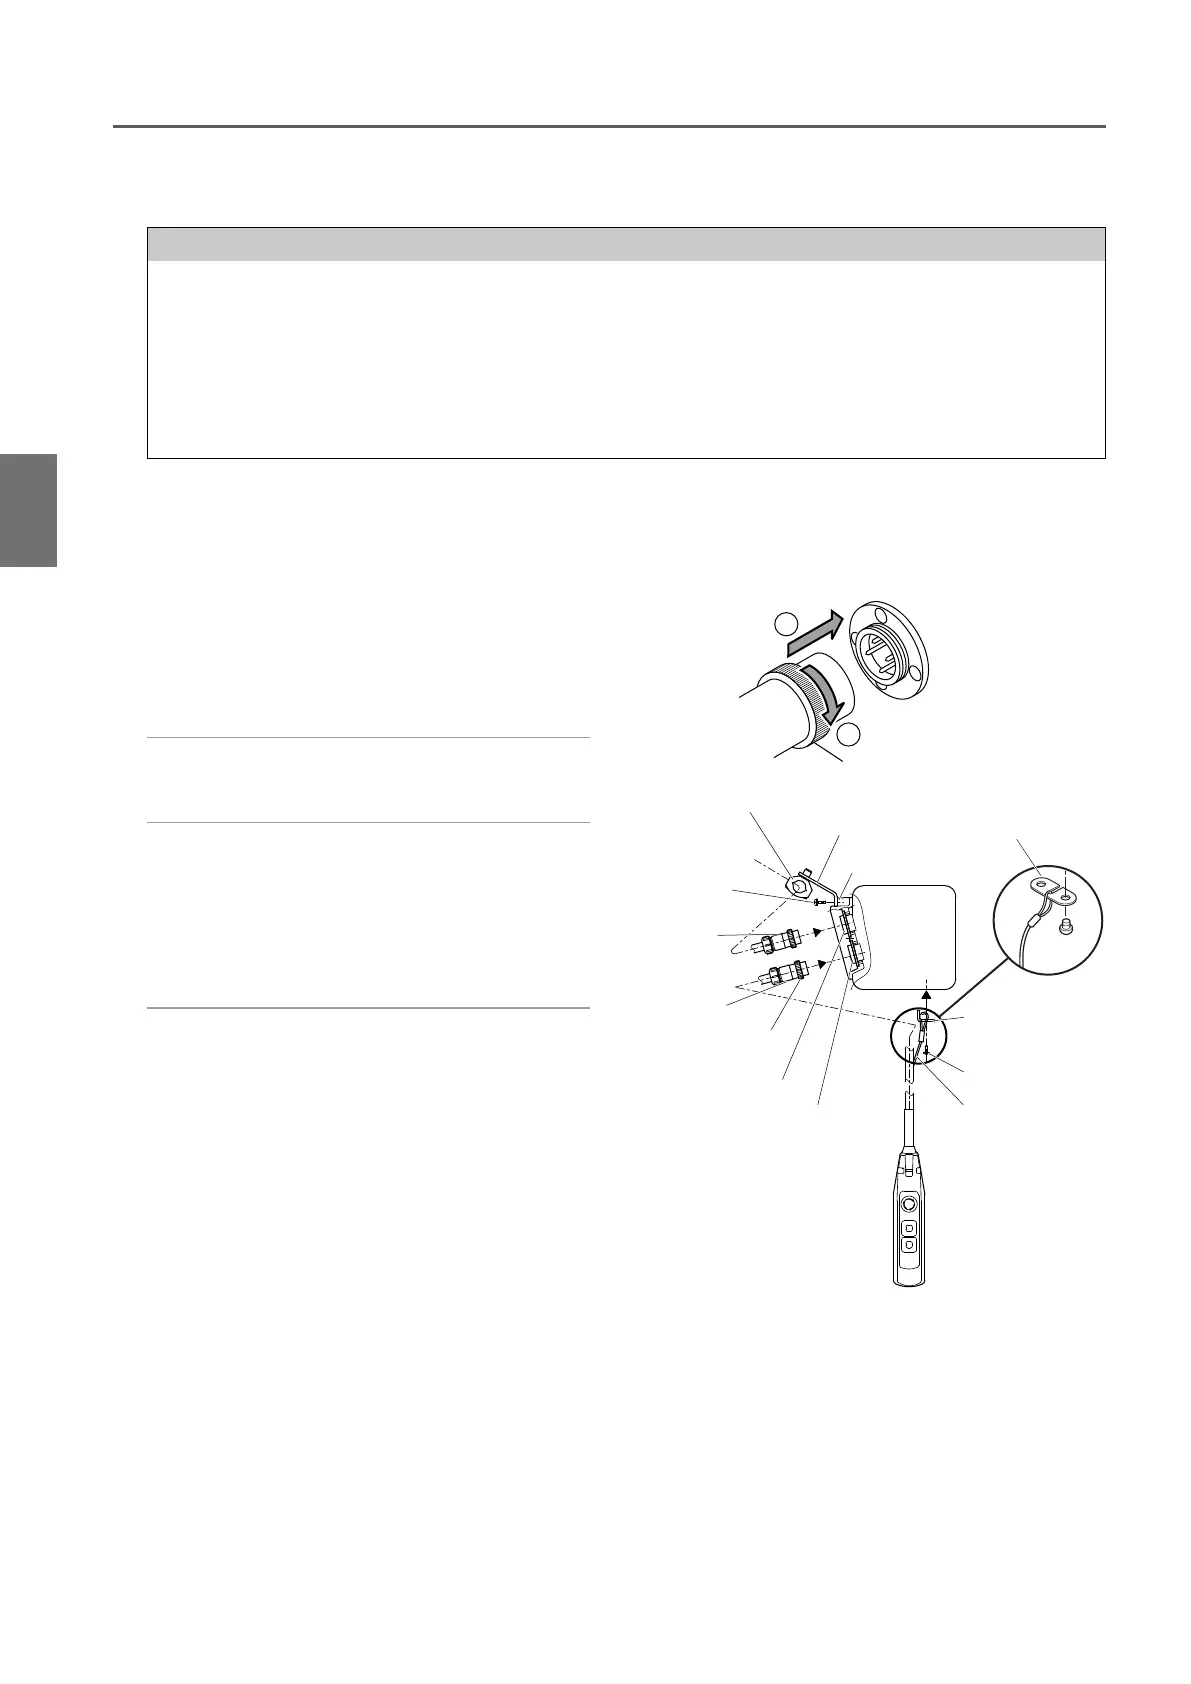
2) Fix the Power Cable using cable support
with a slack.
1) Insert the 4-pin plug of the Power Cable
to the socket (4P) and tighten the Lock
Ring securely.
●
Connecting the Power Cable
●
Connecting the Push Button Switch Cord
1) Insert the 8-pin connector plug of the
Push Button Cord to the connector
socket (8P) and tighten the Lock Ring
securely.
2) Pass the Cable Support L into the ring at
the end of the Protection Wire. Put the
Protection Wire in the notch of the Cable
Support L.
Then fix the Cable Support L to the body
size (at the bottom face of the Gear Case).
NOTE
• When clamping a connector, do not use tools. Be sure to clamp it by hand.
Excessive tightening of a connector may result in the damage or breakage f plastic thread part.
• To prevent wire breakage and unintentional removal of a connector, tie the protection wire attached to the Push
Button Switch Cord to the body size of the electric chain hoist or the trolley.
Be sure to tie the cord with the body size or the trolley to prevent the wire breakage and removal of connector when the cord is pulled
strongly.
• Be sure to turn off the power when carrying out the repair work of wire breakage or removal of the connector.
1
2
Cable holder
Cable holder arm
Socket frame
Connector
Plug (8P)
Connector
Socket (8P)
Cable Support L
Pan head screw
Protection wire
Lock Ring
Connector
Plug (4P)
Pan head
screw
Connector
Socket (4P)
Cable Support L
■
Connecting Cables
■
Hook suspended model (hoist only)
■
125 kg~5 t