36
RESIDUE CUTTING OPTIONS:
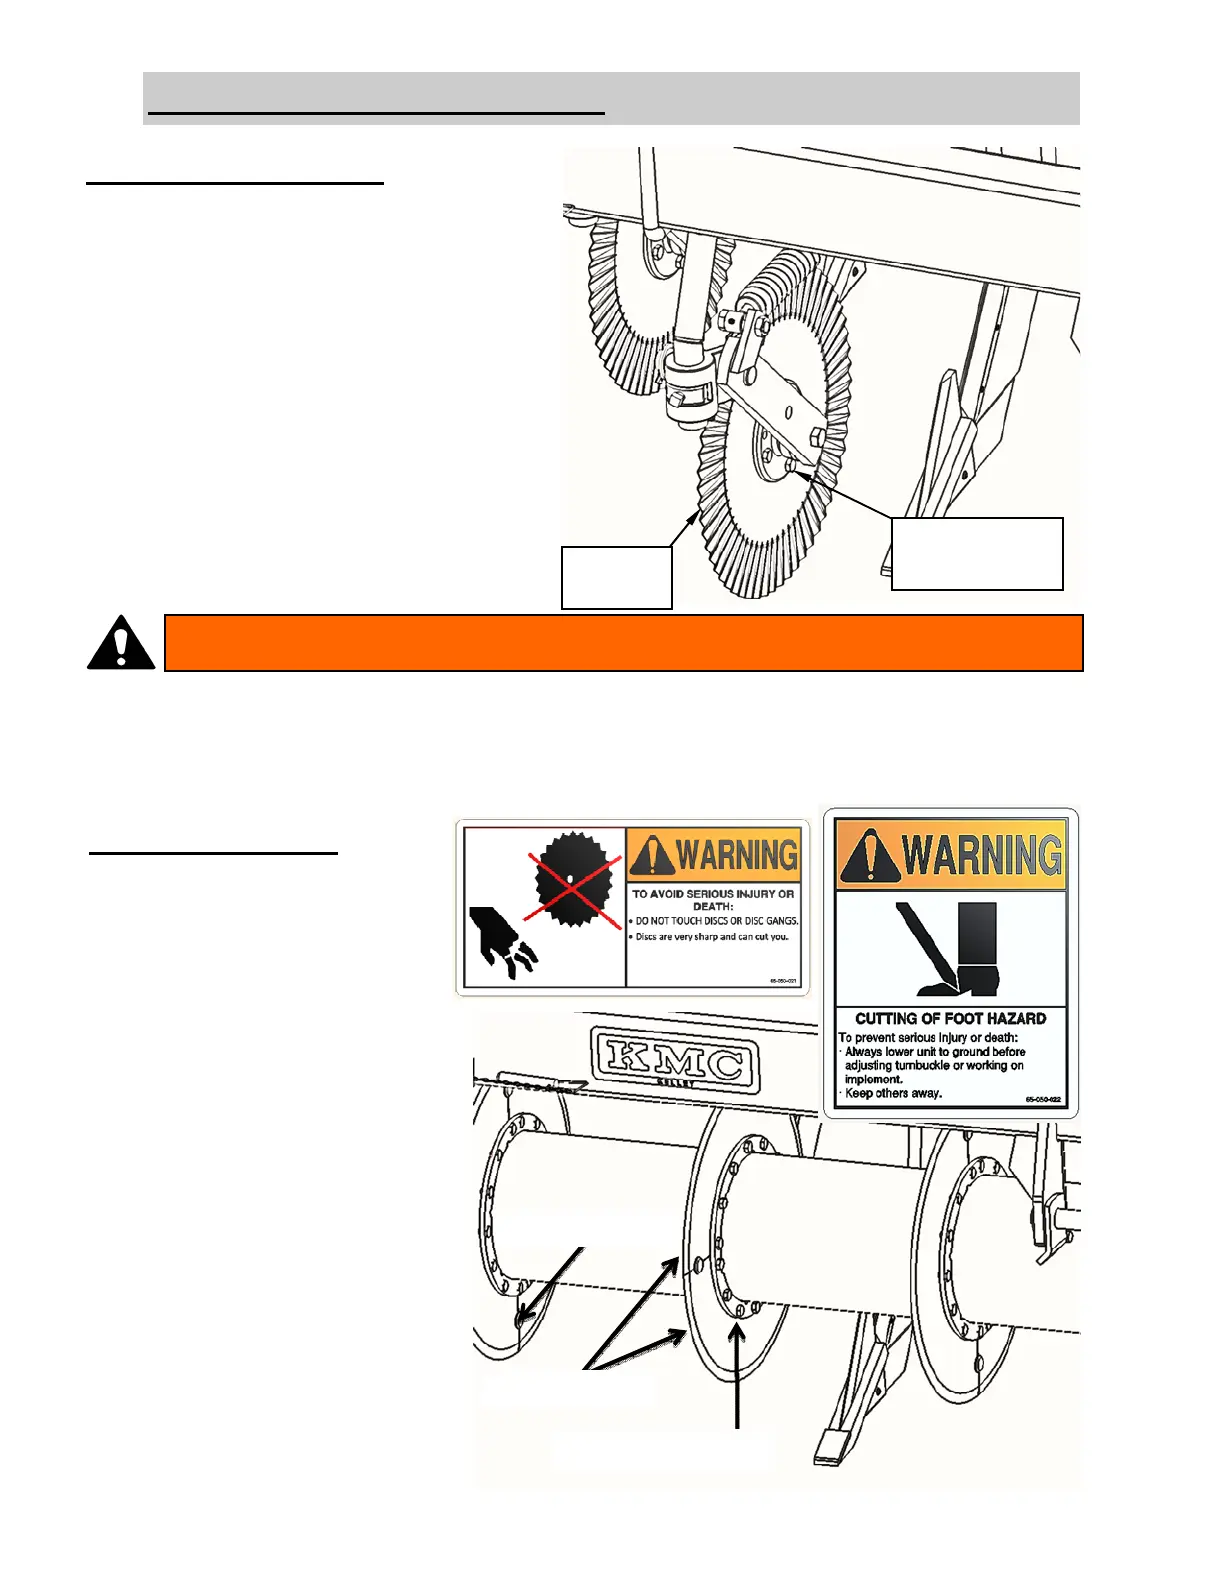
If equipped with Front Swivel Coulters on the
unit, the coulter arm assemblies will be pre-
mounted to the bar (verify pre-mount location
using the “Overhead Layout” portion of this
section) and it may be necessary to mount the
coulter blades to the coulter arm assemblies.
Install the coulter blades, as shown, using 1/2-
13 NC x 1-1/2” long capscrews, 1/2” lockwash-
ers and 1/2” hexnuts. (Refer to the “Bolt
Torque Chart” at the first of this section for
proper assembly torque).
Front Swivel Coulters:
CAPSCREWS,
LOCKWASHERS
& HEXNUT
COULTER
BLADE
Cover Crop Roller:
If equipped with Cover Crop Roller
on the unit, the roller assembly will
be pre-mounted to the bar (verify
pre-mount location using the
“Overhead Layout” portion of this
section) and it may be necessary to
mount the two piece coulter blades
to the roller assembly. Install the
coulter blades, as shown, using 1/2-
13 NC x 1” long capscrews and 1/2-
13” jam locknuts. (Torque jam
locknuts to 50 ft lbs for proper
assembly torque). Make sure the
Capture Devices are installed
between Coulter Blade halves
before the other hardware is in-
stalled. Fully close the gap between
the blade pairs before fully tighten-
ing the hardware.
Coulter Blades
Capscrew & Locknut
Capture Device
CARE SHOULD BE TAKEN WHEN WORKING AROUND COULTER
BLADES. FAILURE TO DO SO COULD RESULT IN DEATH OR SERIOUS
INJURY DUE TO THE BLADE SHARP EDGES.
WARNING
 Loading...