72
Assembly/Installation
1. Position the ice storage bin maintaining the minimum clearances specified in the ice maker
instructions.
2. Level the bin with adjusters on its legs, or by shimming if the bin is to be sealed to the floor. If
there are gaps between the bin and the floor greater than 1/8 inch, install a cove molding
around the bin bottom. Seal the bin (and molding) to the floor with NSF Certified RTV sealant
(Dow-Corning RTV 732 or equivalent).
3. Install gasket on top of bin if not already installed. Gasket material must be positioned so that
it extends to the outside edge of the perimeter of the ice crusher chassis when the ice crusher
is in place. To apply the gasket, peel away the white backing strip and press firmly in place.
4. Place the crusher on a flat surface. If the floor is a rough or marring surface place a large rag or
rubber mat on the floor to the left of the crusher and stand the crusher on its left side.
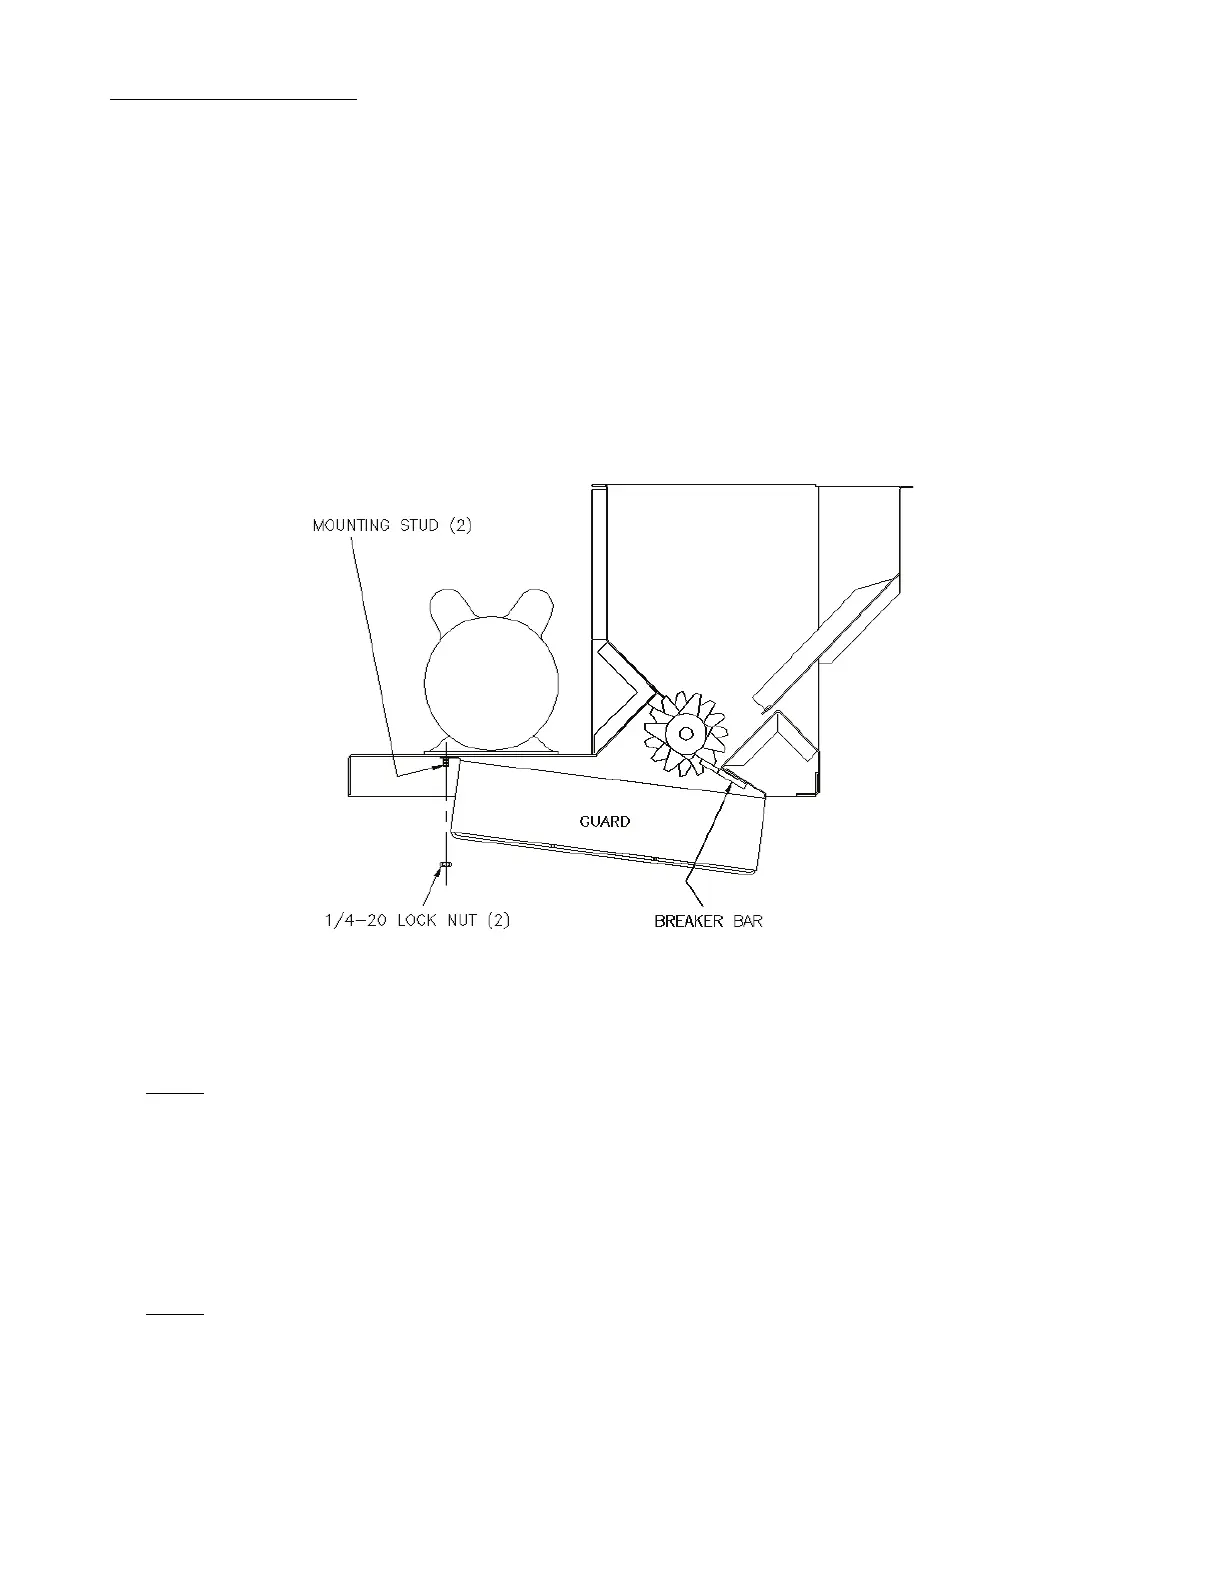
5. Position the bottom guard so that the right side flange is hung over the ice breaker bar.
6. Install the left side flange over the mounting studs and secure in place with the supplied 1/4-
20 lock nuts.
Note: Use care when positioning the ice crusher on the bin so that the guard is not damaged.
Be sure to check for internal bin components such as deflectors, dividers etc., which may
interfere with the guard during installation.
7. Carefully lift the crusher and place onto the bin. Remove the front cover and note the
alignment of the mounting holes in the chassis if mounting means are provided on the bin.
Follow the bin installation instructions for securing the crusher to the bin.
Note: The plastic selector knob must be removed before the front cover can be removed on
older machines.
8. Insert the straight thermostat holder tube into the rubber grommet located directly behind the
crusher motor. Route the crushed ice thermostat capillary tube through the straight thermostat
tube holder. Ensure that the capillary tube is slightly protruding from the bottom of the tube
holder.