bizhub 501/421/361
6. OTHERS
135
Field Service Ver.2.0 Mar. 2009
6.3 Disassembling/assembling procedure
Caution
• When disassembling or assembling the parts, be sure the power cord has been unplugged from
the power outlet.
6.3.1 Removing/reinstalling the rear cover /1
A. Procedure
1.
Remove the rear cover /4.
(See P.137)
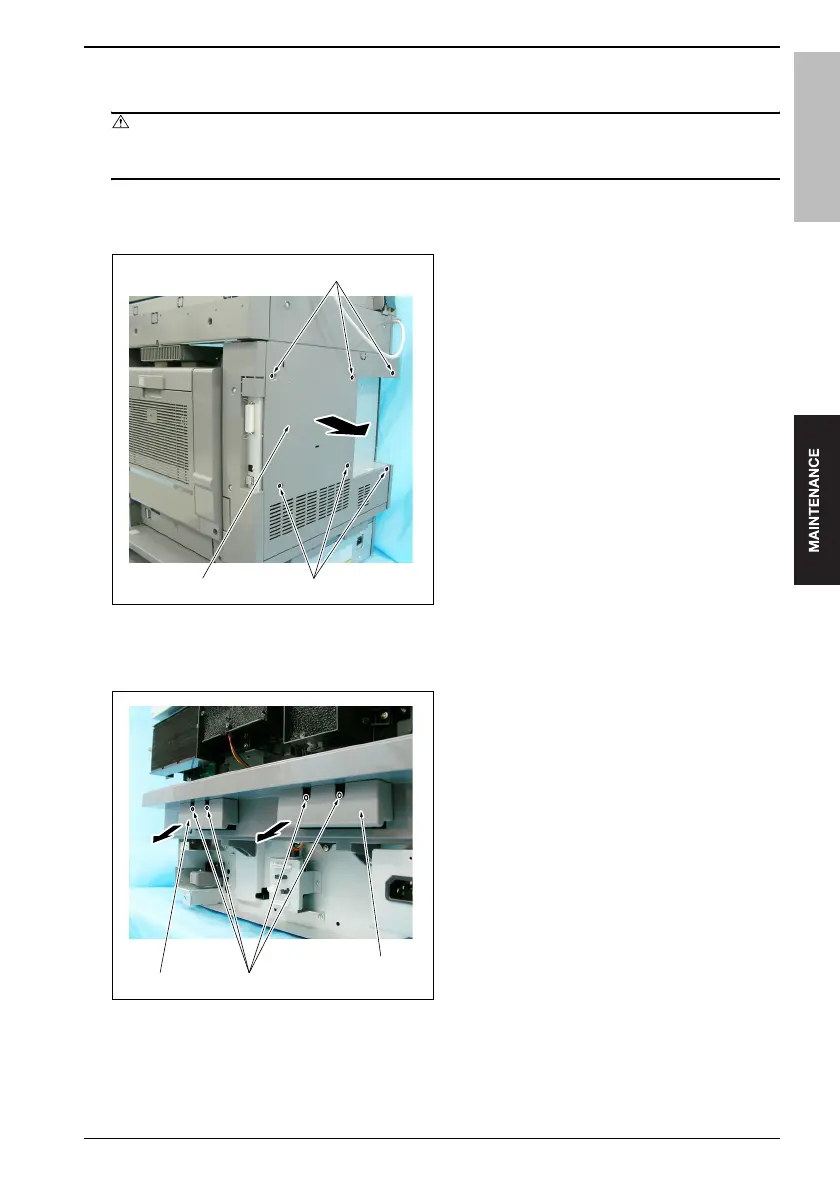
2.
Remove the 6 screws [1] and then remove the
rear cover /1 [2].
3.
Reinstall the above parts following the removal
steps in reverse.
6.3.2 Removing/reinstalling the rear cover /2
A. Procedure
1.
Remove the rear cover /4.
(See P.137)
2.
Remove the rear cover /1.
(See P.135)
3.
Remove the rear cover /3.
(See P.136)
4.
Remove the screws [1], 2 each, and then remove
the 2 handles [2].
[1]
50gaf2c049na
[1][2]
50gaf2c050na
[1][2]
[2]
 Loading...