Convenient functions for playback and recording Adjusting the volume
91
Adjusting the volume
You can use the following methods to adjust the volume of
imported data or of an already-recorded audio song.
If the volume of the imported data is too loud so that it
drowns out the performance of the KROSS, or if multi-track
recording has caused the volume to overload so that no more
can be overdubbed, it is helpful to adjust the volume by
using the following functions.
You can make the following adjustments.
• Set Play Level function: Temporarily lowers the
playback volume of audio songs.
Note: This will change the volume of all audio songs.
• Adjust Song Level function: Applies attenuation
processing to the audio song, creating a new song.
Tip: Use this function if you want to individually adjust
the volume of each audio song.
• Level Adjust: Use the Level Adjust setting during Import
or Export.
About the Set Play Level and Adjust Audio
Level functions
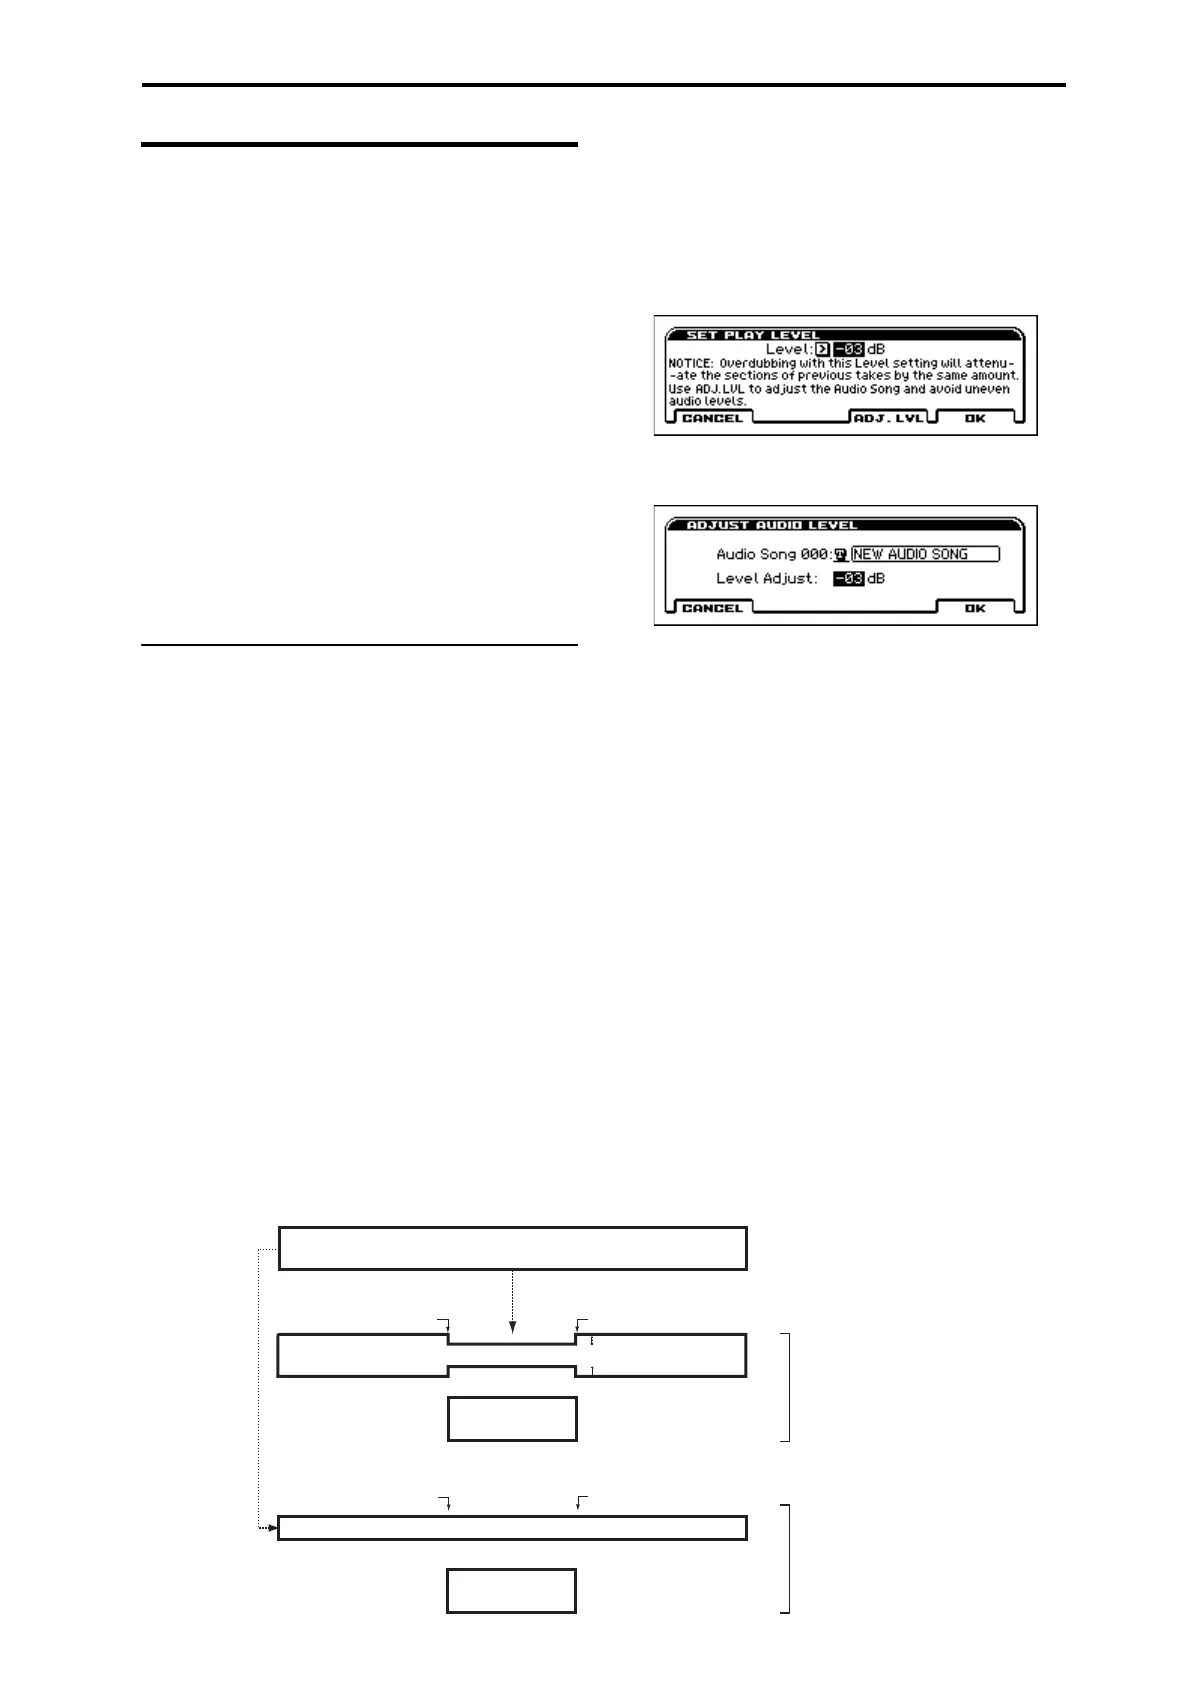
In the Set Play Level function dialog box, setting the Level
to anything other than 0 dB will cause the audio song to play
back at a volume that is lower by the level you specified.
This function is convenient when you want to adjust the
volume balance between the audio song and your keyboard
performance.
Note: The Set Play Level setting applies to all audio songs.
At this time, the following message will appear. Please note
this if you’re overdubbing with the audio song playback
level lowered.
NOTICE: Overdubbing with this Level setting will
attenuate the sections of previous takes by the same
amount. Use ADJ. LVL to adjust the Audio Song and
avoid uneven audio level.
With this Level setting, if you overdub a region of the song
while playing back the previous take, the volume of the
previous take will be lowered only for the recorded region.
To avoid this problem of lowered volume, use ADJ. LVL to
adjust the audio song level.
Select the Set Play Level function, and adjust the level as
follows.
1. Set the Level as desired.
Adjust the volume balance of the keyboard performance
or external input (e.g., guitar or vocal) that you will be
overdubbing next while the audio song plays back. For
example, set this to –3 dB.
2. Press the ADJ. LVL (PAGE+) button. The ADJUST
AUDIO LEVEL dialog box will appear.
3. Use Level Adjust to specify the level adjustment. The
Level value you specified in step 1 will automatically
be set as the default, so usually you can just press the
OK (MENU) button. (You can specify the song name
as you wish.)
You will return to the AUDIO RECORDER SETUP
screen. The audio song whose level you adjusted will
automatically be selected. At this time, Set Play Level
will be reset to 0 dB, so the volume balance you adjusted
in step 1 will be reproduced.
4. Overdub-record additional material.
(see the illustration below)
+
+
Previous take (drums & bass)
SET PLAY LEVEL: –3dB
Start overdub-recording Stop
Drums & bass
–3dB
Guitar solo
Stop
Drums & bass
Guitar solo
If you overdub-record the guitar solo with
SET PLAY LEVEL left at –3 dB. The volume
of the previous take (drums & bass) will be
3 dB lower for a portion of the recording,
causing an unnatural result.
If you overdub-record the guitar solo after
using ADJUST AUDIO LEVEL to lower the
volume of the previous take by 3 dB.
Unnatural volume changes will not occur
in the previous take (drums & bass).
Start overdub-recording
ADJUST AUDIO LEVEL: –3dB