VIA GO² – For Installer: Connecting VIA GO²
For Installer: Connecting VIA GO²
Always switch off the power to each device before connecting it to your VIA GO². After
connecting your VIA GO², connect its power and then switch on the power to each device.
If you wish to use a Kramer active optical pluggable HDMI cable with your VIA GO², contact
your local Kramer office to assist in purchasing the correct cable.
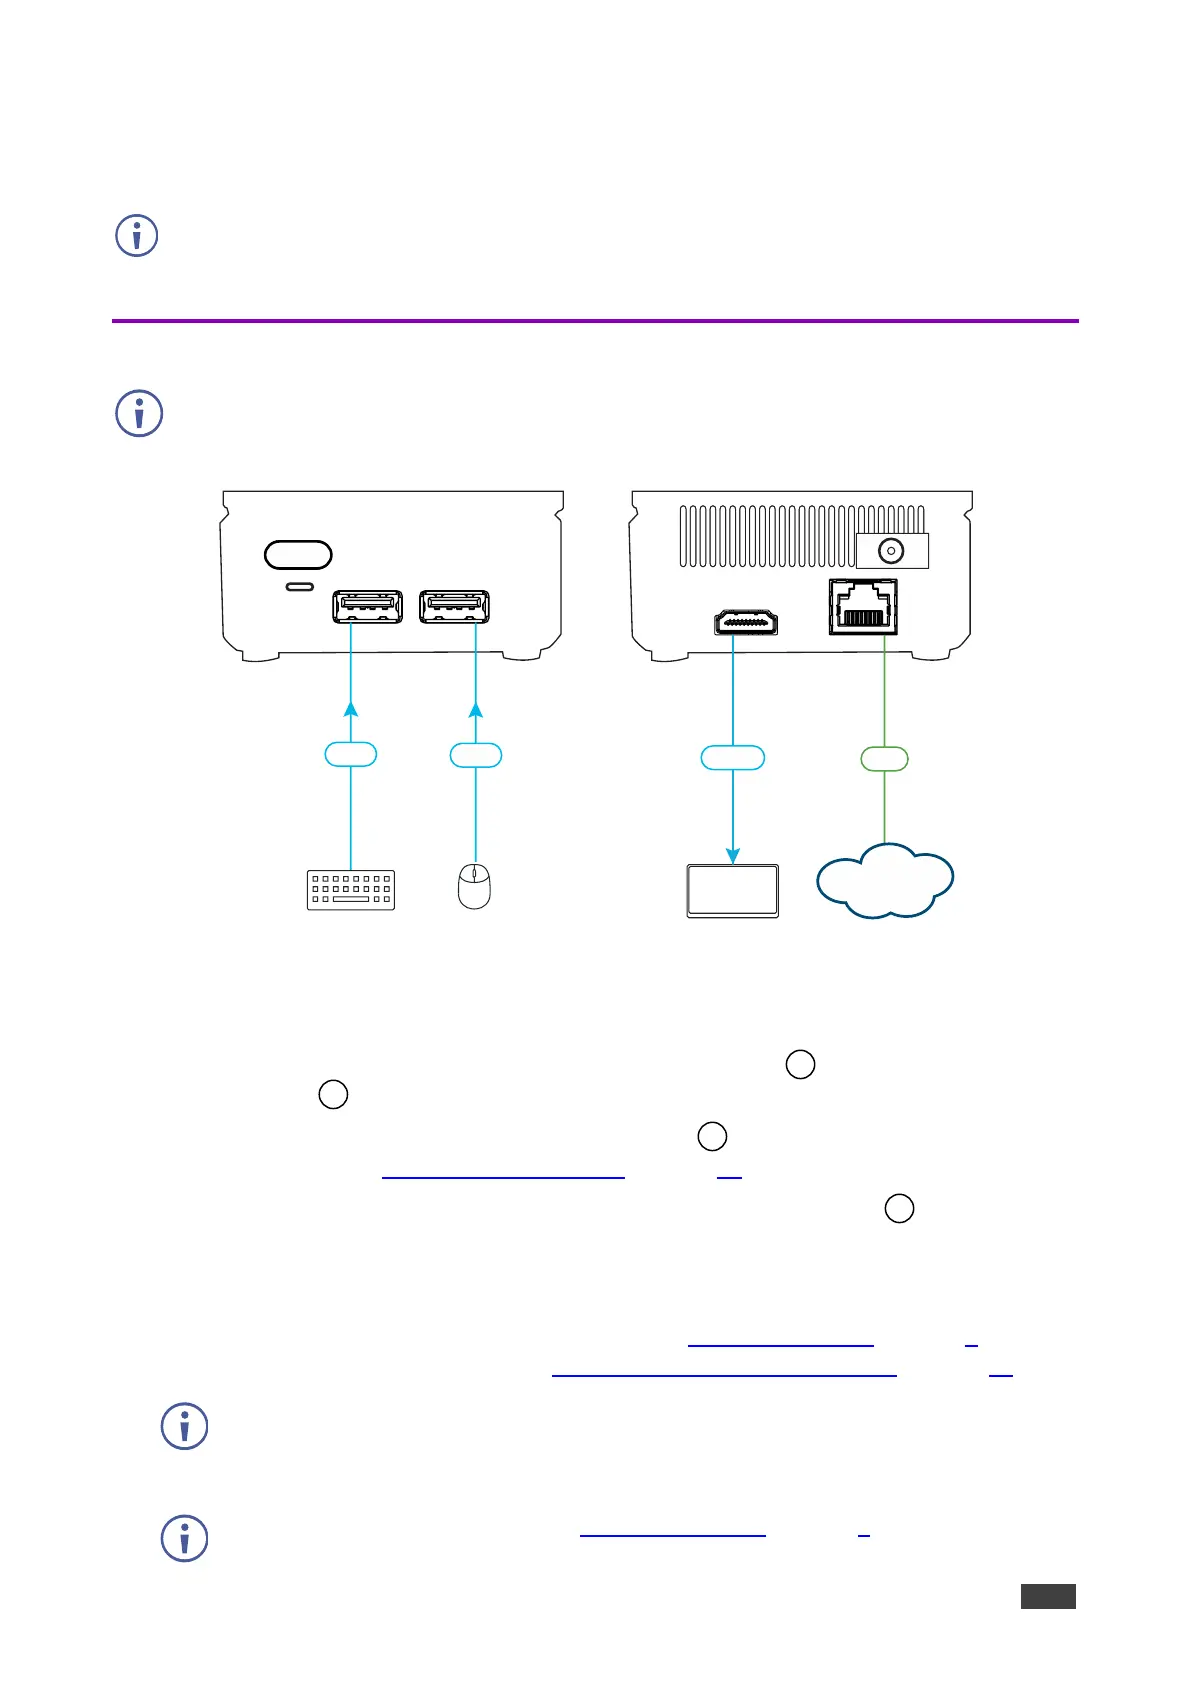
Figure 5: Connecting VIA GO²
To connect VIA GO² as illustrated in the example in (Figure 5):
1. Connect a keyboard and mouse to the USB 3.0 Connector and the USB 2.0
Connector .
2. Connect an HDMI display to the HDMI Connector to be used as the main display for
the meeting (see Connecting Main Display on page 10).
3. Connect the LAN (Local Area Network) cable to the RJ-45 connector
-OR-
Connect to your network using a commercial wireless router.
4. Connect wirelessly with a supported device (see Supported Devices on page 6) after
installing the Kramer VIA app (see For User: Running Kramer VIA App on page 68).
To enable participation in a presentation session (send and receive content), connect
VIA GO² and all participant devices (PCs/ MACs/ smartphones/tablets) to the same
network (LAN or WLAN).
For a list of supported devices, see Supported Devices on page 6.
Eth
KeyboardKeyboard Mouse
USB
USB
Display
HDMI
LAN