Lumio service manual
30
TROUBLESHOOTING
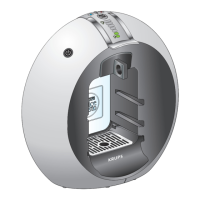
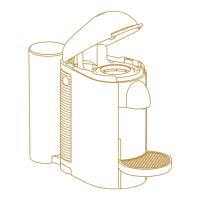
3 Check extraction
head (2)
3.1 Inside of extraction head
soiled (capsule holder
removed)?
YES - Clean with a damp cloth
NO - Go to point 3.2
3.2 Pressure rollers inside of
extraction head jammed?
YES - Clean and make pres-
sure rollers move freely again
NO - Go to point 3.3
3.3 Metal sheet (12) inside
extraction head missing
(necessary for reed switch)?
YES - Replace cpl. coffee
machine
NO - Go to point 3.4
3.4 Cracks in side parts of
locking handle (16)?
Yes - Replace locking handle
NO - Go to point 3.5
3.5 Difficulties when closing/
opening locking handle with/
without inserted capsule
holder?
YES - locking handle does not
stay in open or closed position
or does not move flawlessly
NO - Go to point 3.6
YES - Replace cpl. coffee
machine
3.6 Selection lever cannot be
moved to left/right position
when locking handle is
closed?
YES - Selection lever blocks or
does not move back to middle
position
NO - Go to point 3.7
YES - Replace cpl. coffee
machine
3.7 Selection lever can be
moved to left/right position
when locking handle is
opened?
YES - Replace cpl. coffee
machine
NO - Go to point 4
4 Check water
tank (13)
4.1 Water tank valve func-
tional? For testing press in
and release piston with auxil-
iary tool (e.g. pen)
YES - Go to point 4.2
NO - Replace water tank
—
4.2 Water tank is leaking after
filling?
YES - Replace water tank
NO - Go to point 4.3
—
4.3 Water tank is leaking
when inserted in machine?
YES - Check / replace water
tank and water tank connector
NO - Go to point 5
p. 55
5 Plug into mains
and read out error
code p. 27
5.1 Error code displayed?
YES - Compare with error code
list p. 28
NO - Go to point 6
YES - Continue with repair
6 Plug into mains
and turn rotary
button to switch
ON machine
6.1 Machine shows no func-
tion?
YES - a) Power cord (37)
faulty?
YES - Replace power cord
p. 53
NO - Go to point b)
YES - b) Loose connections or
damaged wires?
YES - Reconnect / replace
wires
NO - Go to point c)
YES - c) Thermo fuse(s) on
thermoblock defective?
YES - Replace building
block (15)
NO - Go to point d)
YES - d) HMI module (1) defec-
tive?
YES - Replace HMI
p. 34. If necessary, replace
building block (15) p. 34
NO - Go to point 5.2
Check
procedure
Symptoms Action / repair work
Further action /
repair work

 Loading...