10 TUNING THE CHASSIS 36
10.9 Checking the riding sag of the shock absorber
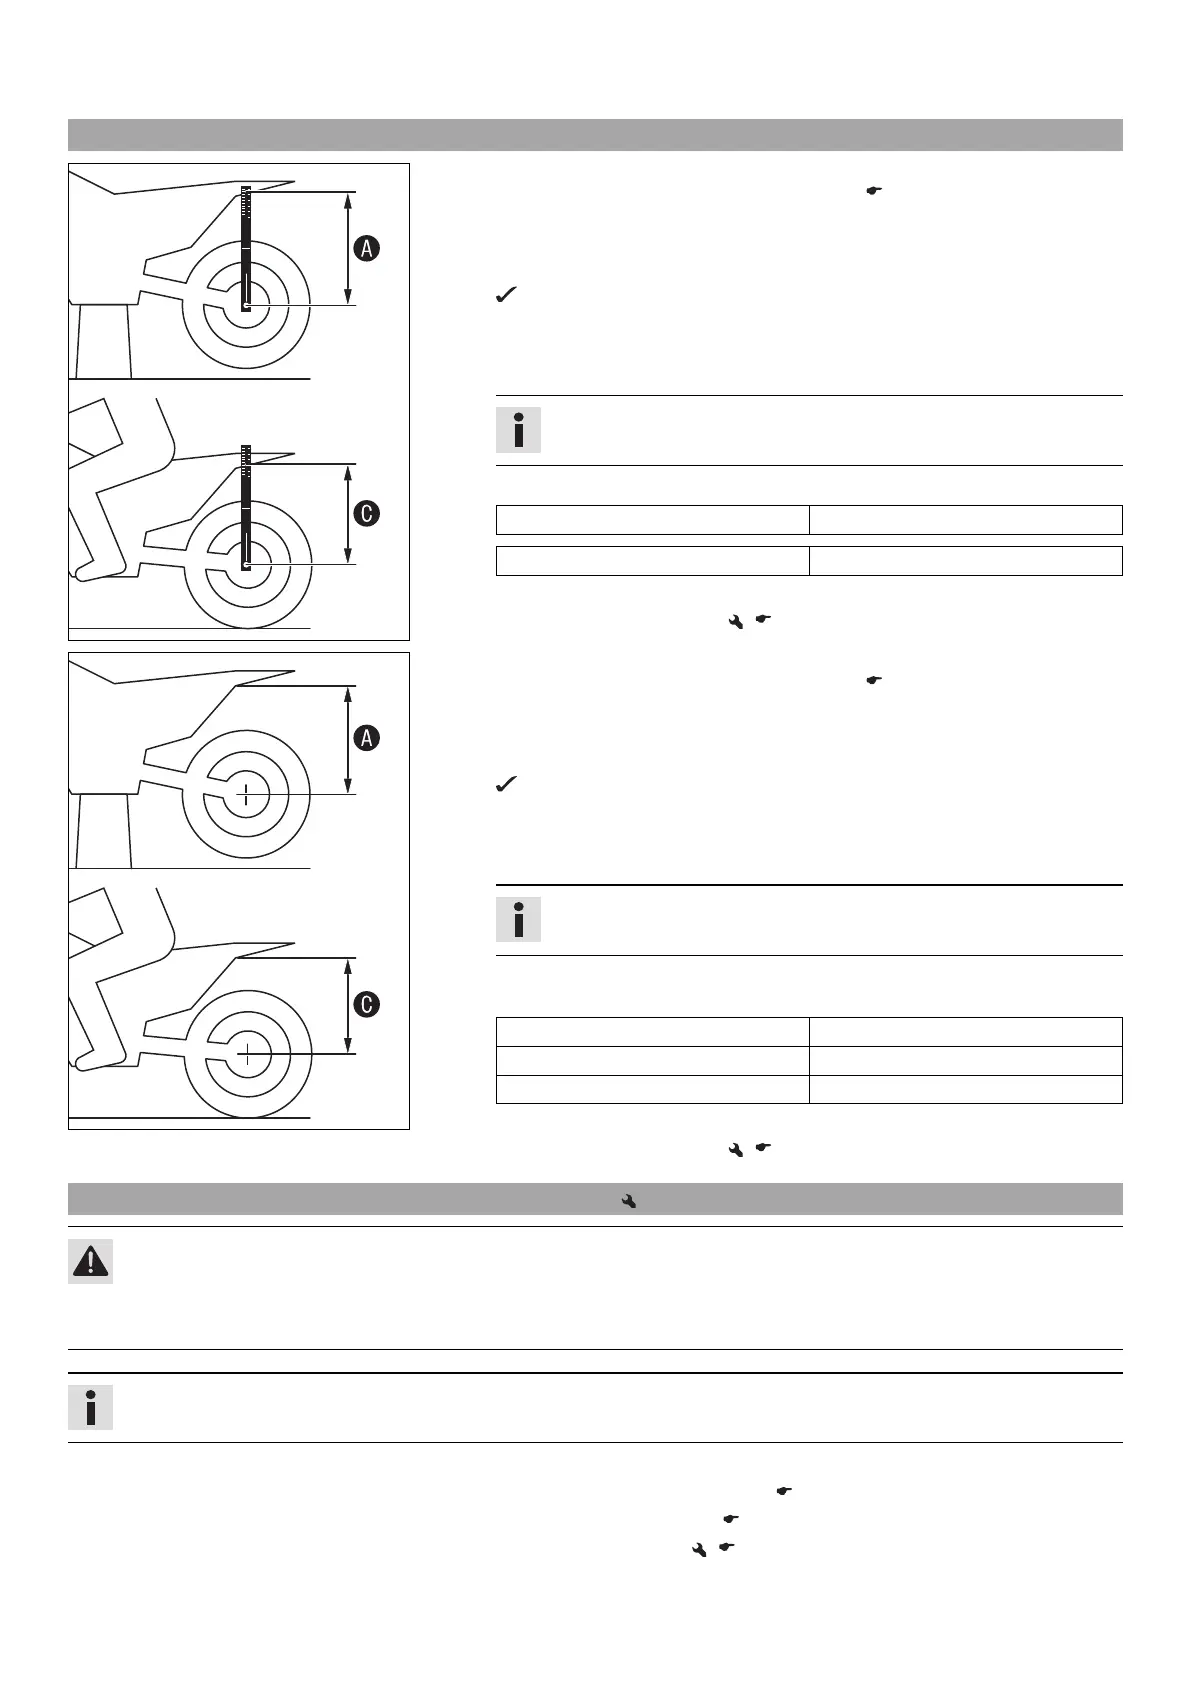
402417-10
(All 125/150 models)
–
Measure distance
of rear wheel unloaded. ( p. 34)
– With another person holding the motorcycle, the rider, wearing full protective
clothing, sits on the seat in a normal sitting position (feet on footrests) and
bounces up and down a few times.
The rear wheel suspension levels out.
– Another person again measures the distance between the rear axle and mark-
ing SAG on the rear fender using the sag gauge.
–
Note down the value as dimension
.
Info
The riding sag is the difference between measurements
and
.
– Check the riding sag.
Riding sag (125/150 SX EU) 105 mm (4.13 in)
Riding sag (125/150 SX US) 110 mm (4.33 in)
» If the riding sag differs from the specified measurement:
– Adjust the riding sag. ( p. 37)
400990-10
(All 250/300 models)
–
Measure distance
of rear wheel unloaded. ( p. 34)
– With another person holding the motorcycle, the rider, wearing full protective
clothing, sits on the seat in a normal sitting position (feet on footrests) and
bounces up and down a few times.
The rear wheel suspension levels out.
– Another person now measures the distance between the rear axle and the fixed
point.
–
Note down the value as dimension
.
Info
The riding sag is the difference between measurements
and
.
– Check the riding sag.
Guideline
Riding sag (250 SX EU) 100 mm (3.94 in)
Riding sag (250 SX US) 100 mm (3.94 in)
Riding sag (All XC models) 100 mm (3.94 in)
» If the riding sag differs from the specified measurement:
– Adjust the riding sag. ( p. 37)
10.10 Adjusting the spring preload of the shock absorber
Caution
Danger of accidents Disassembly of pressurized parts can lead to injury.
– The shock absorber is filled with high density nitrogen. Adhere to the description provided. (Your authorized KTM workshop
will be glad to help.)
Info
Before changing the spring preload, make a note of the present setting, e.g., by measuring the length of the spring.
Preparatory work
– Raise the motorcycle with a lift stand. ( p. 44)
– Disassemble the main silencer. ( p. 61)
– Remove the shock absorber. ( p. 52)