KTR Kupplungstechnik
GmbH
D-48407 Rheine
ROTEX
®
GS
Operating/mounting instructions
KTR-N
Sheet:
Edition:
45510 EN
24of36
15
Please note protection
mark ISO 16016.
Drawn: 15.10.12 Pz Replaced for: KTR-N valid from 08.02.12
Verified: 29.10.12 Pz Replaced by:
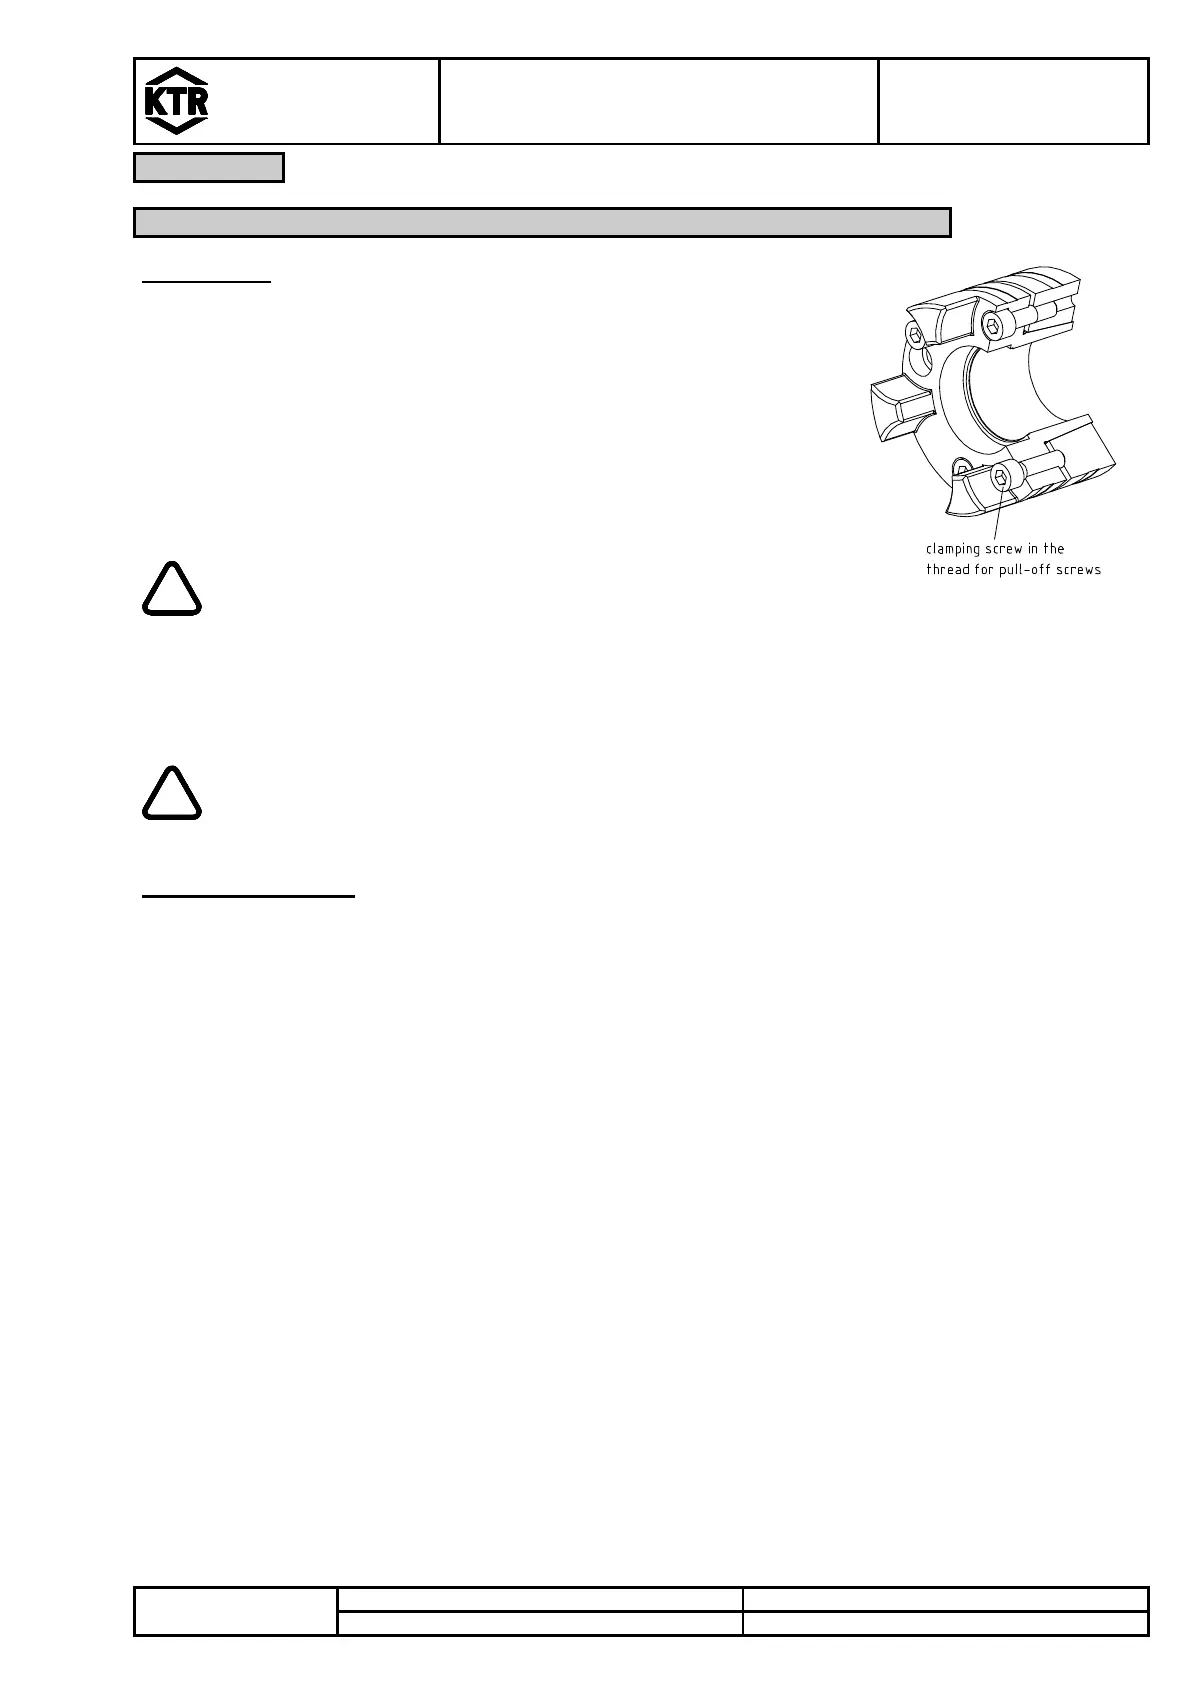
Assembly of Clamping Ring Hubs (
Untighten the clamping screws evenly one after the other. Each screw may
only be untightened by half a revolution for each cycle. Unscrew all clamping
screws by 3 – 4 convolutions.
Remove the screws situated next to the pull-off threads and screw them into
the respective pull-off threads.
The clamping ring is untightened if the screws in the pull-off threads are
tightened evenly stepwise and crosswise.
Illustration 23: Disassembly of
clamping ring hub with clamping ring
If these hints are not observed, the operation of the
coupling may be damaged.
In case of a repeated assembly the hub bore and shaft have to be cleaned and afterwards lubricated with a thin-
bodied oil (e. g. Castrol 4 in 1 or KlüberQuitsch EX). The same applies for the taper surfaces of clamping ring hub
and clamping ring.
Oils and greases containing molybdenum disulfide or other high-pressure additives as well
as internal lubricants must not be used.
For type 6.0 light only:
In case of re-assembly the taper surfaces, hub bores and the shaft have to be cleaned. The
hub bore and shaft have to be lubricated with thin-bodied oil (e. g. Castrol 4 in 1 or
KlüberQuietsch-Ex). Lightly paint the taper surfaces of the clamping ring hub or clamping
ring with the grease Gleitmo 800, afterwards turn the parts by one revolution in order to
spread the grease evenly.