30
Follow these steps to run a Check Switch test of
each DISH Network/Bell TV receiver and/or DVR
connected to the TracVision system.
(
To run a
Check Switch test on Wally receivers, refer to
“Running a Check Switch Test on Wally Receivers”
on page 37.)
a. Ensure the antenna is tracking a DISH
Network (e.g., 77W) or Bell TV (e.g., 91W)
satellite, as applicable.
b. Connect each receiver directly to the
“Receiver” port on the back of the TV-Hub.
c. Navigate to the Point Dish/Signal Screen by
pressing MENU, 6, 1, 1 on your remote
control.
d. Choose Check Switch, then press SELECT.
e. Choose Check (Bell TV) or Test (DISH
Network), then press SELECT.
f. Wait up to 10 minutes for the test to complete
and the receiver’s Program Guide to load.
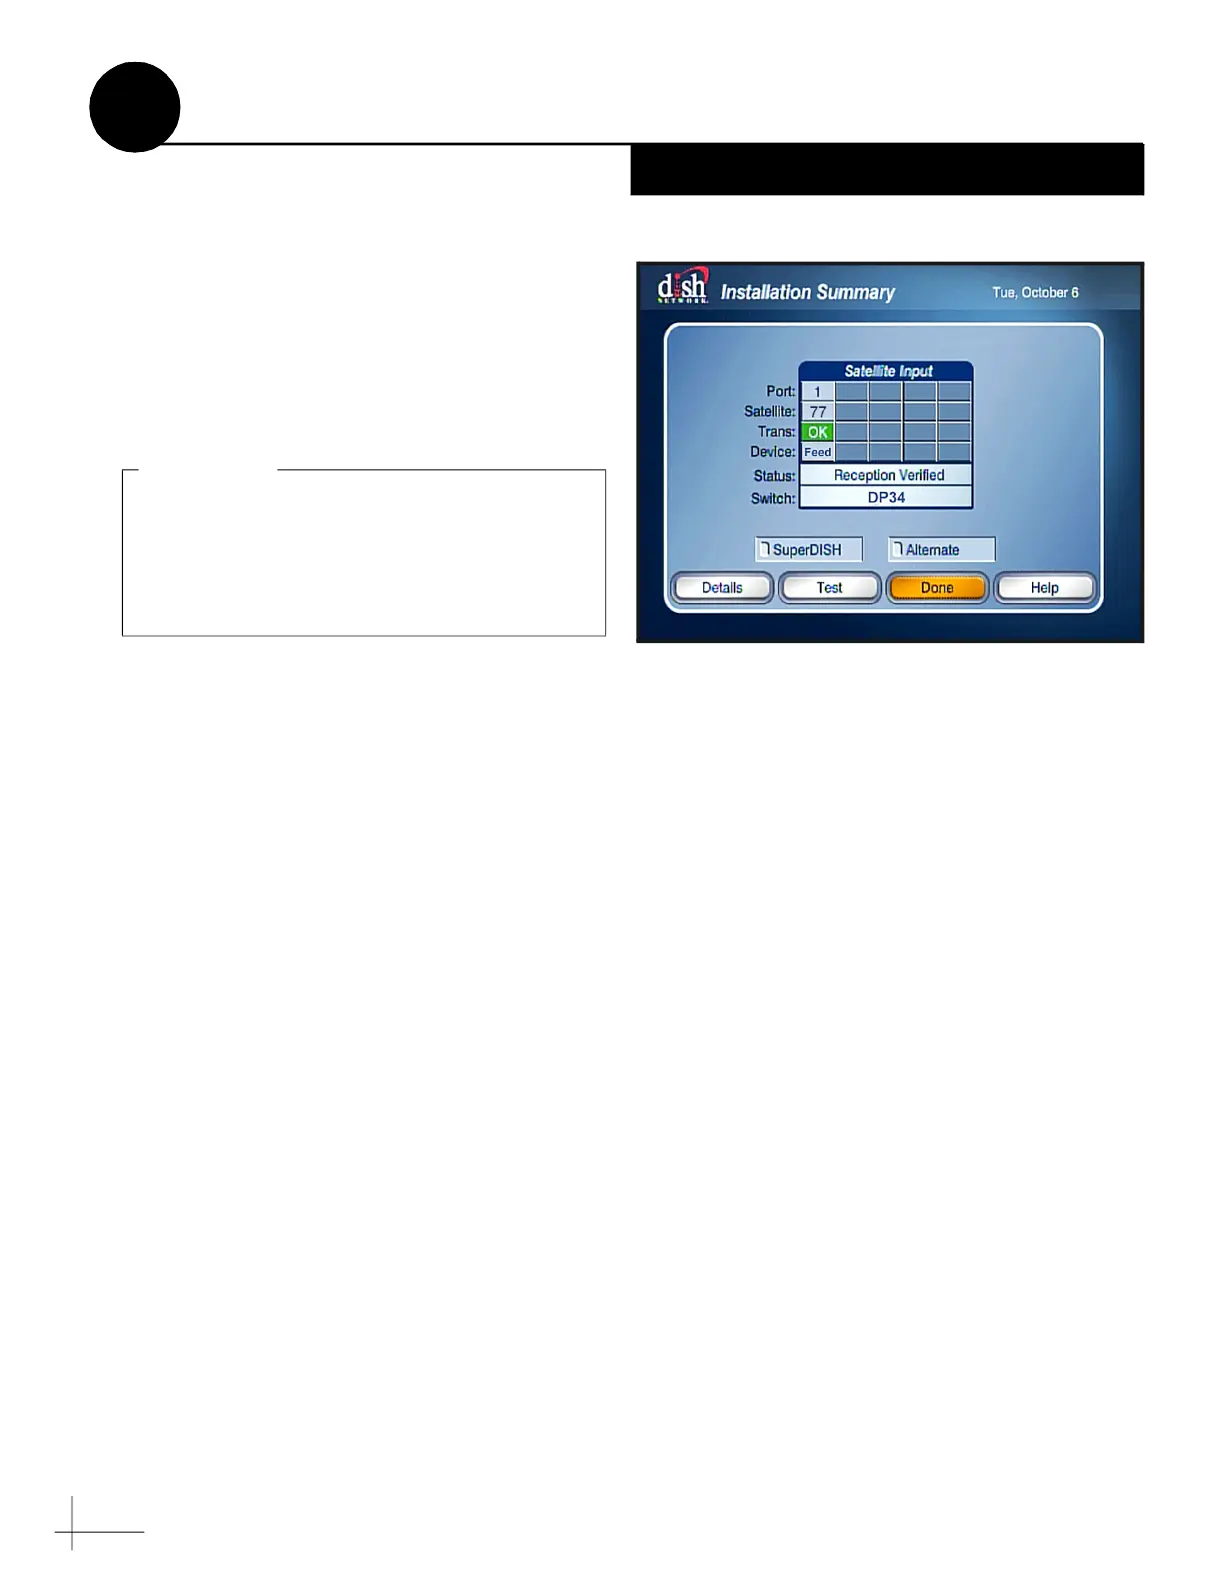
Once complete, the Check Switch test displays
the current satellite, switch type “DP34”, and
OK (see Figure 49).
g. Return the receiver to its proper location.
To run a Check Switch test on any DISH/Bell
receiver other than a Wally, you will need to
temporarily connect each DISH/Bell receiver,
one at a time, directly to the “Receiver” port on
the TV-Hub. Refer to the Help for more details.
IMPORTANT!
Figure 49: DISH Network/Bell TV receiver/DVR Check Switch Screen
Run a Check Switch Test
21
DISH Network/Bell TV Only
 Loading...