IB-32
OFF
OFF
ON
ON
1 32 4
5 6 7
8
10
9
11 1513 1412
(USB model only)
English
Optional Parallel Interface Kit IB-32
Installation Guide
Introduction
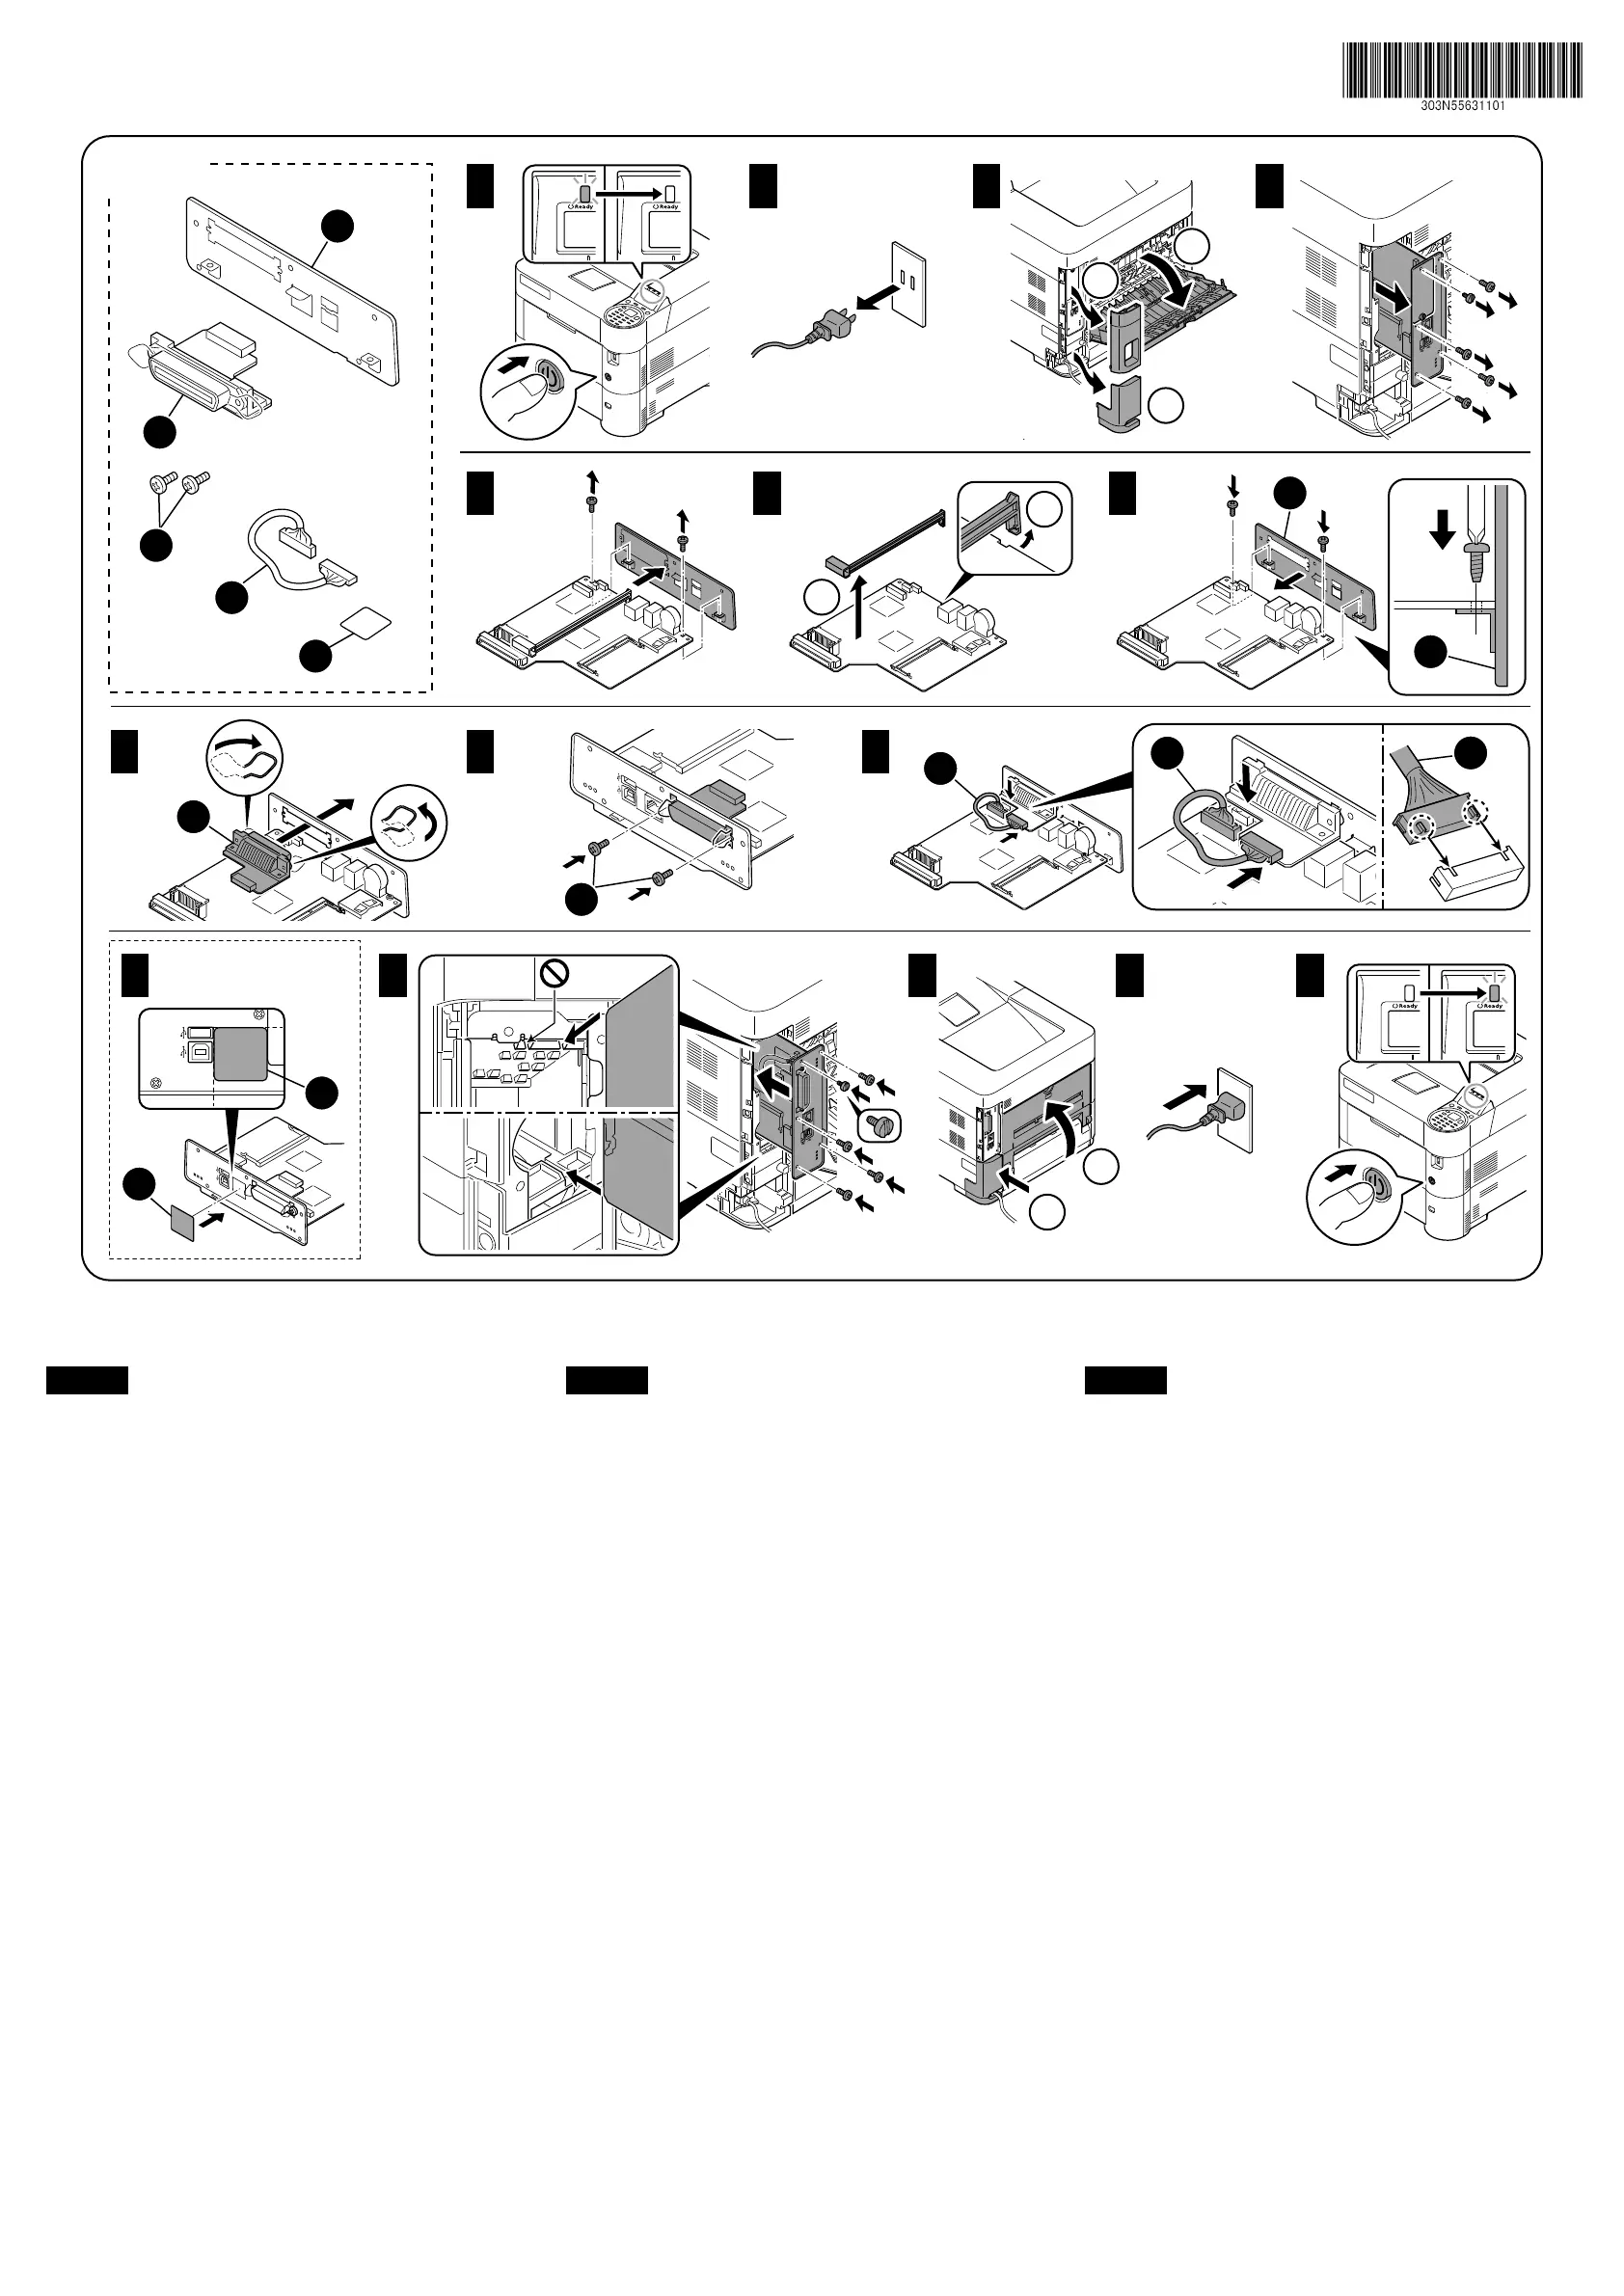
The IB-32 is an optional parallel interface kit for use with the page printers. Please
read this Installation Guide thoroughly so that you understand the correct
installation method.
This parallel interface kit can be installed in other models using the same
installation procedure.
Packing List
IB-32 ...................................................................................................................... 1
Plate ...................................................................................................................... 1
Screw .................................................................................................................... 2
Relay cable ............................................................................................................ 1
Seal ....................................................................................................................... 1
Installation Guide (this guide) ................................................................................ 1
Precautions for Handling the Parallel Interface Kit
When handling the parallel interface kit, adhere to the following precautions.
• The parallel interface kit is delivered in an antistatic bag. To prevent any
damage, briefly touch a large metal object to ensure discharge of static
electricity before removing the parallel interface kit from the bag.
• Never touch the parallel interface kit’s connector section directly with hands.
• When holding the parallel interface kit, avoid contact with the surface of the
circuit board. Hold it at the edges.
• Do not apply undue force when installing.
Installing the Parallel Interface Kit
CAUTION
Before installing (or removing) the parallel interface kit, be sure to turn off
the machine’s power and disconnect the power cord plug from the AC
outlet.
Verifying Installation of the Parallel Interface Kit
To verify that the parallel interface kit has been correctly installed, try to print out
the status page.
Refer to the Operation Guide for the method for printing a status page.
Kit d’interface parallèle IB-32 en option
Guide d’installation
Introduction
L’IB-32 est un kit d’interface parallèle en option destiné à être utilisé avec les
imprimantes par page. Veuillez lire entièrement ce guide d’installation et vous
assurer que vous comprenez bien les méthodes d’installation.
Ce kit d’interface parallèle peut être installé dans d’autres modèles à l’aide de la
même procédure d’installation.
Contenu de l’emballage
IB-32....................................................................................................................... 1
Plaque .................................................................................................................... 1
Vis .......................................................................................................................... 2
Câble de relais ....................................................................................................... 1
Obturateur .............................................................................................................. 1
Guide d’installation (ce manuel) ............................................................................. 1
Précautions de manipulation du kit d’interface parallèle
Lorsque vous manipulez le kit d’interface parallèle, observez les précautions
suivantes.
• Le kit d’interface parallèle est livré dans un sac antistatique. Avant de le retirer
du sac, touchez brièvement un grand objet métallique pour vous décharger de
toute électricité statique.Vous éviterez ainsi d’endommager le kit d’interface
parallèle.
• Ne touchez jamais directement la partie du connecteur du kit d’interface parallèle
avec les mains.
• Lorsque vous tenez le kit d’interface parallèle, ne touchez pas la surface de la
carte de circuits imprimés. Saisissez-le par les bords.
• N’appliquez aucune force inutile en l’installant.
Installation du kit d’interface parallèle
ATTENTION
Avant d’installer (ou de retirer) le kit d’interface parallèle, mettez toujours
l’imprimante hors tension et débranchez la fiche du cordon d’alimentation
de la prise de courant.
Vérification de l’installation du kit d’interface parallèle
Pour vous assurer que le kit d’interface parallèle a été correctement installé,
essayez d’imprimer la page d’état de l’imprimante.
Pour connaître la méthode d’impression de la page d’état, consultez le manuel
d’utilisation.
Kit de interfaz en paralelo IB-32 opcional
Guía de instalación
Introducción
El IB-32 es un kit de interfaz en paralelo opcional para utilizar con la impresora de
hojas. Lea completamente esta Guía de instalación de forma que pueda entender
los métodos de instalación y operación correctos.
Este kit de interfaz en paralelo puede instalarse en otros modelos utilizando el
mismo procedimiento de instalación.
Lista del contenido del paquete
IB-32....................................................................................................................... 1
Placa ...................................................................................................................... 1
Tornillo.................................................................................................................... 2
Cable de relé .......................................................................................................... 1
Sello ....................................................................................................................... 1
Guía de instalación (este folleto)............................................................................ 1
Precauciones para el manejo del kit de interfaz en paralelo
Cuando maneje el kit de interfaz en paralelo, tenga en cuenta las siguientes
precauciones.
• El kit de interfaz en paralelo se entrega en una bolsa antiestática. Para evitar
cualquier daño, antes de sacar el kit de interfaz en paralelo de la bolsa, toque un
objeto metálico grande para descargar la electricidad estática de su cuerpo.
• Nunca toque la sección del conector del kit de interfaz en paralelo directamente
con las manos.
• Cuando sostenga el kit de interfaz en paralelo, no toque con las manos la
superficie de la placa del circuito impreso. Sujétela por los bordes.
• No aplique demasiada fuerza al realizar la instalación.
Instalación del kit de interfaz en paralelo
PRECAUCIÓN
Antes de instalar (o desmontar) el kit de interfaz en paralelo, asegúrese de
desconectar la alimentación de la impresora y de desenchufar el cable de
alimentación de la toma de corriente de CA.
Verificación de la instalación del kit de interfaz en paralelo
Para verificar que el kit de interfaz en paralelo ha sido instalado correctamente,
trate de imprimir la página de estado de la impresora.
Consulte la Guía de uso para obtener información sobre la impresión de la página
de estado de la impresora.
EspañolFrançais
D
1
1
2
2
1
2
3
B
A
A
C
D
D
D
E
A
B
C
E
E

 Loading...