The FT Series Floor Standing, Combination Boiler
Page 83
8.2 Flushing the Combination Boiler
Flushing the DHW Heat Exchanger is a complicated procedure that should only be done by an authorized
technician or licensed professional. Keep in mind that improper maintenance can void your warranty.
1. Disconnect electric power to the combination boiler.
2. It is highly recommended to have 3/4” service and isolation valves installed on both DHW lines.
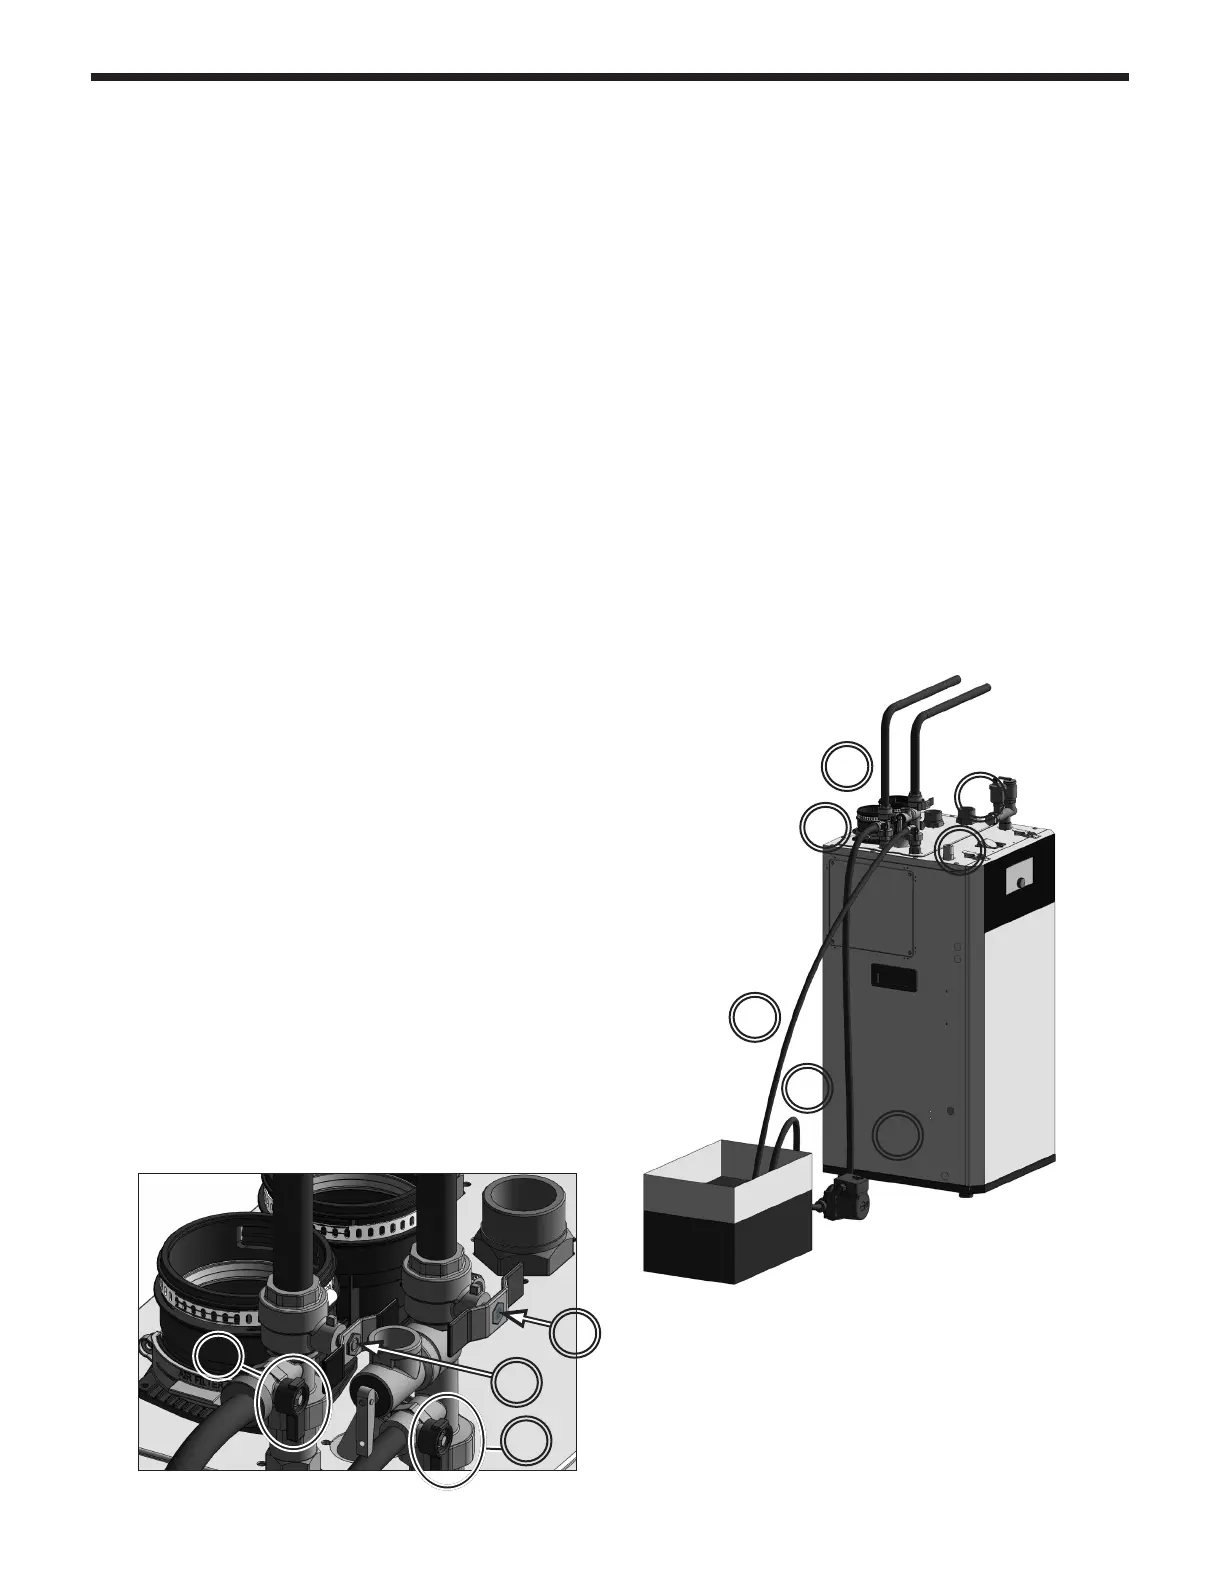
3. Connect hose “D1” to the valve “V3” and place the free end in the bucket. Connect hose “D3” to the
circulation pump outlet and the cold water inlet line at the valve “V4”. Connect hose “D2” to the circulation
pump inlet and place the free end in the bucket.
4. Pour the cleaning solution into the bucket. Place the drain hose (D1) and the hose (D2) to the pump inlet into
the cleaning solution.
5. Open service valves (V3 & V4) on the hot water outlet and cold water inlet lines.
6. Turn on the circulation pump (Operate the pump and allow the cleaning solution to circulate through the
combination boiler for at least 1 hour at a rate of 4 gallons per minute.)
7. Rinse the cleaning solution from the combination boiler as follows:
- Remove the free end of the drain hose (D1) from the bucket.
- Close service valve, (V4), and open shut o valve, (V2).
Do not open shut o valve, (V1).
- Allow water to ow through the combination boiler for 5 minutes.
- Close shut o valve (V2).
V1
V2
V4
V3
D1
D2
D3
8. Ensure service valves are closed (V3 and V4) and shut o valves
are open (V1 and V2).
9. Disconnect all hoses.
10. Open top left access panel and have a few towels available to
mop up any water.
11. Remove the cold water inlet lter from the combination boiler
and clean out any residues.
12. Reinsert the lter and ensure the lter cap is securely tightened.
Reinstall top left access panel.
13. Connect electrical power to the combination boiler.
V1
V4
V3
V2
 Loading...