Clean the internal taper in the drill press with mineral spirits and a soft rag. Use a dowel or
pencil to push the rag into the taper for cleaning. Any debris or residual grease can cause
the chuck arbor to not seat properly. Dispose of rags safely!
Rotate the outer ring of the chuck to retract the jaws into the chuck body to prevent
damaging the chuck jaws during installation. Your chuck may have come separate or pre-
assembled. If pre-assembled, skip to the next step. If separated, assemble the arbor to the
chuck by placing the retracted jaw side of the chuck downwards onto the bench and inserting
the cleaned arbor into the cleaned tapered opening on the chuck. Use a plastic-coated dead
blow mallet, rubber hammer, or a block of wood and hammer to deliver two to three sharp
strikes to seat the arbor into the chuck.
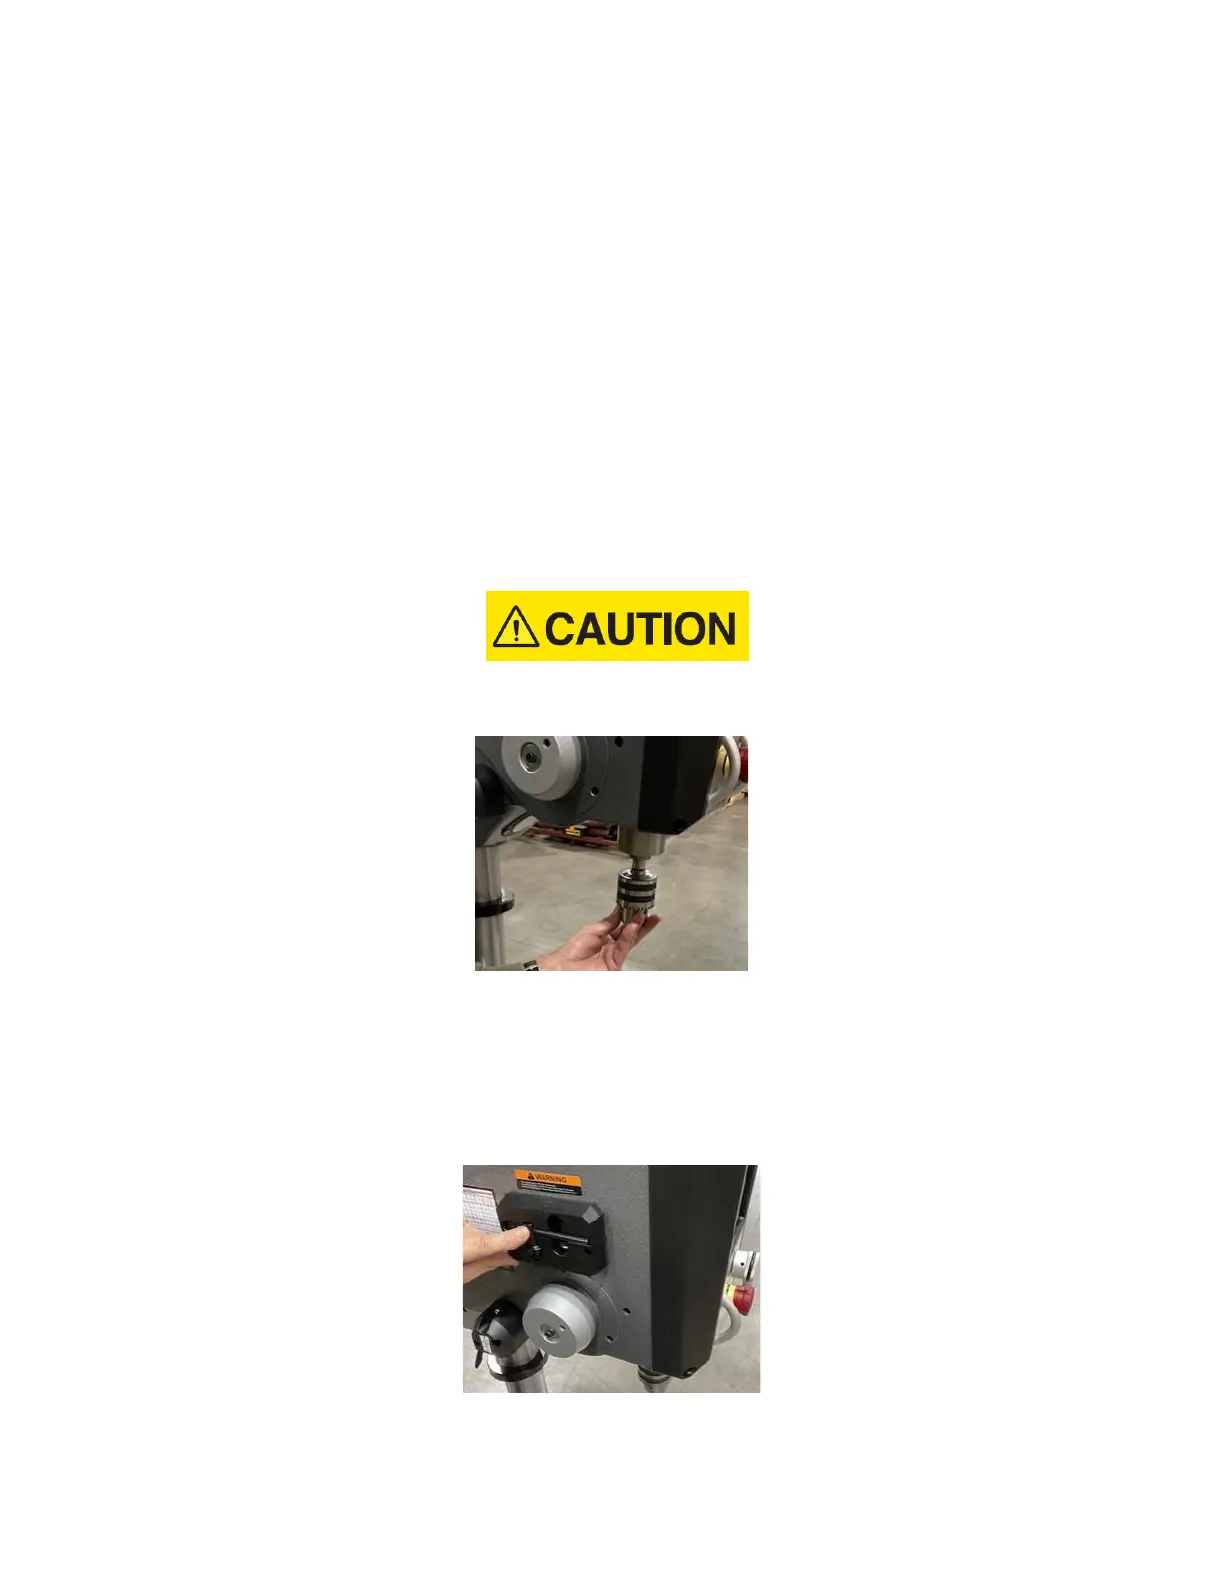
11. Insert the chuck and arbor assembly into the cleaned taper of the drill press. Make sure
that the drill press quill is in the up position. Use a plastic-coated dead blow mallet, rubber
hammer, or a block of wood and hammer to deliver two to three sharp strikes to seat the
arbor and chuck assembly into the drill press.
Do not use a steel hammer directly against the arbor or chuck. This may cause damage to
the chuck and/or arbor.
Figure 27: Chuck with arbor installation
12. The DP20 drill press is equipped with a dedicated chuck key holder on the left side of the
headstock. The chuck key must be in position in the chuck key holder for the Auto-Start
function to operate. This prevents inadvertent starts while using the chuck key in the chuck.
If the chuck key is misplaced, the drill press will operate in normal manual mode without
Auto-Start capability.
Figure 28: Chuck key holder
 Loading...