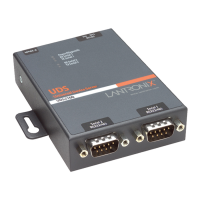
3: Installation of UDS2100
UDS2100 Device Server User Guide 16
To install the unit:
To install the unit, complete the following steps in order. Refer to the numbers in
the previous figure.
1. Connect a serial device to your unit. See 2: Introduction for more information
about what kinds of device attachments the unit supports.
2. Connect an Ethernet cable to the 10/100 port.
3. Supply power to your unit using the power supply that was included in the
packaging.
Note: The required input voltage is 9-30 VDC (center +) (1.8W maximum
power).
4. Supply power to the serial device.
Note: If you encounter a problem, please see A: Troubleshooting and
Contact Information.
Required Information
Before configuring the UDS, have the following information available:
Hardware Address
Take note of the unit’s hardware address (also known as the Ethernet or MAC
address). It is on the product label (see Product Information Label).
Hardware Address: 00 – 20 - 4a - _____ - _____ - _____
Or
Hardware Address: 00 - 80 - A3 - _____ - _____ - _____
Note: Make note of the MAC address. It is needed to locate the UDS2100
module using DeviceInstaller.
IP Address
The UDS must have a unique IP address on your network. This address
references the specific unit. By default, the unit is DHCP-enabled and
automatically assigned an IP address on DHCP-enabled networks. If you are
assigning a static IP address, the systems administrator generally provides the IP
address, subnet mask, and gateway.
Note: The factory default IP address is 0.0.0.0 to enable DHCP, BOOTP,
and AutoIP. When the units boots, it sends a DHCP broadcast to try and
get an IP address. If it receives no reply from a DHCP server, the UDS
tries BOOTP. If the UDS does not receive a response from BOOTP, it
reverts to an AutoIP address.
 Loading...