HVM200 Reference Manual Setting Up the Measurement 3-2
Step 4. Enter the Reference value for the shaker you will use to perform the
calibration check, then click Set.
TAKE NOTE The reference value is usually provided in the shaker documentation.
Step 5. Attach the transducer to your shaker so that the axis you wish to check is
oriented properly.
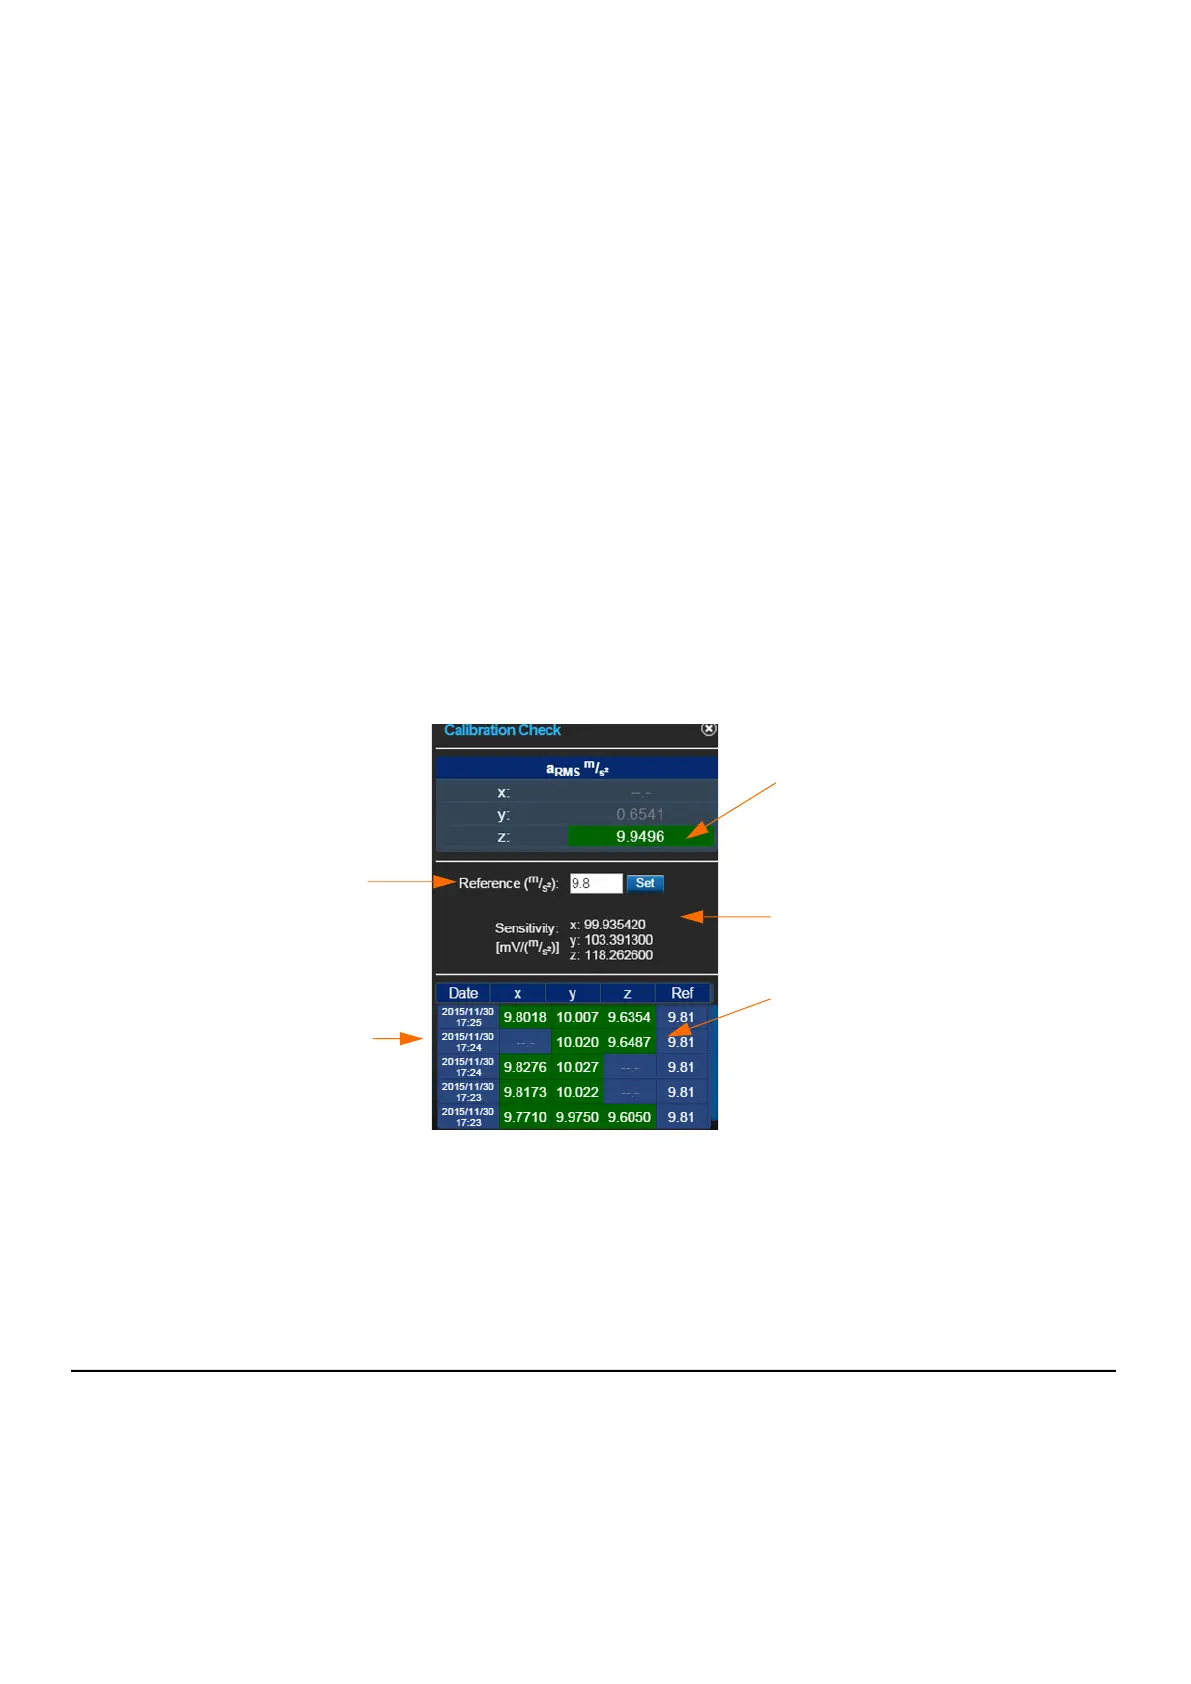
Step 6. Start the shaker and note the
a
rms
values for each axis as shown in
Figure 3-2 Calibration Check, according to the following criteria:
• Values are gray when the level has not been checked. (See
Figure 3-2 Calibration Check)
• Values are white when the level is being checked.
• Values are red if the axis measurement is complete and the
level varies from the reference value by more than ± 5%.
• Values are green if the axis measurement is complete and
the level is within ± 5% of the reference value.
Step 7. Repeat the process for each axis on the accelerometer.
FIGURE 3-2
Calibration Check
LEARN MORE If you are using G4 (with a license for HVM), the last 2 saved calibration
checks are displayed in measurement spreadsheets. For more information, in G4 go to
Help > Manuals and choose G4 LD Utility Software Manual.
Step 8. To save the calibration check, close the Calibration Check dialog box.
3.1.2 Selecting a Setup File by Using Your Mobile Device
The HVM200 includes 9 default measurement setups in the Settings
list. You can also create your own custom setup file. This section
describes this process.
In this section:
• Creating the Setup File
TAKE NOTE During the calibration
check, the filter is automatically set
to the Fb weighting measurements
and restored when the check is
complete.
Z axis has been
checked. Green
indicates values are
within range.
Reference value from
shaker
Saved calibration
checks. Green
indicates the values
are within range.
Sensitivity settings
specified in setup
Green indicates values
are within range.
 Loading...