HVM200 Reference Manual Setting/Syncing Meter Time and Date 4-1
Section 4 Changing Features
4.1 Setting/Syncing Meter Time and Date .......................................................4-1
4.1.1 Setting/Syncing Time via G4 LD Utility ................................................................4-1
4.1.2 Setting/Syncing Time via HVM200 Control app ...................................................4-1
4.2 Enabling the WiFi Signal .............................................................................4-2
4.2.1 Turning WiFi Off .....................................................................................................4-2
4.2.2 Turning WiFi On .....................................................................................................4-3
4.3 Upgrading Firmware or Options ................................................................4-3
This module provides instructions for setting and disabling features,
and upgrading the HVM200.
4.1 Setting/Syncing Meter Time and Date
The HVM200 has a time feature that allows the meter’s internal clock to
be either manually set or synced with your PC or mobile device.
4.1.1 Setting/Syncing Time via G4 LD Utility
Before you begin:
• Make sure the meter is powered on.
• Launch G4 and connect the HVM200 meter. For more information,
see 2.6 Connecting HVM200 to G4 LD Utility
.
• Be sure you’re in the Active setting. You’re in Active setting if you can
see the Time tab in G4.
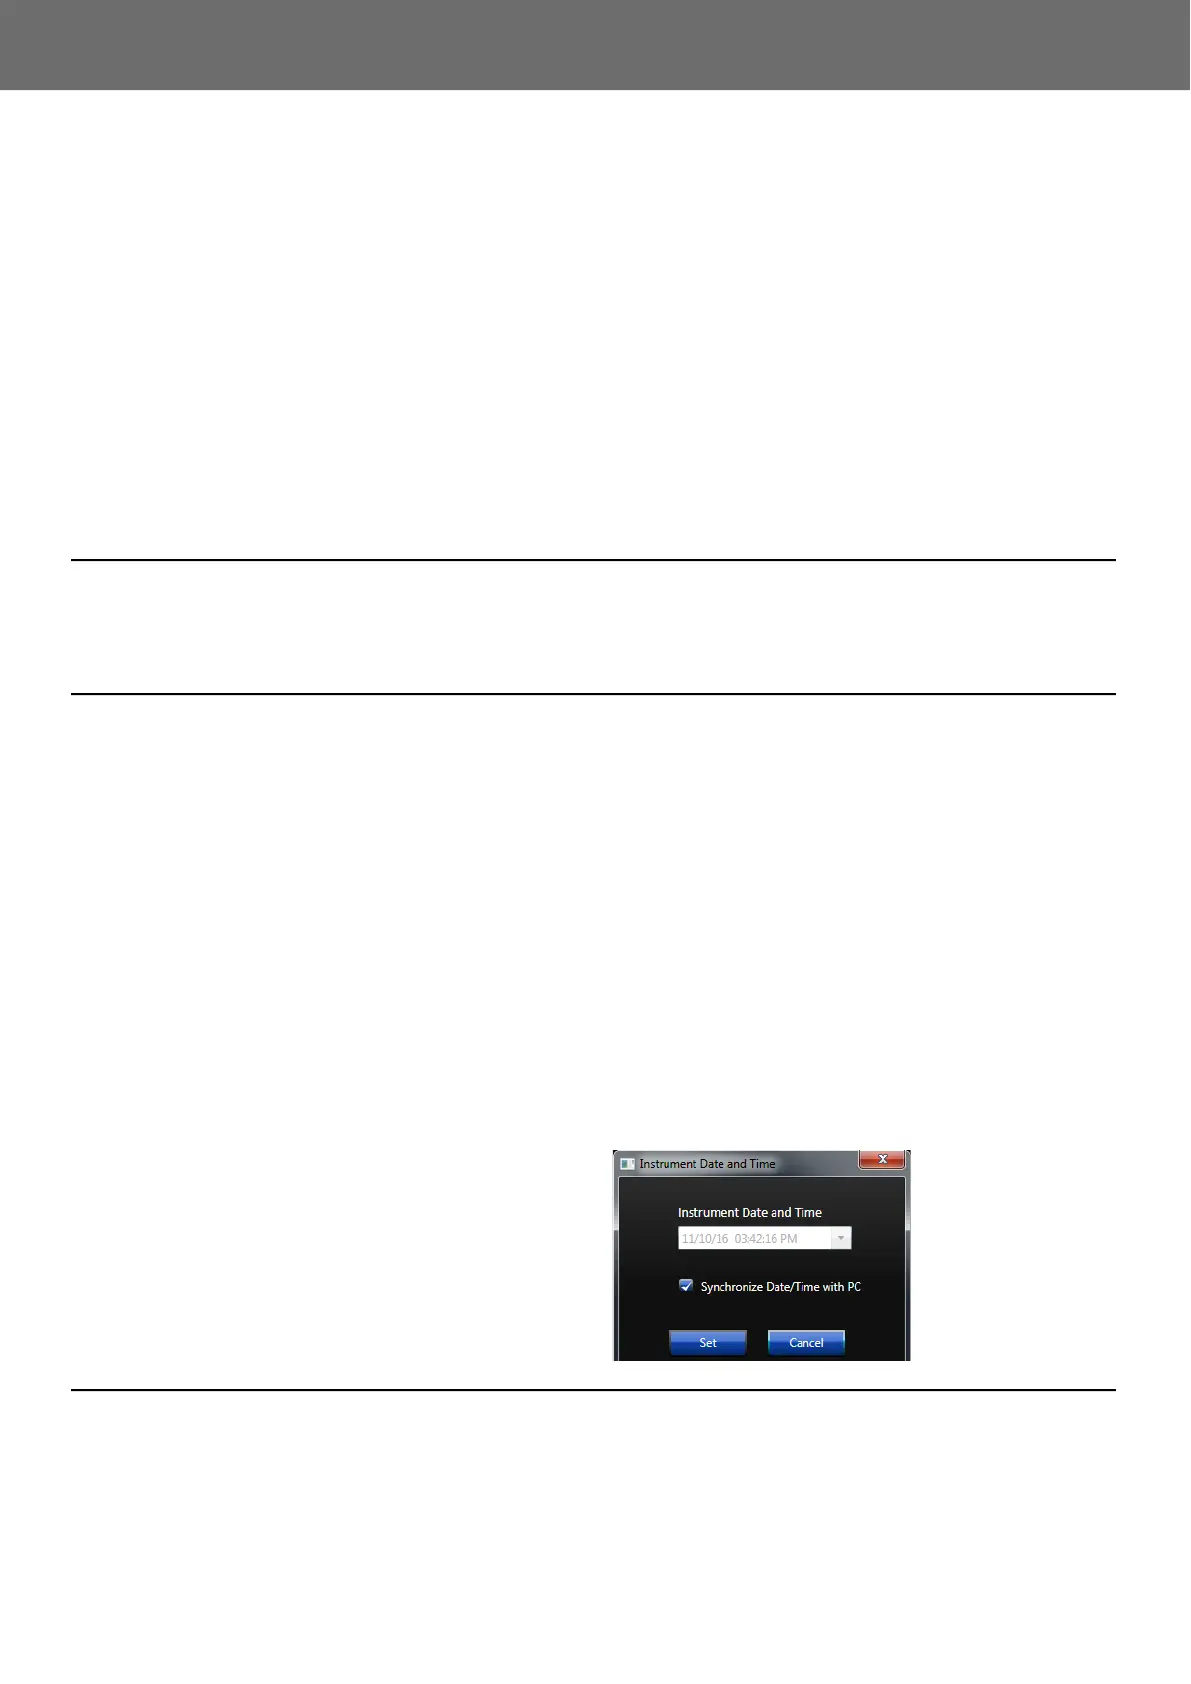
Step 1. In G4, go to Meter Manager Maintenance. This opens the Maintenance
tab.
Step 2. Click on Sync PC and Meter Clocks.
Step 3. Select Set to use the PC clock as the new time for the meter. If you
uncheck this option, you can set the date and time manually.
FIGURE 4-1
Date and Time
4.1.2 Setting/Syncing Time via HVM200 Control app
Before you begin:
• Power on the HVM200.
• Launch the Control app and connect the HVM200 meter to your
device. For more information, see 2.5 Connecting the HVM200 to a
Mobile Device
.
 Loading...