506566−01 09/10
Page 6
Adding or Removing Non−Communicating Equipment
Add or Remove Non−Communicating Equipment
Use this option to add any non−communicating outdoor unit
and any non−communicating accessory. Press the yes button
on this screen (figure 10) to access a list of non−communicat-
ing devices to be installed or removed. A list similar to that
shown in figure 11 will appear.
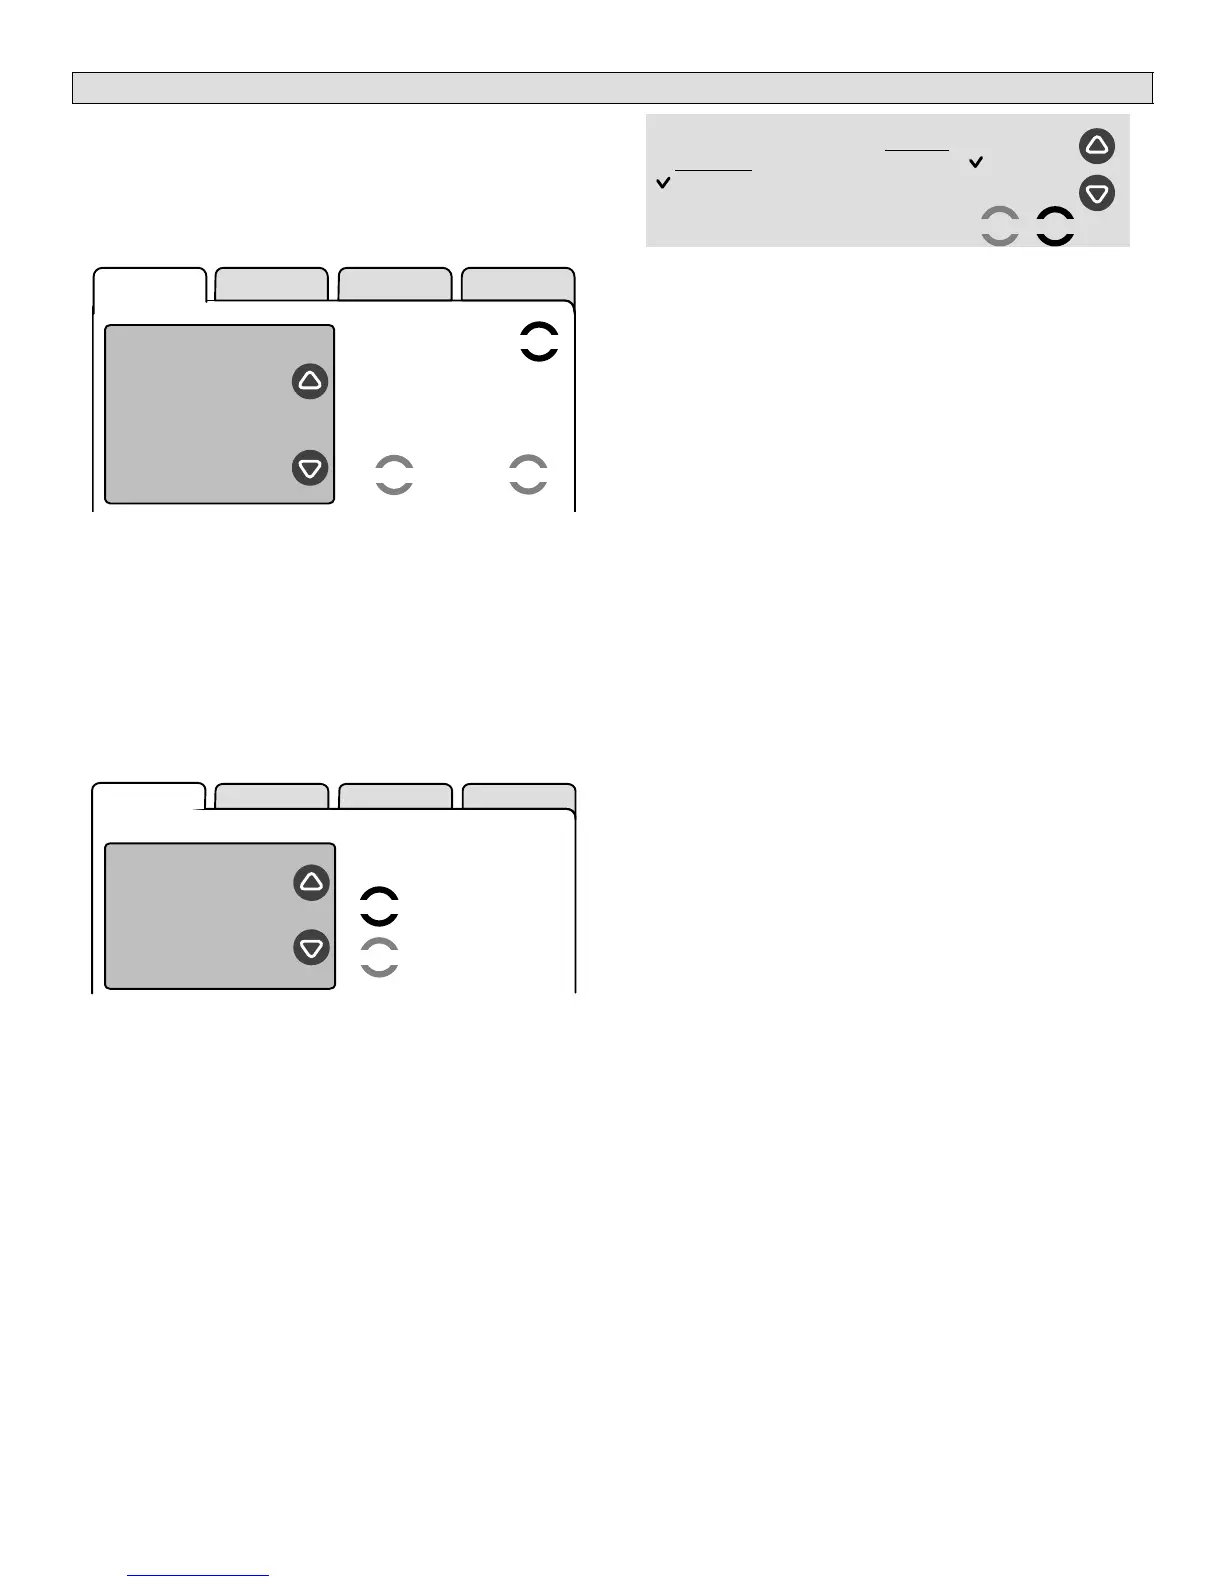
setup HELP
Add or Remove
Non−communicating
equipment?
If no, then press
next step"
system devices
next step
yes
back
Furnace
SLP98UH−
090V36C−01
5910G17546
Thermostat
49W95
A110A00070
System
49W95
Figure 10. Add/remove non−communicating de-
vices screen
Adding a Non−communicating Outdoor Unit
Non−communicating air conditioning unit or heat pumps are
added to the icomfort system as follows:
1. Select Add or Remove Non−communicating equipment
by pressing yes (see figure 10).
2. Use arrows to highlight Outdoor Unit Type and press
edit (see figure 11). Then use arrows to highllight 1 Stage
AC Unit or 2 Stage AC Unit; press save (see figure 12).
setup HELP
non−communicating
device list
Outdoor Unit
Type
Humidifier
Dehumidifier
Electronic Air
Cleaner
to adjust a setting, high-
light it, then press edit
Current Value:
Not Installed
back
edit
Figure 11. Installing non−communicating outdoor
unit
Outdoor Unit Type
default is underlined
current value is checked
savecancel
Not Installed
1 Stage A/C Unit
2 Stage A/C Unit
Figure 12. Defining non−communicating outdoor
unit type
3. Change any red settings (e.g. Outdoor Unit Capacity) by
selecting the setting and press edit. Use up/down arrows
to make changes; then press save. Change any other
red settings (if present) using a similar process to com-
plete installation of the device.
NOTE − Non−communicating heat pumps are adding using a
similar process by selecting 1− or 2−Stage HP Unit under the
Outdoor Unit Type.
Adding UV Light, Electronic Air Cleaner
Adding accessories including UV Light and Electronic Air
Cleaner is a simple process of installing" the device, which
effectively tells the thermostat to activate access to its service
timers.
Select the device from the list and press edit. Use the up/
down arrows to scroll from Not Installed" (default) to the de-
vice name. Press save.
Adding humidifier and dehumidifier
NOTE − Adding humidity−related non−communicating devices
may be a two−step programming procedure:
First, the device must be installed and saved.
Second, the device may also need to be configured (if
Basic" mode is not the desired setting) and saved (see
Page 8).
See the following page for humidifier and dehumidifier instal-
lation and configuration.
 Loading...