icomfort Touch 7−Day Programmable Communicating Thermostat
Page 7
Adding a humidifier
This procedure describes how to add a non−communicating
humidifier controlled by the icomfort Touch thermostat
through the H" output on the furnace or air handler. These
assumptions must have been met:
1. The humidifier is wired to the furnace or air handler con-
trol as shown on the Optional Accessories wiring diagram
(see Page 35).
2. The entire system has been wired, powered up, and the
thermostat has detected the system’s installed communi-
cating devices.
3. You have progressed through setup to the Add or Re-
move non−communicating devices screen (this section).
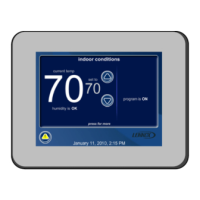
4. Use the up/down arrows (see figure 13) to select humidi-
fier. The right side of the screen indicates the humidifier’s
status (e.g. Current Value: Not Installed).
setup HELP
non−communicating
device list
Humidifier
Dehumidifier
UV Light
Electronic Air
Cleaner
to adjust a setting, high-
light it, then press edit
Current Value:
Not Installed
back
edit
Figure 13. Installing humidifier
5. Press edit to go to the install device screen (figure 14).
Use the arrows to highlight an option and use save to
save the change. (Cancel goes back to previous screen.)
Humidifier
default is underlined
current value is checked
savecancel
Not Installed
Bypass (24VAC) Humidifier
Power (120VAC) Humidifier
Bypass and Power Humidifier
Figure 14. Defining humidifier type
6. Press the back button to return to the adjust screen.
Instead of Not Installed" (see figure 13), the Current Val-
ue will show the humidifier you installed (e.g. Current Val-
ue: Bypass (24VAC) Humidifier).
7. By default, the humidifier will be configured for "Basic"
mode, a 5º autochangeover humidification deadband,
and maximum humidification setpoint of 45% RH. If these
settings are satisfactory, no further configuration is nec-
essary. If another setting is needed, Configure the hu-
midifier as described on Page 8.
TIPS
The standard humidification mode is Basic" humidifica-
tion (humidifier is energized during a call for heat, if there
is a humidification demand).
An outdoor sensor is furnished in an icomfort outdoor unit
or a separate outdoor sensor may be connected to the
furnace or air handler outdoor sensor" connections. If
you have not installed an outdoor temperature sensor,
you will not have a option for Dew Point Control" mode.
If you do not have the ability to select or adjust the Humid-
ity RH setpoint on the Indoor Humidity" tab, the control
is set for Display Only." In the installer program, go the
equipment tab and select System 49W95" and press
the edit button. Select Humidification Control Mode"
and press edit. Choose Basic," Precision," or Dew
Point Control" and press save.
Adding a dehumidifier
This procedure describes how to add a non−communicating
dehumidifier controlled by the icomfort Touch thermostat
through the DH" output on the furnace or air handler. These
assumptions must have been met:
1. The dehumidifier is wired to the furnace or air handler
control as shown on the Optional Accessories wiring dia-
gram (see Page 35).
2. The entire system has been wired, powered up, and the
thermostat has detected the system’s installed communi-
cating devices.
3. You have progressed through setup to the Add or Re-
move non−communicating devices screen (this section).
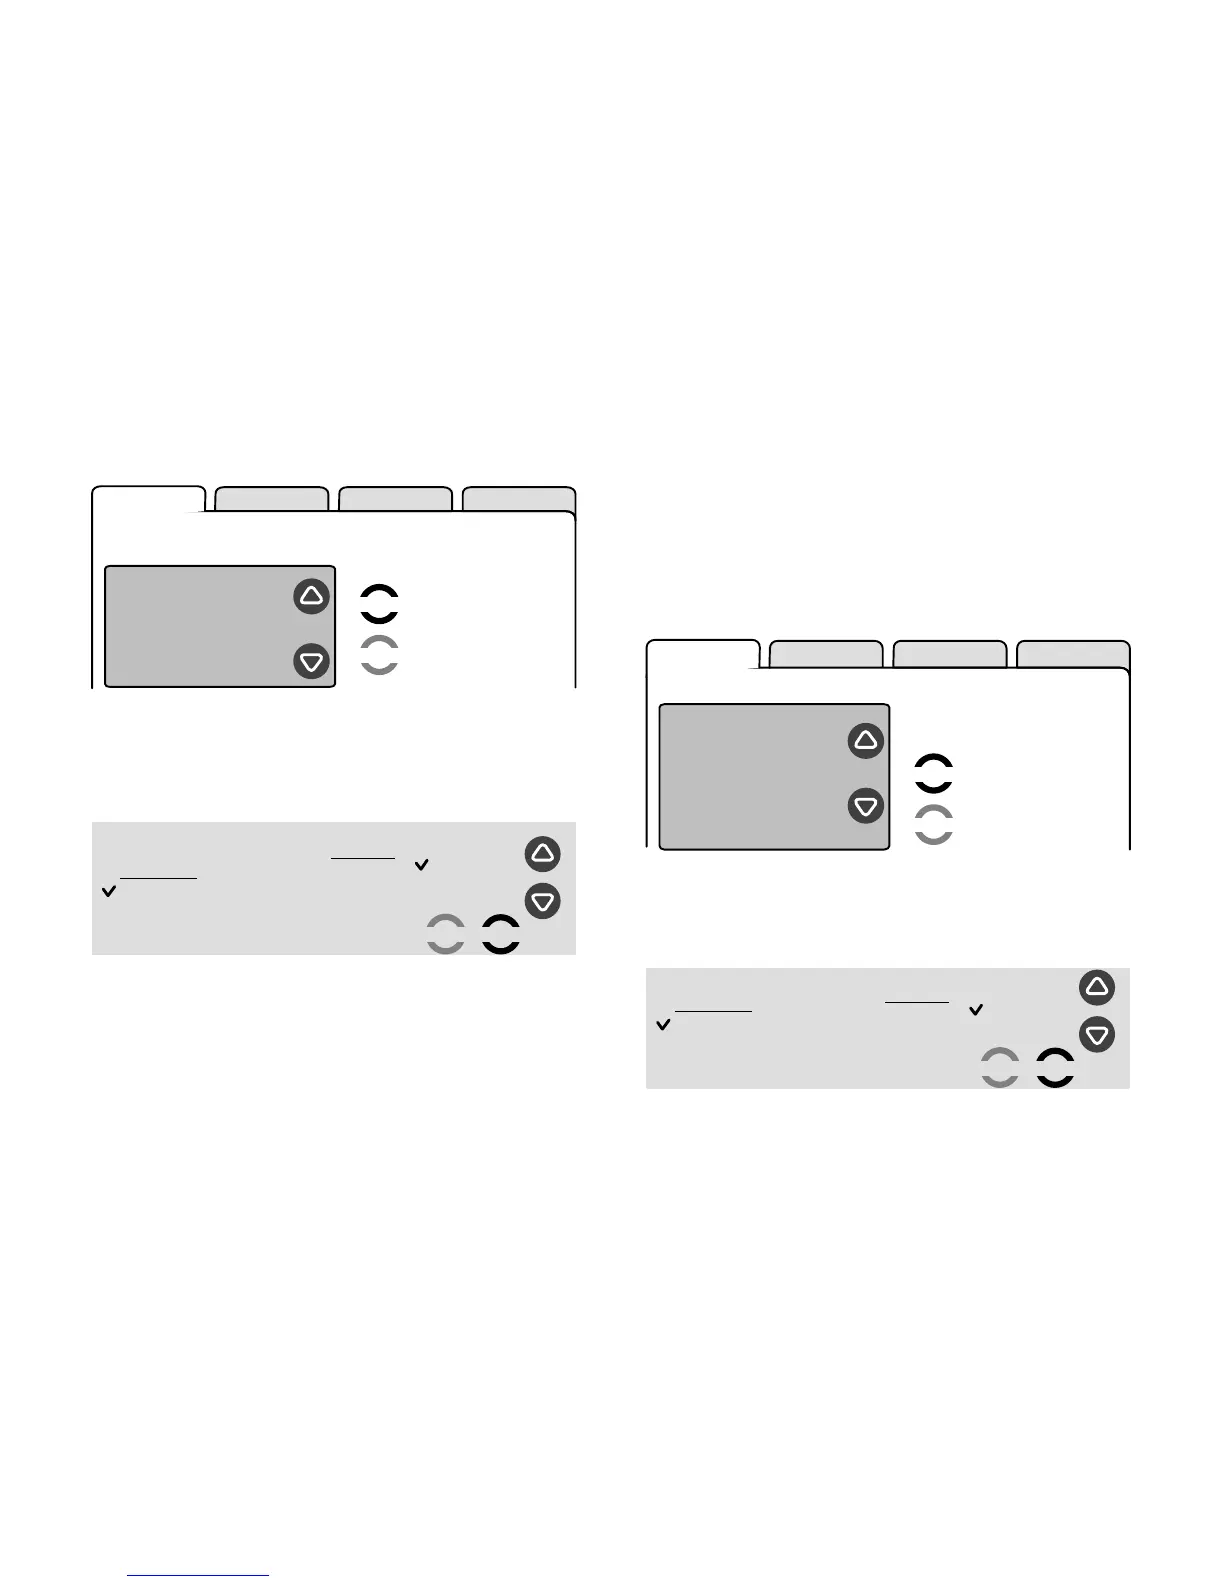
4. Use the up/down arrows (see figure 15) to select dehu-
midifier. The right side of the screen indicates the dehu-
midifier’s status (e.g. Current Value: Not Installed).
setup HELP
non−communicating
device list
Humidifier
Dehumidifier
UV Light
Electronic Air
Cleaner
to adjust a setting, high-
light it, then press edit
Current Value:
Not Installed
back
edit
Figure 15. Installing dehumidifier
5. Press edit to go to the install device screen (figure 16).
Use the arrows to highlight an option and use save to
save the change. (Cancel goes back to previous screen.)
Dehumidifier
default is underlined
current value is checked
savecancel
Not Installed
Humiditrol
Auxiliary Dehumidifier
Figure 16. Defining dehumidifier type
6. Press the back button to return to the adjust screen.
Instead of Current Value: Not Installed" (see figure 15),
the Current Value will show the dehumidifier you installed
(e.g. Current Value: Humiditrol).
7. By default, the dehumidifier will be configured for maxi-
mum overcooling and minimum dehumidification set-
point of 40% RH. If these settings are satisfactory, no fur-
ther configuration is necessary. If another setting is
needed, Configure the dehumidifier as described on
Page 8.
NOTE − When either dehumidifier option is installed and add-
ed using Add a non−communicating device screem, that op-
tion will be the selected option under Dehumidification Con-
trol Mode options (see figure 18) and cannot be changed.
 Loading...