• Youku: http://list.youku.com/albumlist/show/id_50429987
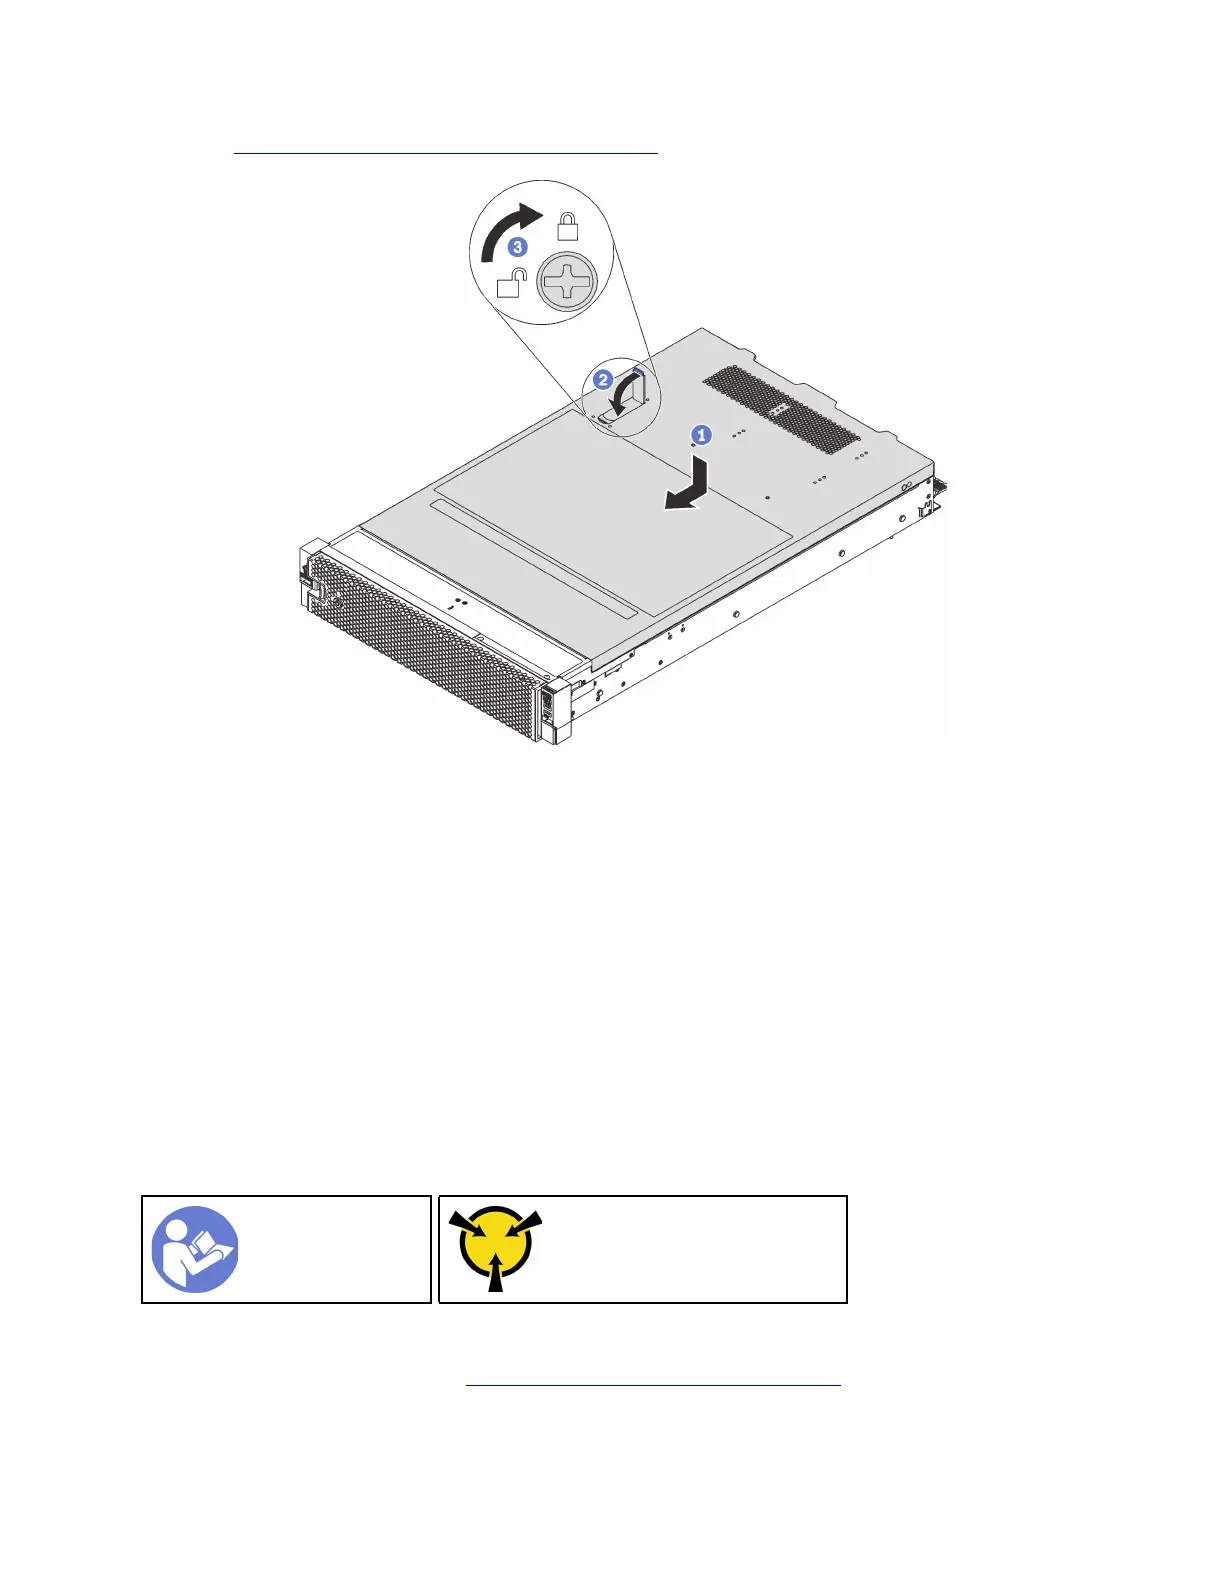
Figure 55. Top cover installation
Note: Before you slide the cover forward, ensure that the tabs on the front, rear, and side of the cover
engage the chassis correctly. If all the tabs do not engage the chassis correctly, it will be difficult to remove
the cover later.
Step 1. Ensure that the cover latch is in the open position. Lower the top cover onto the chassis until both
sides of the top cover engage the guides on both sides of the chassis.
Step 2. Pivot the cover latch and slide the top cover to the front of the chassis at the same time until the top
cover snaps into position. Ensure that the cover latch is completely closed.
Step 3. Use a screwdriver to turn the top cover lock to the locked position.
After installing the top cover, install the server in the rack,
Install a hot-swap drive
Use this information to install a hot-swap drive.
“Read the
installation
Guidelines” on
page 46
“ATTENTION:
Static Sensitive Device
Ground package before opening”
on page 48
Notes:
• For a list of supported drives, see
http://www.lenovo.com/us/en/serverproven/.
• The drive bays are numbered to indicate the installation order (starting from number “0”). Follow the
installation order when you install a drive. See “Front view” on page 15.
Chapter 3. Server hardware setup 85

 Loading...


